Monday, August 06, 2012

Expecto Patronum and Dementor Stones: A Harry Potter Party Favor


 EXPECTO PATRONUM!!

Almost two months ago, I showed you a craft I made, with plastic animals and silver craft paint. I called them patronuses and had plans of making them a favor/activity for my son's Harry Potter birthday party, but I was stumped as to how I was going to present them.

It took me a while but I did finally figure out how to do it. I created a modified surprise ball from a tutorial I found here. These are more stone shapes than balls, but I thought that was appropriate because they're kind of dementors. The black shapes of darkness, fear and sadness.

I filled the bowl (found at a thrift store in a lucky coincidence... always keep your eyes and mind open when on the look out for creative project ideas) with my dementor stones.

And then I drew out a sign for the spell the kids needed to defeat the dementors. I had a whole sheet of blank labels that I made, using a tea stained paper, so any time I needed a label or sign, I just wrote out another. I used many of the labels for my potion bottles, and others for candy labels. I taped the label to a skewer that I cut in half, and the tapes the end of the skewer to the patronus bowl.
The party was planned out with different levels of activities. After they'd run around a bit I set them down with the Expecto Patronum/Dementor Stones, and asked them what they knew about dementors. Enough of the party goers were Harry Potter fans that they explained the story to the others.

Then I told them about the Expecto Patronum spell, and when they said the spell, they had to think very hard about good and happy things. so that while they were opening up the dementor stones, they could bring their patronus into being.

They unwound their dementor stones and ended up with their silvery patronus charm.

Each kid found one of these inside of their dementor stone and I told them that their patronus spirit would help chase away bad thoughts and feelings.

"Like bad dreams?" one of the kids asked.

"Exactly," I said.

These were the stones that were left, and the dementor shrouds that dried up and blew away.


Dementor Stone Tutorial


This is how I made the dementor stones. I bought black crepe paper streamers and then I picked a relatively large patronus figure.


I started with one end on the figure and, holding it tightly and stretching the crepe paper out slightly as I did it, started wrapping up my figure. I tried to wrap it evenly, sort of like wrapping a ball of yarn. The tighter you pull it, the more the paper will conform to the shape of your figurine.


You want to wrap it in opposite directions, pulling snugly so that the crepe paper almost stretches around it.


When the stone is wrapped completely and the shape of the patronus is concealed in the streamer, cut the streamer and glue or tape the end to the outside. It does not have to be round like a surprise ball. This is only one gift and I do like the stone shapes. I was thinking that it would be a cool surprise, though, to add glittery confetti inside of the stones, so as they unwrap, the wizard or witch would be releasing magic. But I thought of that after my shopping trip was already done.


If the patronus figure is smaller, like this little turtle, you actually need a thinner streamer. So I pulled off a good deal of the streamer, folded it several times so that it was layered, and then cut it in half lengthwise, so when unfolded I ended with two long narrow streamers.


At this point, you wrap up the figure the same way you wrapped up the bigger one, snugly and firmly, wrapping in different directions as you go to cover the whole figure. If the streamer snaps, it's no big deal. Just hold onto the end that has already been wrapped, and keep wrapping it with the rest of the streamer. You can add more glue if you want, but it's not necessary. You don't want it to be too hard to unwrap.


Finish wrapping and glue. Let the glue dry. I like how the black crepe paper, pulled tight, is almost shiny and seemingly solid.


Present to your favorite Harry Potter fan, and watch the magic happen.

Harry Potter Party!


 I have been working on this party for quite some time, from searching pinterest for great ideas to making favors to hunting thrift stores and making decorations and taking trips to the 99 cent store oh and all the crafts.

So this weekend it finally happened. And it didn't rain until after the party, woo hoo!

I still have some crafts to post, so I'm going to show you some of the things I've already posted or things where I don't have tutorials, or just fun things.


 I brought my fancy wooden table out to the deck and laid a baroque looking runner across it so I could set up my potions table scape. I set out the gold cups and napkins and I had a few candle stands and candy bowls that I set with crystal platters. I liked the height they gave and thought they would work really well when I brought out the candy for Honeydukes Sweetshop and the Cauldron Cakes.  But somehow, the sweets never made it onto the pretty table.


 I took some of my son's toy snakes and wrapped them in and out of the bottle, for just a little bit of added spookiness.

And how about that fantastic green glass bowl I found at the thrift store? I filled it with the Expecto Patronum and Dementor Stones activity.


 Here we have a photobooth set up that I made. I took out the navy sheet and pillowcase and bought some glow in the dark stars from the dollar store, but for a while, I thought I'd run out of time and not be able to put it up... but at the last minute, I tacked the sheet up to an unused corner of the deck and covered the ottoman with the pillow case, brought out the little railroad village rug and stuck those stars on the sheet.


For the amount of effort it took, this photobooth was really worth it.  If I'd had a little more time, I would have made a witch broom to go with it.


When the kids first got here, I had them choose their favorite owlet from amongst Pigwidgeon's Pals.

That is Ivy's christmas gift, Mrs Hoot Hoot inside the old birdcage, on top of the old suitcase, ready to travel to Hogwarts.

Then they got to pick their wand from the box sent from Ollivander's Workshop.


I made gift bags and wrote their names on the gift bags so that they would be able to keep track of their owls and wands and other assorted stuff. That was a good plan, because with all the running around that happened later, they really needed one place to put their favors. Here is a tutorial for the gift bags .

 While waiting for all the kids to arrive, they got right to work at Transfiguration Class, where they needed to turn a rock into a creature.

All I did for this activity was to go to the 99 Cent store and buy some decorative rocks (in gray and green glass) some paint, glue, feathers, markers, gems, pipe cleaners and of course, googly eyes.

Then I just put those all in a box and put it on a kids table covered with a silver table cloth.  They really loved it. Who knew?


 I also made some Hogwarts House Banners. I really like how they came out, so I'll try to do a tutorial later on, but I really just painted them free hand.

I kept staring at them during the party and going, "wow, I like those." Right now, they are living very happily up above G's bed.

Once a bunch of kids were all there, I brought out some balloons and told them that they had to keep them in the air with their wands and the spell, "Wingardium Leviosa" I didn't get any pictures of that because I was going another craft at that point.


ACID POPS! You can see how I made these and displayed them here. They were a big hit with the kids and with the adults. But the kids were still sweaty after the acid pops so I remembered that I had some Gillywater in the fridge.

What is Gillywater? Oh, no one knows, but it was in the books, and I found this site where they wanted an alternate Harry Potter drink and found an Invisible Koolaid that tastes like Koolaid but looks like water. I put it in a clear glass jar and filled their glasses with the magical stuff.

The kids really liked the Gillywater and it was so easy, I almost forgot about it until I realized how thirsty the kids were after running around.

I forgot about quite a few things during this party. I forgot to put out the chocolate covered flies/raisins. I forgot to make that broom so the kids could fly. I forgot to do the crystal ball reading with the meditation jars I made. I also forgot to hang up the floating candles, and I'm kind of bummed about that one, because I really wanted to see how they turned out.


Then they went back out to play again, off in the yard. It was a Wizard War, with their wands and another craft I made out of recycled coffee can lids that I painted with silver stars, lightning bolts and swirls of various types. They would fling them like frisbees at each other and then run around picking them up again, with cries of, "I'm loaded! Better watch out!"


These are the spell discs I made. No tutorial. It's just painted directly on the plastic with silver craft paint. Frisbees would work very well for this and could also serve as favors for the kids to take home, but I had a dozen coffee can lids that I'd been holding onto (I use them for paint palettes sometimes) and when the brainstorm came that is what happened. I'd been thinking they would be used in a Wizard Duel where two kids stood apart and tried to throw it at/to the other kid, but the kids turned them into a wizard war and then ran their little butts off and got all sweaty.

I really tried to alternate slow paced, sit down activities with running around, because it would keep the kids from getting bored or worn out. So after Wizard War, I got out the Butter Beer. No photos of that, because I was too busy serving and by the time I was finished, everyone was pretty much done.


The next activity was the Expecto Patronum spell with the Dementor Stones.  That was a lot of fun and very cool when they were opening them... I mean, working on their spell. You can see how that worked here.

Once we finished the Expecto Patronum, I asked the kids what they wanted to do next and if they were ready for the candy.

Silly me.

They practically herded me into the kitchen to get the candy. I wisely didn't have it sitting out for most of the party, not only because some things would melt in the heat, but also because they would have been snitching candy the entire time.

As it was, they all wanted to be "helpful" when it came to the candy, and offered to carry the candy back out to the deck. Aww so sweet. I gave them the sugar mice and the chocolate frogs to take out.

But by the time I brought the main tray out, they'd set everything up on the little coffee table I'd put out there, kid height, instead of the pretty potions display table where I had all the nice cake stands and such.

Oh well. There was no orderly civilized Honeydukes Sweetshop line. No, it was mass, sweet, chaos. A free for all.


THEY LOVED IT.


Then I brought out the cauldron cakes but that was kind of anticlimactic after the candy. I thought they were great, but the kids were mostly sugared out.

And then they spent about an hour pulling each other around in a wagon. That wasn't part of my party planning. Perhaps in their imaginations, it was the flying Ford Anglia that Ron wrecked.

Anyway it was a lot of fun and some things were definitely more worth the fuss than others.

The wands were worth it.

The owlets, sadly, not quite as fun. Unless they took them home and loved them quietly. So not quite worth it.

The Acid Pops were great... for adults and kids. Worth it.

The chocolate frogs? They were cool, but the kids didn't love them that much and the adults didn't bother much with the candy. I would have made fewer chocolate frogs. Not so worth it. Better for an adult party.

Sugar Mice? Also cool, but I will probably eat more out of my fridge than all of the kids combined. So I'm glad there are left overs, because those are mine. But perhaps not worth it for the level of time consumed in making them. Also better for an adult party.

Honeydukes Sweetshop/table of candy. TOTALLY worth it. Maybe better to just get candy from the store instead of making some of it, though. Most of the home made candy was more trouble than it was worth.

The Gillywater/Invisible Koolaid? Cheap, easy and fast. Beloved by kids. Worth it.

The Butterbeer? Tasty, but very sweet, done soon, with no refills. I bought too much ice cream and cream soda. Maybe not worth the stress. Adult party. Spiked with real booze.

The Expecto Patronum/Dementor Stones activity. Really cool and worth it, though it took a while to craft.

Cupcakes? Worth it, because you need cake and these were tasty and not that hard, although a little stressful. But it could have been any cake really... so not necessary. Also, i had trouble with the heat and the melting of chocolate. Again possibly more for an adult, indoor party.

Those flying disc spells? I painted them months ago and just stuck them in a cupboard and the kids played a lot with them, so Worth It. Same for the balloons which are always fun.

Gift bags, easy and worth it. Really I had been planning some sort of difficult craft for making cauldrons and the bags worked fine.

The Pet Rocks/Transfiguration. awesome and low maintenance and just the cost of the dollar store items. Worth It.

And as for the banners and the potion bottles? I really liked the way they looked and I think they added to the Harry Potter feel, so worth it. And G gets to keep the banners.

Also, the photo booth was pretty easy, so that was worth it too. I've got pictures from it.

It seems that I got wrapped up in "cool projects" that would have been better for older party goers but were kind of lost on little kids who like koolaid, running around and candy. Hmm. Well, live and learn there, Ro.

Boy, I also have a lot to post on this party. If you click the links, you will find my tutorials and recipes to many of the crafts and foods, and you can decide for yourself which ones might be worth your time and effort.


Friday, August 03, 2012

Easy DIY Sweet Creamer and a Pretty Tea Cup

 Yum. Sweet Cream Creamer.

I'm taking a break from the Harry Potter extravaganza to make myself a cup of iced coffee with this super easy creamer.

So easy.

One can of evaporated skim milk.
One can of sweetened condensed milk.

Mix together.

Pour into coffee.

I had an open can of sweetened condensed milk from making my sugar mice and I needed to use it up and then I came across this recipe.  And I always have coffee to drink. Regular coffee is fine with sugar, but iced coffee needs something that is already dissolved for sweetness. We don't want grainy iced coffee, now do we? No we don't. So I tried the creamer recipe. Maybe some day I'll get around to doing that cold brewed coffee thing. I should hurry up before summer is over.

And yes that is a parmesan cheese container. Don't hate me. They are a good size and have that nice flip cap, so the sticky stuff doesn't get all gummed up in the threads of the screw cap.

Here's the iced coffee. For some reason it reminds me of  my grandmother. She made cafe con leche all the time, and it wasn't with canned milk, but something about it brings her back, so that's nice.

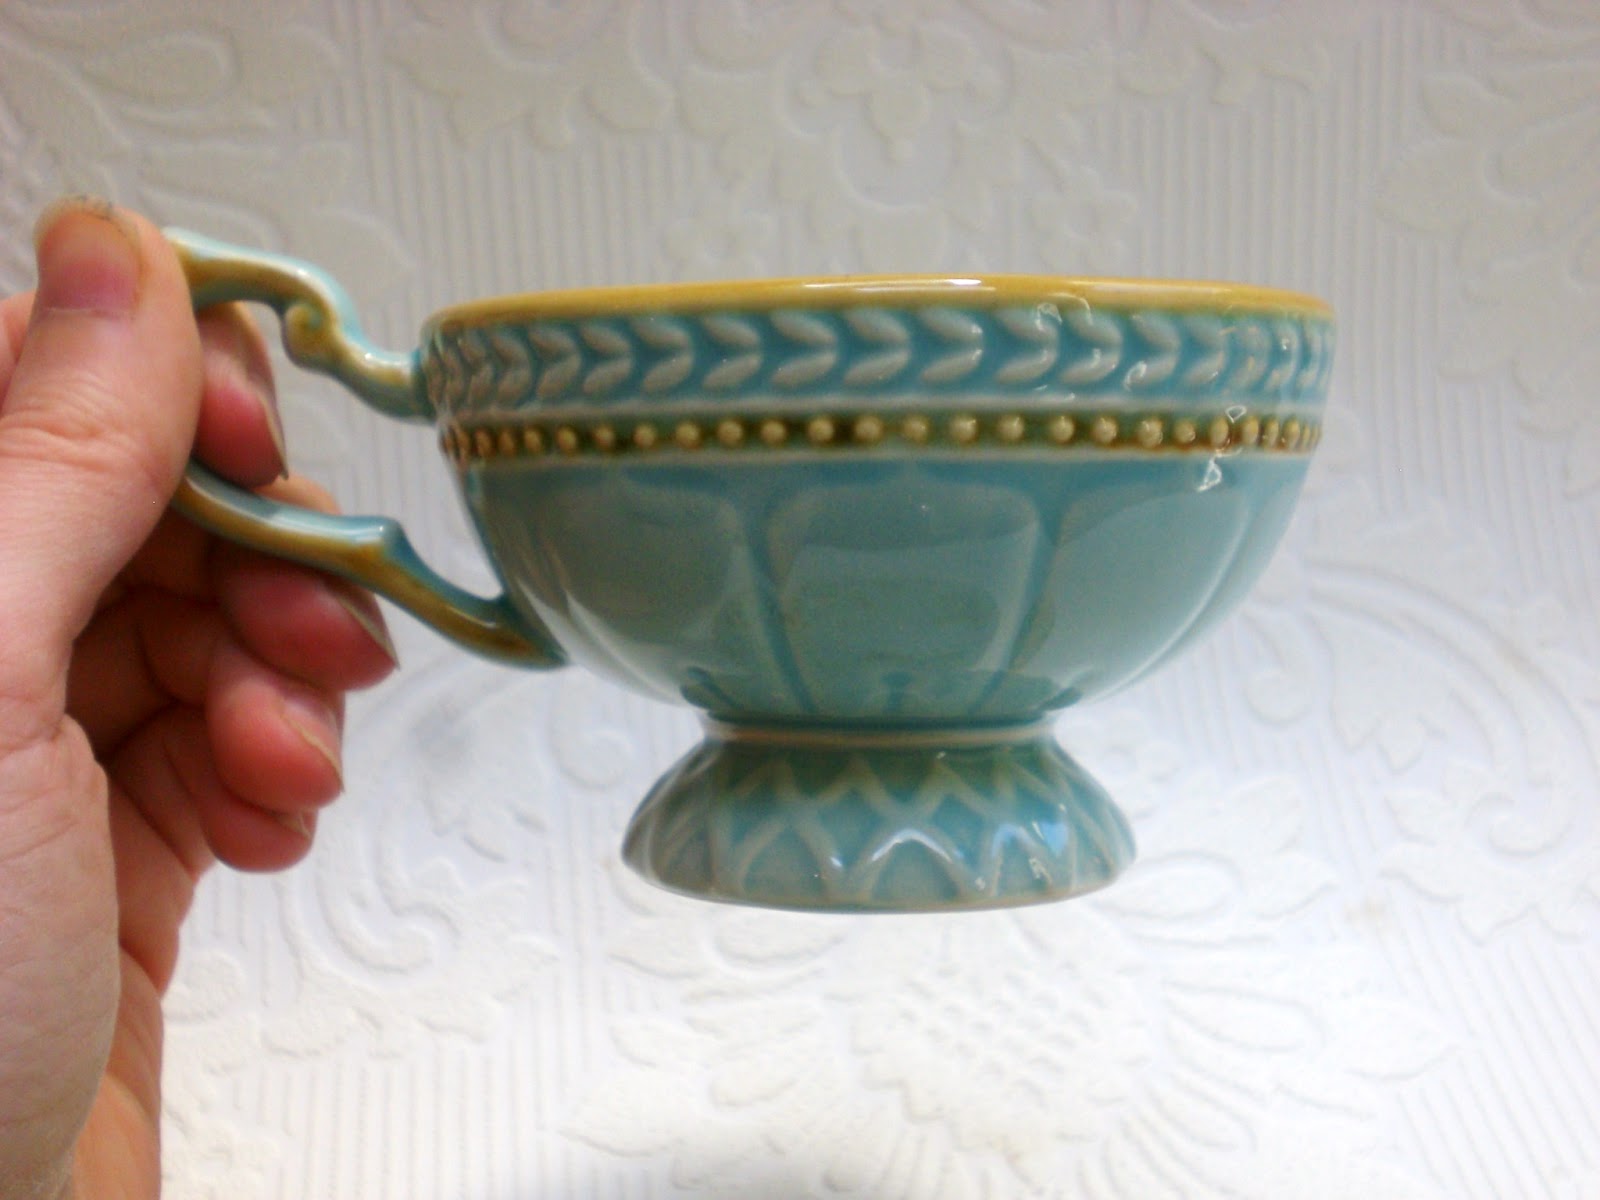
Also nice is this lovely majolica tea cup I found at a thrift store when I was out looking for bottles and other supplies for my Harry Potter party.

It is so pretty I couldn't resist. Love the color and the design. I used to collect tea cups before I had kids, so it's nice to find one that I like.


Oh, what a pretty pattern.
And a lovely cup.

That is all. Break over. I must go back to tending the Harry Potter party now. I hope to have many pictures come Monday.  I hope I have the time to take photos. Sometimes I run out of time and the kids are too all up in my bizness and won't let me have leisurely photo shoots.  Well. We'll see what happens.

Thursday, August 02, 2012

DIY Harry Potter Stuffed Owlets from Upcycled T-Shirts


Pigwidgeon's Pals 
DIY mini stuffed owls made from upcycled t shirts, felt and buttons.

Meet Pigwidgeon's pals.  We have here a Parliament of Owls. Parliament is the group word for owls, not flock. Hm.  And this is 20 owls, therefore, a parliament.  They might be considered owlets. I guess it's all in your perspective. For G's last birthday party (outer space theme) I made felt alien beanbags as favors. So when we decided on a Harry Potter theme for this year, I thought little owls would be a good favor. I was inspired by the stuffed animal pillows I made for my kids this past Christmas. The owlets are a variation on the larger owls.

I enjoy upcycling and recycling, so I went into it planning to use old t-shirts for the body of the owlets. Also, from experience, I've learned that I like felt for the applique, since you don't need to hem it. I use a nice, thick wool blend felt for these, rather than the polyester kind of craft felt you can find in craft stores. The cheaper felt pills very easily, but the more expensive felt can stand some wear and washing. I got mine here.

These aren't a complicated project, just time consuming when you're gathering a whole parliament. 

The first step, after collecting your t-shirts, is to cut out the shapes.  I wanted my owlets to be vaguely owl colored, so I picked neutral colors, grays, tans and white, for the snowy owls, of course. My daughter is crazy for pink, so I added in a gray and pink heart pattern for her. A whole bunch of different patterned owlets might be great, and I was tossing around the idea of mixing patterns... but with so many owlets on my plate, I decided to go simple.

I cut out different sized and proportioned ovals. I went into it with the intention of making each one different, so I wasn't looking for a pattern to make uniform owlets. If I wanted to, I would have drawn my first owl pattern on a piece of brown paper (remembering to leave an inch or so for sewing) and then just used the pattern as I was cutting out all of the owls.  For some of my owls, I wanted ears, so I added a scoop to the fabric at the top.

Make sure when you are cutting out your owl body shapes, you take TWO pieces of t-shirt and place them insides together, cut out your body from both shapes at once. That will mean that your irregular shaped pieces will make one irregular shaped owl, rather than having to match odd pieces into one owl.   Keep your owl body back and front together to simplify things later. Pin them if you are afraid the pieces will get lost.


 Here are some of the cut outs. They each have a back and front together. You can see the different oval/owl shapes here. Some are smaller, some wider, some taller, some larger. This is part of how we give them personality.

The next step is to cut out the felt faces. The faces are the rest of the personality.  I toyed with making separate eye balls, but in the interest of simplicity, I made these kind of number eight shapes, of the two eyeballs connected together.

To make sure the eyeball shapes worked on the owlet bodies, I kept trying them against the cut outs. That's how I chose the figure eight shapes vs two separate eye balls... they actually looked cuter.

I cut out little triangle shapes out of a contrasting color felt for the beaks.

As I began cutting out the felt faces, I began to experiment with the size and shape. I found my figure eights got larger as I went on, and I threw in some puffy heart shapes. Owls are not all the same and different breeds have different faces, so I liked the heart shapes to add some variation.


This is my little kit of owl supplies. You can see the pile of owl bodies in different colors and shapes. This pile is on top of the felt squares in colors I thought would work for my owls... mostly in whites, tans, and beigy yellow... although there is one bright yellow eyed guy. Not sure why I didn't make more in that color. He's cute.

Also in my project kit is a collection of needles, pins and various owlish colored threads and a bunch of buttons (inside the altoids tin). The buttons were used as eyes. Most of them are shades of black, tan or brown, with a little bit of pink thrown in for the girly girls.

Cute factor is important here. I actually tried on variations of all the faces on my owl bodies before I started sewing. I would test out the eyeballs on the tshirt, pick out the perfect buttons. Stand back a little, move the button in or out, the face up or down, squint at the soon to be owl face, and then, when I felt the, "awwwwww" reaction, I said, "yes, that's the one."

The first thing I would do, once I'd found the perfect face combination, in the perfect placement, was to stitch the buttons down, since that would keep most of the pieces in place enough for me to sew the whole thing.

As I went on I found that a little bit of fabric glue also made it more secure and sped up my parliament assembly line process of creating them and avoided the need for pins, but I'd still have to sew those buttons on.

You have to stitch the faces on before sewing the two sides of the bodies together or you make everything more difficult. In my case, sometimes I wanted the thread to show, so I picked contrasting thread for when I stitched the faces on. Some I wanted the stitching to be less obvious, so I chose the same tone of thread. I did not really try to hide the stitches. I like the hand made look, so I let it show, and I wasn't worried about the hand stitching being perfect. Again, that's part of the personality.

At this point, when the face was stitched on securely, I took both pieces of matching owl bodies and turned them inside out, outside faces touching and pinned them together, so that I could sew them.

I sewed them together on my sewing machine, leaving a seam allowance of about an inch (it was not important if it was perfect, because I was going for wonky and personality filled) more or less and sewed all around, leaving the bottom two or three inches open.

When the owlets were finished being sewn together, I turned them inside out, making sure that the ones with ear points were fully pointy (you can use a paintbrush or pencil to gently poke them out from the inside) and I stuffed them with poly fill. Fill them as full as you want.

Then, pin the opening with the seam allowance folded inside the bird. I used a hidden ladder stitch for this for the first time and was really pleased with how it turned out.

Voila.

Owlets done.

Oh. One more thing. When I was done, I found that some of the oval owls didn't quite look owlish enough. They looked kind of blobby. So I pinched ears into their heads and then simply stitched them with a couple of stitches. That's one of the fun things about making stuffed animals. You can actually sculpt them with a few stitches here and there.

Here's the whole parliament.
 Here are the pink heart ones. You can see the different faces here. There's a heart shaped one. The two on the left had ears pinched and stitched into their heads. The one on the right was left round headed.

The four white owlets. Notice the different sized eye/beak combo. How some eyes are closer together. The different effect that light buttons have vs darker buttons.. or the light and dark thread inside the eyes. Only the bottom owlet was left without pinched ears... because he looks like a little puff ball to me.


Tan owlets. Notice here that even the ovals are different shapes. Some pear shaped, some squarish, some are oriented upwards and some sideways.  And the eyes, faces and beaks all make for different guys. Two of these (left) were patterned with ears, and two of them (right) had ears pinched in. One of them looks like a potato.
 Here are the light gray owls. I really like the one with the little yellow face, and left him without ears. Another puffball.  He also has the smallest face of any of them.  And the darkest beak. But I also like the one with the big white face and yellow eyeballs and pinched ears. Oh, and the one with the darker yellowish face and brown button eyes. This might be my favorite collection.

The dark gray owls. Look at the difference between the two hear shaped faces here. In one, the face fills the whole body and there are bigger button eyes. In the other the face takes up half the body, which is pear shaped and the eyes are much smaller. Completely different personalities.

I hope when the kids pick out their owlet buddies, they leave me some of my favorites.
I thought I'd show you a sneak peak of my craft cupboard, though, since you saw one of my project boxes filled with the sewing supplies. I get these boxes from my job. They get them filled with herbs. I always saw the boxes and thought they were nice and sturdy and with a good size, and when I brought one home, thinking to put writing projects in them and sticking them in my book shelf for storage, I realized they were a perfect fit for my craft cupboard. I can keep my ongoing projects separated. I can easily grab a box and take it to my chair or bed or the porch or wherever I want to work.

The craft cupboard itself is a thrifted camp kitchen. There's even a little drawer in it for pencils (utensils, whatever) and the front opens up to make a work station. Perfect on top of a dresser for me.

I will show you a neater picture of it some day when I am not busy making a Harry Potter party.

Anyway, I must go. Happy crafting.

Wednesday, August 01, 2012

DIY Harry Potter Potions Decor

 Harry Potter Potion Ingredients Decor

I have so many things to post now, that it's hard to keep it down to one project per day, but I have to, because they're all big post, many steps, lots of photos kind of projects. All the things I've been working on for the last month are finally being completed. It feels good to cross these off the list. I will probably be posting about the Harry Potter party well into next week. I hope it looks as impressive as the work load. I am very glad that I started so early, though. That helps a lot.

Anyway, lets get down to the tutorial.

This one is pretty easy and almost cost free, if you already have things like recycled bottles, a little glue and paint, a color copier and random ingredients. I used this tutorial for aging bottles and it really served as my jumping off point. She has a label download that is great, but which I didn't use.


 First get some interesting looking, cleaned bottles, with the labels removed. For once, I am glad I don't take the recycling out as often as I should. If you will notice, most of these are cleaned but the two on the top right  have already been treated to look as if they have been sitting in a potions shop for eons. (I used some gold paint and glue with those bottles.)
 Then, you take some paint--whatever colors you think would make them look aged and dusty. I liked the browns for this-- and mix it with some glue or mod podge to make it translucent. Then paint the glue/paint on your bottle. This application is actually a little heavy. Try to paint it a little thinner, because your next step is to blend and smudge it and remove much of the paint so it no longer looks like paint, but rather like the dust and dirt of the ages. I used both a paper towel and my hands to smudge it, rubbing it in random directions to make it look natural.

You don't even need to use paint to age the bottles. Just some white glue will give it a different aged appearance. I wanted all the bottles to look a little different, as if they came from different wizard shops, so I varied the treatment, with different paint colors and heavier or lighter applications. Some bottles already looked antique, with tinted glass or, in the case of one bottle I found in my basement, ACTUAL dust, so I left them.

Oh, and to combat the shiny or printed twist tops for some of my bottles, I just painted the tops with matte black craft paint. I thought about covering them with fabric or trying to find corks to fit many bottles, but in the end, I went the easy way out and just painted the tops. There were enough variations that the black tops kind of faded into the background.

I was also creative with my bottle choice. Not only did I use bottles from my recycling bin, but I also found containers at thrift stores and at least one of the bottles is actually a vase in which I stuck a wine cork. This kind of creativity, looking around the house and seeing what can work for the project is actually the best thing about this endeavor. And is quite necessary, when it comes to the next step.


Filling the potion bottles with potion ingredients.

I am assuming that no one reading this actually has a cupboard full of bat wings and bezoars... so what you need to do is look around your cupboard and find interesting, mysterious or unidentifiable ingredients.  I found ingredients in three places. My kitchen, my garden and my craft cupboard.

A good thing to do is to go into the pantry and look for some of those things I rarely use, like a jar of pearl onions or the stub of a piece of ginger that was dehydrated. I got some ideas for these from pinterest, but after that, I just fudged things.

It almost doesn't matter what you put into the jars. Once you put the labels on, the names you give your ingredients with suggest to the brain what is inside the bottles and they will become magic. It helps if they are less familiar, but say, what if you fill a jar with half milk and half water? Who is to say what the white, milky, semi translucent liquid could be?  Of course, I wouldn't want to leave that out more than a couple hours. 

But that brings us to our next step. Labels!

 Labels

This is a multi step part of the process, too, but it is one that can be useful for more than just one thing, so it's worth it to give it a try.  First I started with my tea/coffee stained paper that I used for my invitations.  It is just copy paper soaked in a combo of tea and coffee and left to dry in the sun.   I took my favorite sheet of stained paper and  I photo copied it on my color copier. On the copy, I took my brown calligraphy pen and drew out some interesting label shapes, creating borders or flourishes on some. I was inspired by this label sheet, which you could just download, actually. But I made my own and then I photocopied that label sheet again. (I did this, because I am planning to use these labels for other parts of the party, like the sweet shop, and I don't want to draw more labels, in the interest of saving time and effort.)
 On the photo copied label sheet, I used my calligraphy pen again to write in various ingredients.  Then I cut out the labels and brushed the back of the labels with watered down white glue (I want to be able to take these labels off some of these bottles) and stuck them onto my bottles. I tried to match the bottle shapes/sizes with the labels, and they mostly fit pretty well.

 Here they are.

I'm particularly proud of the dream fluid. It's such a pretty color and in such a pretty bottle (this one is the vase with cork. I think they look pretty good. And mysterious. So mysterious that I will give you a key to my ingredients.

Veritaserum: some kind of pink lemonade drink that no one in my family actually likes and has been in my refrigerator far too long.

Dream fluid: water with blue food coloring, that's it.

Salamander Scales: pink mica glitter (that container is going back in my craft cupboard just as it is, after the party)

Powdered Unicorn Horn : baking soda

Dragon's Blood: Water with red food coloring

Mummy Finger: dried piece of ginger root

Gillyweed: yard weeds in water with a few drops of green food coloring

Bezoar: garden gravel

Dittany: coffee

Mummified Dung Beetles: dried dates

Bat Eyes (blind): pearl onions

Fairy Dust: mixed color glitter left over from projects for my daughter's birthday in March.

Witch Hazel: I think at this point, the witch hazel is just an empty dark brown beer bottle. I should probably put something in there.

I also am using the meditation jars that I made for my kids months ago. I didn't put labels on them, because I think they are better clean, so that you can actually shake them and look into them and perhaps find a prophecy. Perhaps they shouldn't be in with the potions ingredients at all.


Related Posts Plugin for WordPress, Blogger...