Work In Progress (dream catcher)
acrylic on paper
8.5x11
After a life of being creative, I think I've learned a few things. One of those things is that we are always starting over. We're always going through endings. We're always going through transformation. And we're always beginning again.
This is the process. Fighting it doesn't help, it just makes us feel guilty. Trusting the process means that we believe things will turn around, eventually. It gives us hope.
So in this period of starting over again (where did my creativity go? where?) I am going to make a list. I like lists.
How To Get Creative
1. Start something.
2. Turn on the music and dance.
3. Take a camera and go take pictures of something.
4. Read an old journal.
5. Go to a museum or gallery or show or concert.
6. Talk to someone creative.
7. Watch a documentary about something you care about.
8. Divide a page into four sections. Fill each section with a different drawing, painting, poem, story, song.
9. Sing a song.
10. Play with clay. Create a tiny sculpture. Display it proudly.
11. Take out your old portfolio, mss, tapes, or other creative work, and look at it as if you'd never seen it before.
12. Climb a tree. Take a minute and pay attention to the view from up there.
13. Climb under a table. Take a minute and pay attention to the view from down there.
14. Cry unashamedly.
15. Take a shower and plan a great story/painting/dance routine/song while the water is running.
17. Freewrite in your journal for fifteen minuets without stopping.
18. Make something with a child.
19. Read your favorite author.
20. Write out 100 great words on little slips of paper. Fold the words and put them in a jar. Shake and pull a word or two. Create something based on those words.
21. Make a commitment to create something every day for one week, no matter how small.
22. Set an alarm for 15 minutes and be creative until that alarm goes off, no excuses and no stopping.
23. Join a class, group, workshop, community, blog party, organization, etc of like minded, creative beings.
24. Clean up your creative space.
25. Write a list of ways to be creative.
Seeing that I like lists, and since this is a process and there are a million ways to be creative, I just might come back and add to this list.
Add a comment and share your tricks to getting your creative juices flowing.
Showing posts with label hints. Show all posts
Monday, April 15, 2013
Wednesday, August 01, 2012
DIY Harry Potter Potions Decor
Harry Potter Potion Ingredients Decor
I have so many things to post now, that it's hard to keep it down to one project per day, but I have to, because they're all big post, many steps, lots of photos kind of projects. All the things I've been working on for the last month are finally being completed. It feels good to cross these off the list. I will probably be posting about the Harry Potter party well into next week. I hope it looks as impressive as the work load. I am very glad that I started so early, though. That helps a lot.
Anyway, lets get down to the tutorial.
This one is pretty easy and almost cost free, if you already have things like recycled bottles, a little glue and paint, a color copier and random ingredients. I used this tutorial for aging bottles and it really served as my jumping off point. She has a label download that is great, but which I didn't use.
First get some interesting looking, cleaned bottles, with the labels removed. For once, I am glad I don't take the recycling out as often as I should. If you will notice, most of these are cleaned but the two on the top right have already been treated to look as if they have been sitting in a potions shop for eons. (I used some gold paint and glue with those bottles.)
Then, you take some paint--whatever colors you think would make them look aged and dusty. I liked the browns for this-- and mix it with some glue or mod podge to make it translucent. Then paint the glue/paint on your bottle. This application is actually a little heavy. Try to paint it a little thinner, because your next step is to blend and smudge it and remove much of the paint so it no longer looks like paint, but rather like the dust and dirt of the ages. I used both a paper towel and my hands to smudge it, rubbing it in random directions to make it look natural.
You don't even need to use paint to age the bottles. Just some white glue will give it a different aged appearance. I wanted all the bottles to look a little different, as if they came from different wizard shops, so I varied the treatment, with different paint colors and heavier or lighter applications. Some bottles already looked antique, with tinted glass or, in the case of one bottle I found in my basement, ACTUAL dust, so I left them.
Oh, and to combat the shiny or printed twist tops for some of my bottles, I just painted the tops with matte black craft paint. I thought about covering them with fabric or trying to find corks to fit many bottles, but in the end, I went the easy way out and just painted the tops. There were enough variations that the black tops kind of faded into the background.
I was also creative with my bottle choice. Not only did I use bottles from my recycling bin, but I also found containers at thrift stores and at least one of the bottles is actually a vase in which I stuck a wine cork. This kind of creativity, looking around the house and seeing what can work for the project is actually the best thing about this endeavor. And is quite necessary, when it comes to the next step.
Labels
This is a multi step part of the process, too, but it is one that can be useful for more than just one thing, so it's worth it to give it a try. First I started with my tea/coffee stained paper that I used for my invitations. It is just copy paper soaked in a combo of tea and coffee and left to dry in the sun. I took my favorite sheet of stained paper and I photo copied it on my color copier. On the copy, I took my brown calligraphy pen and drew out some interesting label shapes, creating borders or flourishes on some. I was inspired by this label sheet, which you could just download, actually. But I made my own and then I photocopied that label sheet again. (I did this, because I am planning to use these labels for other parts of the party, like the sweet shop, and I don't want to draw more labels, in the interest of saving time and effort.)
On the photo copied label sheet, I used my calligraphy pen again to write in various ingredients. Then I cut out the labels and brushed the back of the labels with watered down white glue (I want to be able to take these labels off some of these bottles) and stuck them onto my bottles. I tried to match the bottle shapes/sizes with the labels, and they mostly fit pretty well.
Here they are.
I'm particularly proud of the dream fluid. It's such a pretty color and in such a pretty bottle (this one is the vase with cork. I think they look pretty good. And mysterious. So mysterious that I will give you a key to my ingredients.
Veritaserum: some kind of pink lemonade drink that no one in my family actually likes and has been in my refrigerator far too long.
Dream fluid: water with blue food coloring, that's it.
Salamander Scales: pink mica glitter (that container is going back in my craft cupboard just as it is, after the party)
Mummified Dung Beetles: dried dates
Bat Eyes (blind): pearl onions
Fairy Dust: mixed color glitter left over from projects for my daughter's birthday in March.
Witch Hazel: I think at this point, the witch hazel is just an empty dark brown beer bottle. I should probably put something in there.
I also am using the meditation jars that I made for my kids months ago. I didn't put labels on them, because I think they are better clean, so that you can actually shake them and look into them and perhaps find a prophecy. Perhaps they shouldn't be in with the potions ingredients at all.
I have so many things to post now, that it's hard to keep it down to one project per day, but I have to, because they're all big post, many steps, lots of photos kind of projects. All the things I've been working on for the last month are finally being completed. It feels good to cross these off the list. I will probably be posting about the Harry Potter party well into next week. I hope it looks as impressive as the work load. I am very glad that I started so early, though. That helps a lot.
Anyway, lets get down to the tutorial.
This one is pretty easy and almost cost free, if you already have things like recycled bottles, a little glue and paint, a color copier and random ingredients. I used this tutorial for aging bottles and it really served as my jumping off point. She has a label download that is great, but which I didn't use.
First get some interesting looking, cleaned bottles, with the labels removed. For once, I am glad I don't take the recycling out as often as I should. If you will notice, most of these are cleaned but the two on the top right have already been treated to look as if they have been sitting in a potions shop for eons. (I used some gold paint and glue with those bottles.)
Then, you take some paint--whatever colors you think would make them look aged and dusty. I liked the browns for this-- and mix it with some glue or mod podge to make it translucent. Then paint the glue/paint on your bottle. This application is actually a little heavy. Try to paint it a little thinner, because your next step is to blend and smudge it and remove much of the paint so it no longer looks like paint, but rather like the dust and dirt of the ages. I used both a paper towel and my hands to smudge it, rubbing it in random directions to make it look natural.
You don't even need to use paint to age the bottles. Just some white glue will give it a different aged appearance. I wanted all the bottles to look a little different, as if they came from different wizard shops, so I varied the treatment, with different paint colors and heavier or lighter applications. Some bottles already looked antique, with tinted glass or, in the case of one bottle I found in my basement, ACTUAL dust, so I left them.
Oh, and to combat the shiny or printed twist tops for some of my bottles, I just painted the tops with matte black craft paint. I thought about covering them with fabric or trying to find corks to fit many bottles, but in the end, I went the easy way out and just painted the tops. There were enough variations that the black tops kind of faded into the background.
I was also creative with my bottle choice. Not only did I use bottles from my recycling bin, but I also found containers at thrift stores and at least one of the bottles is actually a vase in which I stuck a wine cork. This kind of creativity, looking around the house and seeing what can work for the project is actually the best thing about this endeavor. And is quite necessary, when it comes to the next step.
Filling the potion bottles with potion ingredients.
I am assuming that no one reading this actually has a cupboard full of bat wings and bezoars... so what you need to do is look around your cupboard and find interesting, mysterious or unidentifiable ingredients. I found ingredients in three places. My kitchen, my garden and my craft cupboard.
A good thing to do is to go into the pantry and look for some of those things I rarely use, like a jar of pearl onions or the stub of a piece of ginger that was dehydrated. I got some ideas for these from pinterest, but after that, I just fudged things.
It almost doesn't matter what you put into the jars. Once you put the labels on, the names you give your ingredients with suggest to the brain what is inside the bottles and they will become magic. It helps if they are less familiar, but say, what if you fill a jar with half milk and half water? Who is to say what the white, milky, semi translucent liquid could be? Of course, I wouldn't want to leave that out more than a couple hours.
But that brings us to our next step. Labels!
This is a multi step part of the process, too, but it is one that can be useful for more than just one thing, so it's worth it to give it a try. First I started with my tea/coffee stained paper that I used for my invitations. It is just copy paper soaked in a combo of tea and coffee and left to dry in the sun. I took my favorite sheet of stained paper and I photo copied it on my color copier. On the copy, I took my brown calligraphy pen and drew out some interesting label shapes, creating borders or flourishes on some. I was inspired by this label sheet, which you could just download, actually. But I made my own and then I photocopied that label sheet again. (I did this, because I am planning to use these labels for other parts of the party, like the sweet shop, and I don't want to draw more labels, in the interest of saving time and effort.)
On the photo copied label sheet, I used my calligraphy pen again to write in various ingredients. Then I cut out the labels and brushed the back of the labels with watered down white glue (I want to be able to take these labels off some of these bottles) and stuck them onto my bottles. I tried to match the bottle shapes/sizes with the labels, and they mostly fit pretty well.
Here they are.
I'm particularly proud of the dream fluid. It's such a pretty color and in such a pretty bottle (this one is the vase with cork. I think they look pretty good. And mysterious. So mysterious that I will give you a key to my ingredients.
Veritaserum: some kind of pink lemonade drink that no one in my family actually likes and has been in my refrigerator far too long.
Dream fluid: water with blue food coloring, that's it.
Salamander Scales: pink mica glitter (that container is going back in my craft cupboard just as it is, after the party)
Powdered Unicorn Horn : baking soda
Dragon's Blood: Water with red food coloring
Mummy Finger: dried piece of ginger root
Gillyweed: yard weeds in water with a few drops of green food coloring
Bezoar: garden gravel
Dittany: coffee
Bat Eyes (blind): pearl onions
Fairy Dust: mixed color glitter left over from projects for my daughter's birthday in March.
Witch Hazel: I think at this point, the witch hazel is just an empty dark brown beer bottle. I should probably put something in there.
I also am using the meditation jars that I made for my kids months ago. I didn't put labels on them, because I think they are better clean, so that you can actually shake them and look into them and perhaps find a prophecy. Perhaps they shouldn't be in with the potions ingredients at all.
Labels:
cool,
crafts,
CreativeKids,
DIY,
everyday,
harry potter,
hints,
home,
how-to,
kids,
magic,
mixed media,
no money,
process,
stationery
Tuesday, July 31, 2012
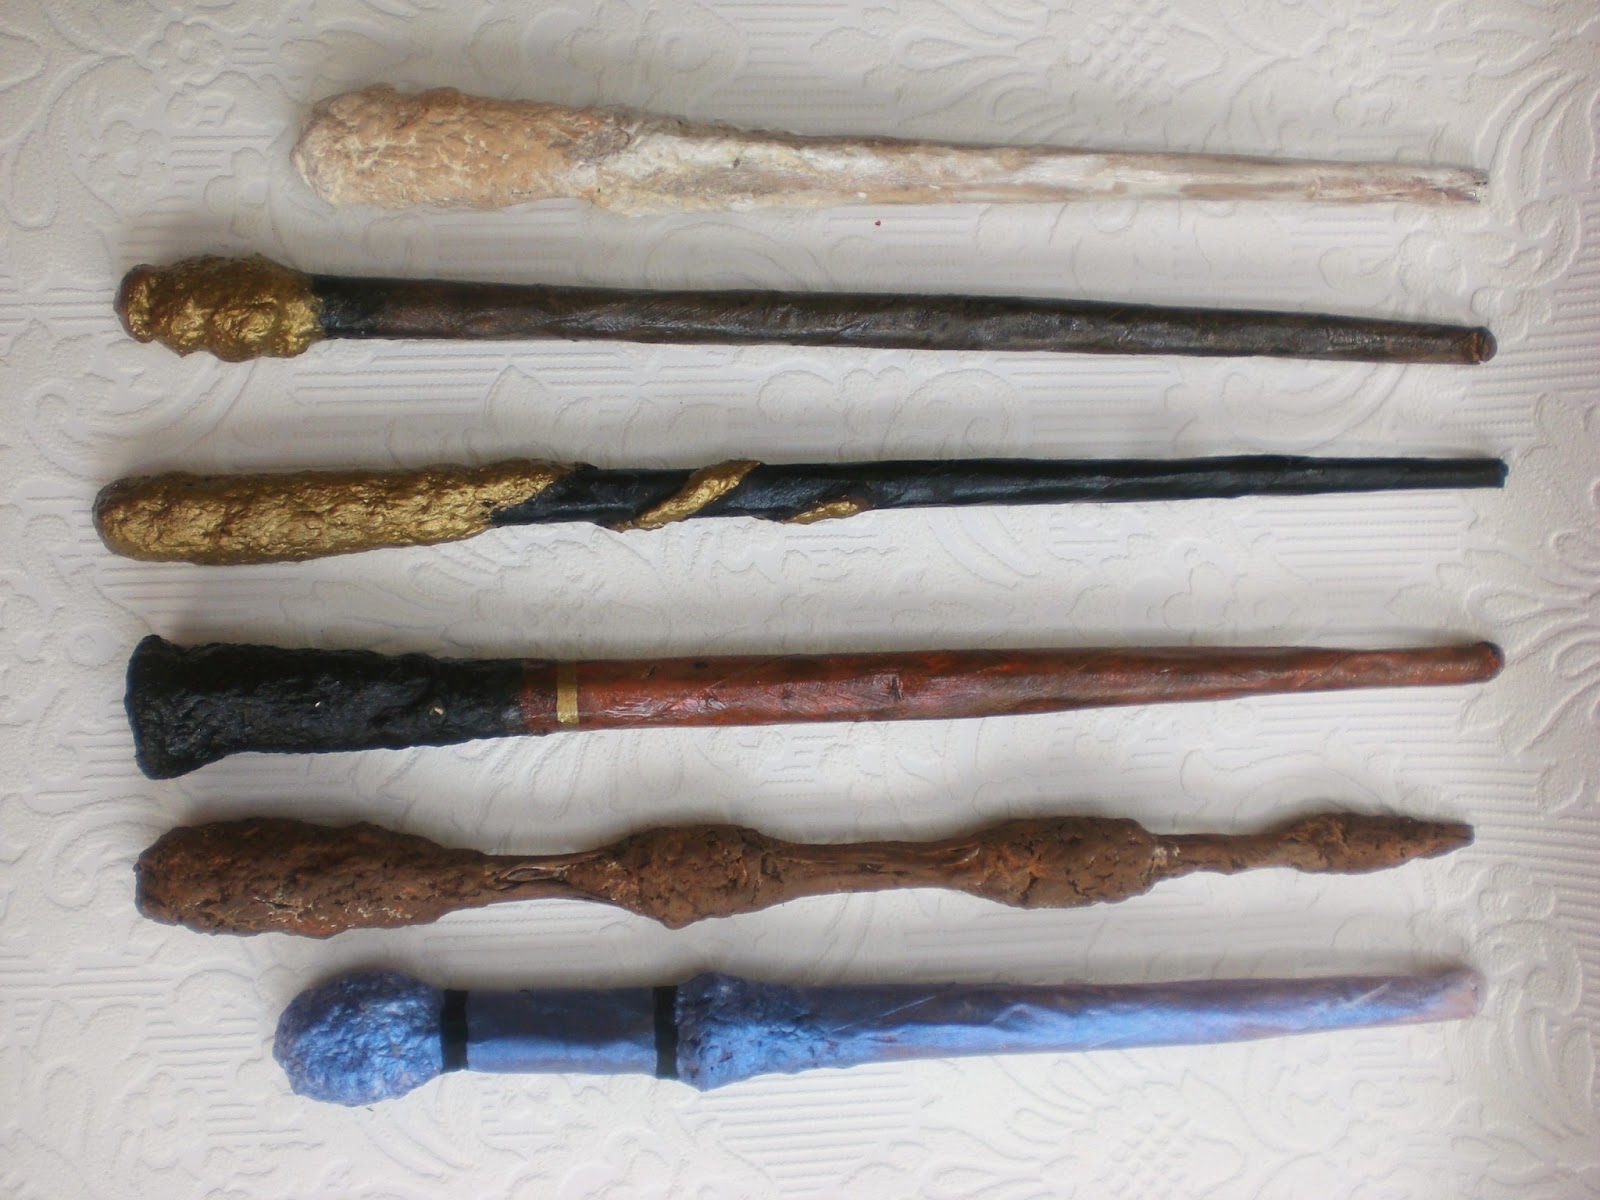
DIY Harry Potter Wands II: Paper Mash, Kraft Paper, String and Paint.
Welcome back to my Harry Potter Wand tutorial. Part two. Yesterday was part one. Check here for how I made the paper wand blank and for how I embellished some of the 21 wands. Today I'm going to talk about another embellishment technique that is a bit more labor intensive, but ends up with some impressive results, in my opinion.
This is the paper pulp portion of our adventure. There are many ways to create with paper mache. We start out when we're kids, maybe, with the water/flour paste and strips of newspapers on balloons, sometimes we might move on to fancier paper or fancier glue. And then there is the paper pulp fun, where you take little bits of paper, soak them in water, mix them with some sort of fixative and then mold them like clay.
That is what I did here. I used this tutorial for paper pulp ala Miranda Rook. It takes some cardboard egg cartons, some glossy magazines, water, electric equipment (mixers and blenders) some big bowls or containers for soaking and mixing, and strainers... a colander and cheesecloth or stockings will do.
I'm not going to do a tutorial for this, because I pretty much just followed Miranda Rook's instructions. Plus I forgot to take pictures and hers are great. I wasn't sure how well it was going to work out, so I only did a fraction of her recipe, using one large 18 count egg carton and about half of a small glossy. It didn't make nearly as much as hers, but I knew I wouldn't need so much for just a few wands and wasn't sure if I'd use it again.
So after soaking my paper and combining it well with a mixer, I took a bit and mixed it with my white glue to make my first batch of wands. Since I did my wands in a couple of batches, I followed Miranda Rook's instructions on storing the pulp and rolled the leftover into these little balls that I set out in the sun to dry.
They dried well and made nice hard balls. I followed Miranda Rook's instructions again and took a few of the balls and set them in my bowl with some water. Not too much because I didn't want it to be soggy I just wanted it to be mashable. I broke the balls apart as the water made them soft and kept breaking them up as I added small amounts of water.
Then I added more of my trusted white glue. I mixed this with my hand mixer. If it were a bigger batch, a stand mixer would work better, but I was working in small batches so it was okay for me. I blended it until all the glue was mixed in and if it wasn't mashy enough or sticky enough I added more glue. MORE GLUE! (this has been my refrain the last few weeks.) The one thing I would have liked to do with this mash was to blend it even finer with a hand blender or in a regular blender. My blender was broken so I went with the bumpy mash. It adds a nice texture, but I would have like to have seen what could have happened with a smoother mash.
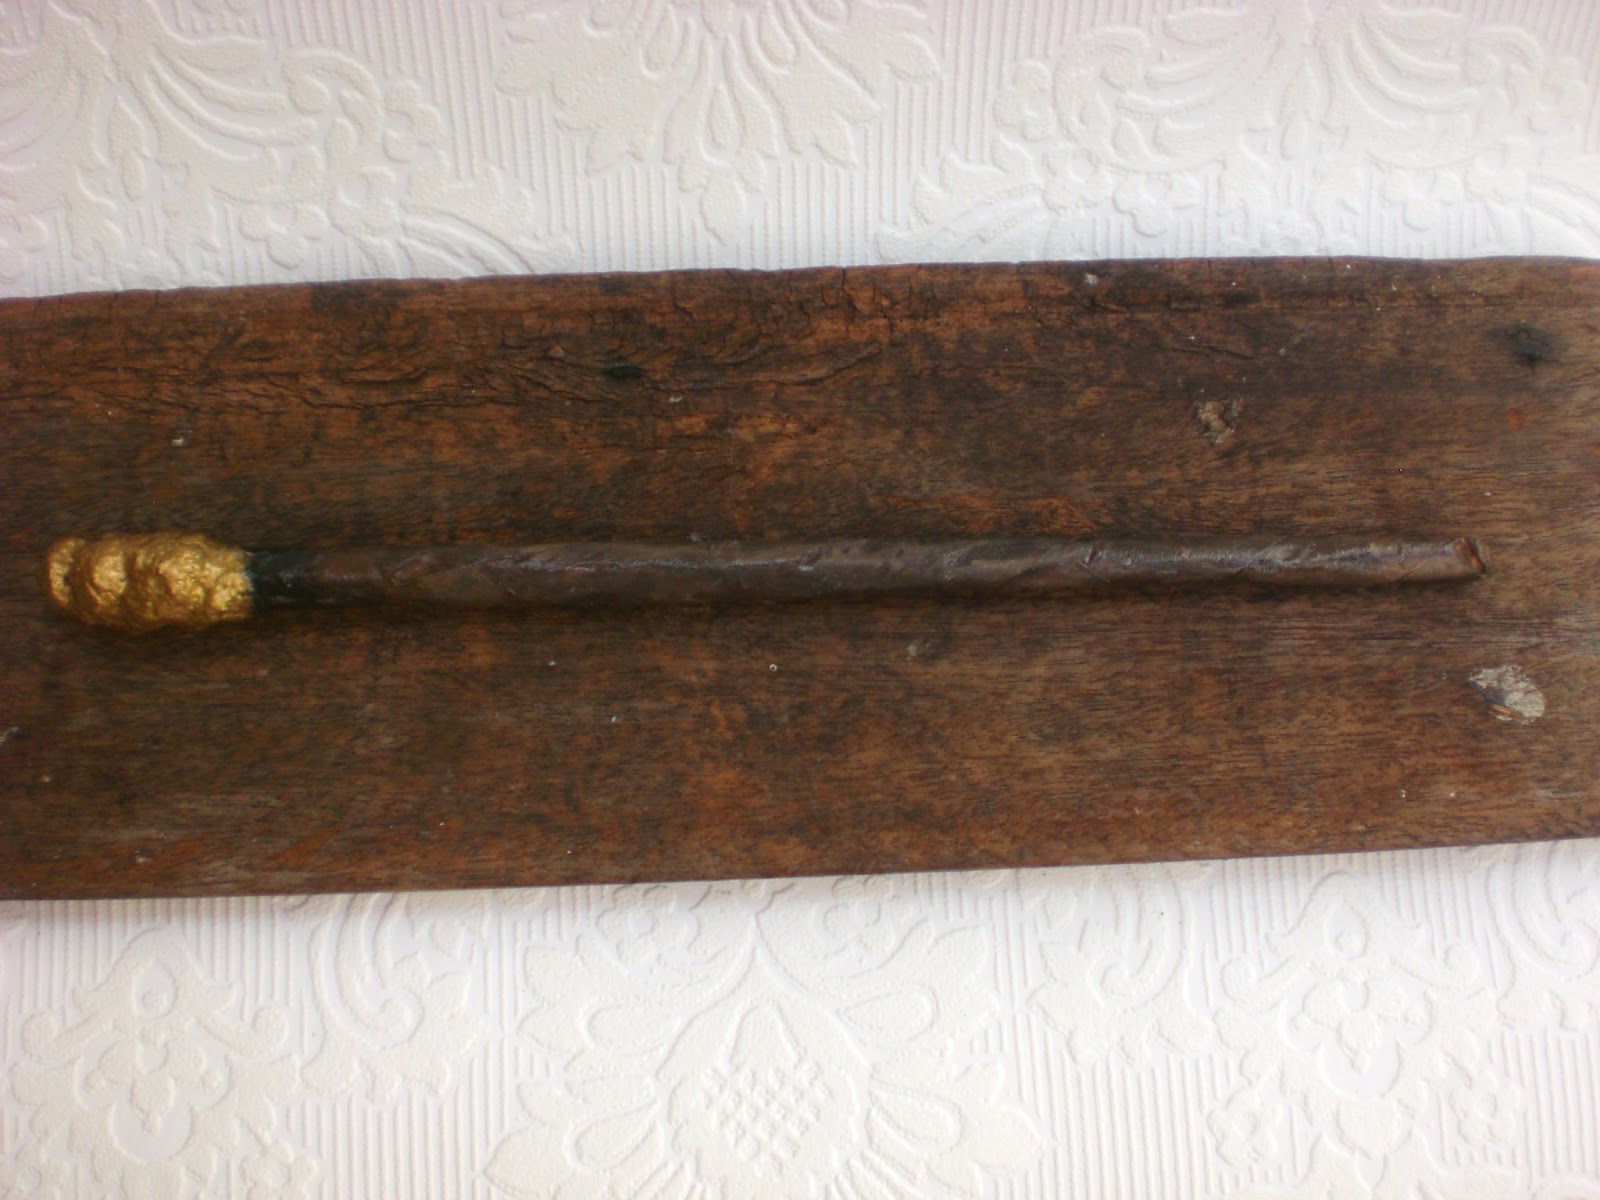
Once mixed well with the glue, I got out my wand blanks. Yesterday, I mentioned that it was okay if some of your wands weren't perfect. If they were wrinkled or bumpy. This was the first wand my son made and he got upset because it was all wrinkled. I told him not to worry, because I could almost see The Elder Wand in the bumpiness. Instead of trying to straighten it out and smooth the wrinkles/bumps or just tossing it in the garbage as a loss (it is only glue and paper, after all,) I emphasized the wrinkles, squeezing and smooshing the original blank into something that was less sleek and more organic looking. Then I took out paper pulp and added more pulp to the bumpy parts, emphasizing them, smoothing them on, compressing them around the bumps and adding a nice hefty clump of mash as a handle.
In the end, this was the "messed up" wand. It's a beauty. And the one my son actually chose for himself. I chose the most flawed wand blanks for the paper mash. I worked with the wrinkles to make them unique and give them personality.
Some were too wide, so I made them wider and solid.
Some did not have round shafts, so I made them more angular.
Some didn't have enough glue at the grip side, so I covered the soft paper with the bulky pulp which dries very hard. The soft handle was actually a common problem I had, and paper pulp was not the only solution for this problem.
And that brings us to another family of wand embellishments.
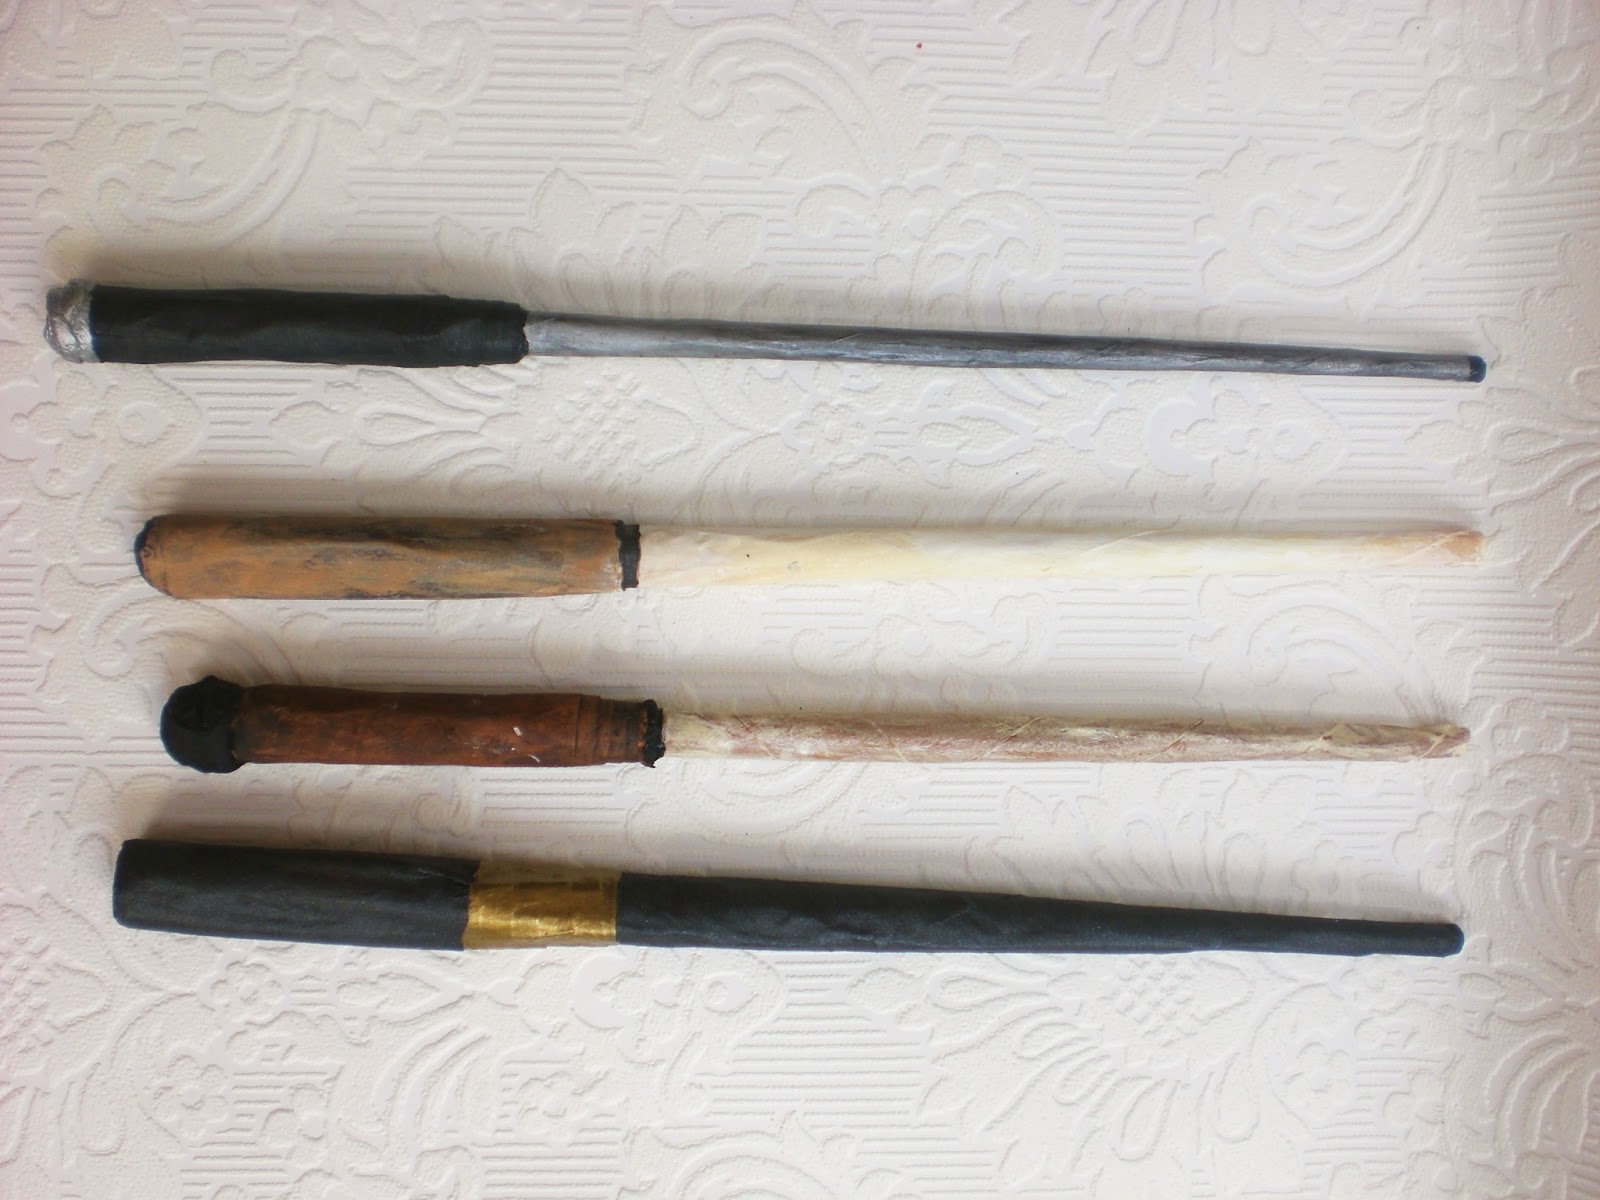
Wrapped Kraft Paper Handle Harry Potter Wands
This is a simple embellishment and all it takes is a strip of paper bag and more glue. (MORE GLUE!)
You want to cut your brown bag/kraft paper in a slight taper so the outside edge is narrower, because that will make the hand a little bit graduated on the wand. Add glue liberally and roll it tightly to the wand handle, much like the original wand construction. Smooth out the wrinkles and bumps as you go and when the whole handle is wrapped, smooth the glue out.
For most of these paper bag wands, I added a twist for a pommel gem or where the grip meets the wand, but I didn't do it for all of them. It's just another embellishment. For one of these, I dipped a braided cord in glue and wrapped that around the top of the handle.
And that leads me to the last of my embellishment catagories.
This is my least favorite embellishment. Sorry. It's easier, but I found that it had the least modelling capability and the string dries hard, with a distinct string texture. It works, but it's not my favorite. The silver one was yarn, and the yarn and glue together made an almost rough texture which reminded me of metal. That's why I made it silver. The bottom one was cotton twine and while I kind of like the way it looks on the handle, I don't like the way it feels when I grip it. Well. We'll see if any of the kids choose my least favorite wands as THEIR favorite. Shh. Don't tell them these are my rejects. One person's trash is another person's treasure (says the avid repurposer.)
I suppose at this point, I should talk a little bit about the painting techniques. I do not have any tutorials for these because I just went on my gut and my hands were really messy and full of wands and paint. But if I think back over it, there are really only two techniques I used.
The easiest is the flat effect. This is just an opaque layer of paint in one color. It might or might not have a layer of glossy mod podge (I found it too sticky for grips, so it was only on the wand shafts) or gel medium or even a glaze of iridescent fluid acrylic. Silver, black and gold gave the best flat effect, I found.
And also I had a dark mica paint that I got many years ago and doesn't work for when I paint pictures. This was the perfect use for it.
A bit more difficult was the layered paint effects. This consisted of a base coat and then one to multiple (and I do mean multiple) following layers of thin paint that I then rubbed off with my hand. I found using my hand made the best effect sometimes, avoiding brushstrokes and giving it a more natural variegation. Plus, I was careful not to use too much paint for each layer, because it doesn't rub off very well if the paint is applied thickly.
I found the layered effect worked best with browns, tans, ivory and white. Blending the colors gave a natural wood or bone feeling. And sometimes I found the browns too flat, so I would dab on some orange with the brown/tan and blend it on as I went.
I found that adding the lightest colors first, and then putting on darker layers as I went worked the best, although a little bit of lighter color added to a darker color could also give a feeling of age/dimension.
Whenever a wand didn't look right, I would just add another layer of color until it made me happy. Sometimes that meant a solid layer of color changing the entire color scheme. Sometimes it just meant another thin layer of brown that I then wiped off
And then there's my daughter's request. A pink wand. And I had to get over my resistance to the pink wand (Harry Potter wands aren't PINK!) and find a way to put it together. This wand is actually a graduated base layer of orange blended with white, a little bit of tan, and then an iridescent glaze on top. The blue iridescence altered the orange to a vaguely pink color. Win!
I wish I had the presence of mind to photograph the painting techniques, but I was too involved in the actual painting, which is often that case when I craft.
If you have any questions, feel free to comment and I will answer. Also, I'd love to see if anyone makes a wand with any of these hints, or finds new solutions or new embellishments or new techniques. They can be lots of fun to make and they look so impressive considering the materials and effort involved. I mean,with a little bit of paper, glue, and paint, you too can be called Ollivander.
To check out the previous post and see all of the 21 wands, click here.
Labels:
color,
cool,
crafts,
CreativeKids,
DIY,
harry potter,
hints,
how-to,
kids,
magic,
mixed media,
painting,
play,
process
Friday, May 25, 2012
How To Make Your Own Orange Liqueur, and Bonus Candied Orange Peels
Orange Liqueur In Progress
One of the things about being a mom and being an artist and being a partner and being a worker and all these other hats I have to wear in this modern gotta-get-it-done world is that I don't necessarily take time to take care of myself.
I do a lot of sacrificing. I do a lot of taking care of others. I do a lot of anxious, running to catch up. I do a lot of crashing, exhausted, feet up at night.
One of the things I'm trying to do is to remember to do things for myself. Things that are not just about crashing and watching tv anyway. Rather things I just do for fun, things that renew me, things that I'm not trying to find a way to turn into a business. Things that are not about money or responsibilities or work. I started reading The Giver, by Lois Lowry. That's one of those books I've heard about for years, and I'm finally getting around to it.
And I'm getting back into my margarita habit. For some reason, margaritas and summer just seem go together.
And to feed my margarita treat, I am making my own orange liqueur.
I was inspired by this recipe from pinterest, but of course, I had to put my own spin on it. It's very simple. It has only four ingredients. Vodka. Oranges. Water. Sugar. But it does take some time and patience in order for the oranges to infuse the vodka, and it is a two part recipe, first the orange vodka, then the orange simple syrup. I am not all that patient, so, that accounts for my small adjustments to the original recipe.
Orange Vodka
One bottle of vodka. I just used a fifth of cheap vodka. Since it is my first attempt at this, I didn't want to make too much or spend too much.
Organic sweet oranges. Organic because you're using the peels in this so you don't want them to have anything unsavory on them. I used navel oranges.
Clean and dry a good sized jar.
Slice oranges into fairly thick slices.
Pour vodka into jar.
Add as many orange slices as will fit and still be covered by vodka. Pack them in there. I used two very large oranges and there was no room left. If you have more vodka or smaller oranges it will take more.
Cover and let sit in a cool dark place for 2 to 3 weeks.
Strain through cheesecloth or mesh sieve into a bottle. Squeeze the remaining pulp/oranges to remove all the juice/vodka, add to bottle. (I used the sieve, but I think the cheesecloth is better, because you can just wrap up all the pulp and squeeze that out without the mess. I had to squeeze mine handful by handful. Messy.)
The original recipe said to let this sit for another 3 weeks. Like I said. Impatient. So on to the next step.
Simple Orange Syrup
One cup sugar
One cup water
The rind of one orange. Try to remove as much pith as you can and just use the orange part.
Peel the orange, trying to remove only the orange zest, without the white pith. I did not zest the orange, because I wanted to remove the peels later. Cult the peels into fairly large pieces. Put in a saucepan. Add one cup water and one cup sugar. Boil the water, sugar and orange peels until the sugar is dissolved, stirring occasionally. Continue to simmer for a few minutes to infuse the orange into the sugar syrup. Let cool. Remove orange peels.
The original recipe just used plain simple syrup, but I saw an opportunity for another layer of orange flavor, and I took it.
Add orange syrup to the jar with the vodka. I had about 31/2 cups of orange vodka and started with 1/2 cup of syrup, tasting as I went until I liked it. All together, I added about a cup of orange syrup. It has a little bit of a floral flavor to it, not nearly as sweet as most orange liqueurs and a slight bite of bitterness from the peels. I am still considering adding more syrup, because I want my margaritas to have a bit of sweetness, but not too much. Oh these are the things that you really need to work through with trial and error. Perhaps I'll err on the side of another 1/4 cup of syrup, since I have no idea what I'll do with that last little bit of syrup.
The original recipe says it will get sweeter as it ages...
Stop the presses.
I just went to add the last little bit of syrup, and realized I had these lovely syrup soaked peels. So I...
ROLLED THEM IN SUGAR!!!!
HOLY COW. Candied orange peels. It's a quadruple bonus recipe day. Orange vodka, orange liqueur, orange simple syrup and candied orange peels. They're super yummy, too.
Plus, since I took the time out to make the candied orange peels, and S was putting some meat in a marinade and had sliced open a lime for it, I said, 'hey give me that other half of the lime, I should try a margarita with my new orange liqueur.' So that's what I did.
Uhm. Ohmagah!
WOW.
This margarita is absolutely fantastic. Note the pleased, slightly smug look on my face from a new recipe that not only works, but improves an old recipe and is a new skill never attempted. Plus, I'm also supremely tickled about the candied orange peel brainstorm.
Plus, I haven't had lunch yet and it is mighty early for a margarita and even though I only sipped it for a taste test, I might just be a little tipsy.
Anyway, happy Friday, happy Memorial Day, and remember to do something for yourself, something that makes you feel good, not just for the moment, but about yourself.
Labels:
cool,
DIY,
food,
hints,
how-to,
living,
mommy time,
pinterest,
the happies
Thursday, May 17, 2012
Fawn paper doll and Cultivating Creativity in Gentleness
Fawn paper doll, with mushroom
Sometimes, I feel like I am chasing inspiration, chasing down my aspirations, hunting them through the woods.
And I'm making a lot of noise, crashing through the woods with my clumsy intentions.
My inspiration runs off, faster than I can keep up, and disappears into the shadows, just a tease of an idea, a flash of white tail and what I want to do.
In the almost 40 years that I have been pursuing my creativity, I am still learning how this all works. There's no equation for it all.
Perhaps I should take my metaphor father, though. Perhaps instead of chasing after inspiration, I need to do more sitting quietly, hidden in the camouflage of my life, and wait for it to come to me.
Yes, I know I do. Sigh. Moms with little kids don't get to do much sitting quietly.
Yesterday I had so many ideas and so many intentions they were all crowding for attention. I made lists and ran around from one idea to the next, running around also taking care of my daughter and getting ready for work. Honestly, I almost forgot I had to go to work, so wrapped up was I. Then I went to work with the same amount of nervous energy, and was unable to do anything practical with it. I tried to stay away from more coffee, let's just say that.
Perhaps also what I'm chasing is not something outside of me. Perhaps it is inside of me, that creativity, that center of calm or that energetic intention. Perhaps I need to be gentle with myself through this process. Perhaps we all do. Perhaps we need to cultivate our selves, our creativity and our souls with a measure of gentleness, care, and feeding. Provide for our creative selves, offer safety, calm and sustenance, and instead of having to hunt down inspiration, it will come to us.
With that in mind, what are some ways that we can cultivate our creativity.
1. Provide time where we can be silent with our thoughts, dreams, visions, experiences, etc. In other words, stare out the window time, futz with our supplies time, do nothing and just exist time.
2. Provide space where creating is encouraged. A desk. A basement study. A corner in the bedroom set up for writing. A dining room turned into an art studio. Tell your creativity that this is the space reserved for it, and it is welcome to come.
3. Provide food for creativity. Read great books, fiction and non fiction. Watch films that engage you. Play music that fills you with energy. Look at art that makes you want to pick up a paintbrush.
4. Husband your physical well being. Eat well. Sleep enough. Get out and exercise. Organize your physical space. Declutter.
5. Provide the supplies that you need to create. Gather them so that they are available to you when you need them.
6. Set up regular time to be creative. Yes, inspiration is fleeting, but give it a comforting routine, a safety in the knowledge that it is welcome and will be fed, and it will come.
These are ways to cultivate our creativity in gentleness and positivity. And then we actually have to sit down and do. DO. Write. Paint. Compose. Cook. Whatever your creativity demands. Don't forget the do. It is good to be gentle with ourselves in order to reach our goals, but we can't get there without taking action.
What are some ways that you have for cultivating your own creativity, luring it to come to you?
Sometimes, I feel like I am chasing inspiration, chasing down my aspirations, hunting them through the woods.
And I'm making a lot of noise, crashing through the woods with my clumsy intentions.
My inspiration runs off, faster than I can keep up, and disappears into the shadows, just a tease of an idea, a flash of white tail and what I want to do.
In the almost 40 years that I have been pursuing my creativity, I am still learning how this all works. There's no equation for it all.
Perhaps I should take my metaphor father, though. Perhaps instead of chasing after inspiration, I need to do more sitting quietly, hidden in the camouflage of my life, and wait for it to come to me.
Yes, I know I do. Sigh. Moms with little kids don't get to do much sitting quietly.
Yesterday I had so many ideas and so many intentions they were all crowding for attention. I made lists and ran around from one idea to the next, running around also taking care of my daughter and getting ready for work. Honestly, I almost forgot I had to go to work, so wrapped up was I. Then I went to work with the same amount of nervous energy, and was unable to do anything practical with it. I tried to stay away from more coffee, let's just say that.
Perhaps also what I'm chasing is not something outside of me. Perhaps it is inside of me, that creativity, that center of calm or that energetic intention. Perhaps I need to be gentle with myself through this process. Perhaps we all do. Perhaps we need to cultivate our selves, our creativity and our souls with a measure of gentleness, care, and feeding. Provide for our creative selves, offer safety, calm and sustenance, and instead of having to hunt down inspiration, it will come to us.
With that in mind, what are some ways that we can cultivate our creativity.
1. Provide time where we can be silent with our thoughts, dreams, visions, experiences, etc. In other words, stare out the window time, futz with our supplies time, do nothing and just exist time.
2. Provide space where creating is encouraged. A desk. A basement study. A corner in the bedroom set up for writing. A dining room turned into an art studio. Tell your creativity that this is the space reserved for it, and it is welcome to come.
3. Provide food for creativity. Read great books, fiction and non fiction. Watch films that engage you. Play music that fills you with energy. Look at art that makes you want to pick up a paintbrush.
4. Husband your physical well being. Eat well. Sleep enough. Get out and exercise. Organize your physical space. Declutter.
5. Provide the supplies that you need to create. Gather them so that they are available to you when you need them.
6. Set up regular time to be creative. Yes, inspiration is fleeting, but give it a comforting routine, a safety in the knowledge that it is welcome and will be fed, and it will come.
These are ways to cultivate our creativity in gentleness and positivity. And then we actually have to sit down and do. DO. Write. Paint. Compose. Cook. Whatever your creativity demands. Don't forget the do. It is good to be gentle with ourselves in order to reach our goals, but we can't get there without taking action.
What are some ways that you have for cultivating your own creativity, luring it to come to you?
Labels:
creativity,
drawing,
goals,
hints,
inspiration,
lists,
mixed media,
MomCreates,
painting,
paper dolls,
process
Monday, May 07, 2012
Rowena's Easy Crockpot Chicken Tacos
Here I am trying to keep up with my blogging and all my artistic goals at the same time I am a mom who stays at home part of the time and works out of the house part of the time. It's kind of a difficult balancing act, much like being a mom just in general.
But I have decided to count my cooking and organizing and repurposing and kid activities and photo editing and social networking and researching as part of my creative output, along with my painting, writing and crafting. I need to understand all the various parts of my life as being creative and productive. It makes me feel more productive, which makes me feel stronger and more capable which means I am able to tackle more and more challenging creative endeavors.
It all goes together. It isn't separate. One of the things I'm trying to do, in addition to keeping to do lists and creative logs, is to plan ahead. Take photos of things as I am doing them and then saving them for when I am ready to post, or editing them, (I used PicMonkey here, due to the demise of Picnic.) Also to make my plans for Monday early, so I can get prepared and not feel overwhelmed when I sit down to do EVERYTHING I want to do on my day off. Unlike most people, my weekends are the height of my work week, and Monday is when I can get my personal work done.
And the truth is, I often devise my own recipes, and then I forget to write them down and think I'll remember the next time I try, and sometimes I don't, so I lose that dish that I liked so much (like that Linguine alla Rowena... black olives, lemon zest, goat cheese? I forget.) So maybe I'll start posting them here, a kind of illustrated extended creative log.
So here is my crockpot chicken tacos recipe, which I made last week while also painting.... and which is inspired by this post and my own shredded pork tacos recipe that I've been making for years now. I have a couple of secrets that make it super easy and super tasty.
Chicken breasts (can be frozen, no defrosting! save time!)
1 large can diced tomatoes (this time I used tomatoes with chiles, which is great, but you can use plain tomatoes, too.)
One diced onion
Chilpotle in Adobo (diced or food processed)
Salt and Pepper to taste
Cumin to taste.
Toss your diced onion into the crock pot. Open a can of diced tomatoes, toss that in, too. Add your chilpotle in adobo. I put in one heaping tablespoon of the food processed mix. That might be two or three chiles diced. Don't forget to add the adobo sauce if you are dicing. Put less in if you like it less spicy and more if you like it HOTT. Put in your frozen chicken breasts. I used 5 here. Again, adjust it to your needs and tastes. Salt and pepper to taste. Cumin to taste. The chilpotle in adobo adds a lot of flavor, but I put in cumin because it is a comforting flavor to me. You could probably skip it if you want. Or add some of your favorite spices and herbs.

Cook it for 8 hours on low or 4 hours on high.
Shred with two forks.
Serve with slotted spoon on tortillas with desired toppings. Cheese, Avocado, Jalapenos, Pico De Gallo, Lettuce, Tomatoes, Onions, Cilantro, Olives, Sour Cream....really anything that floats your boat. I used Cheese, Avocado, Jalapenos.
Bring a big napkin, it's messy and delicious.
You could use this chicken recipe in many dishes. A quesadilla with this, cheese and salsa verde is delightful. Or burritos or Enchiladas? Yum.
Like I said, I actually adapted this from my pork tacos recipe, and really the only difference is that instead of frozen chicken breasts, I use a big pork roast. Everything else is the same. And it's great with cheese, pico de gallo, guacamole and lime.
But wait. There's more.
Get ready for my two hints.
TIP#1
Chopped onions are great for cooking. Yes. They are cheap and flavorful and a necessity for many foods and many cuisines.
However, chopping a load of onions while you are watching two rambunctious kids can be dangerous. When my kids were toddlers, I actually chopped off the tip of my finger trying to prep a crockpot meal while my kids were running around. Not only did that meal take longer than necessary to get ready, since I spent quite a while clutching my finger and getting lightheaded at the sight of blood, it also caused a great deal of pain and stress.
Then my mom introduced me to the little bags of pre-diced onions in the frozen food section of the grocery store. Sometimes they come with diced peppers and carrots too. Once I started using those, my prep time could shrink down to almost nil with some dishes (like this one.) Frozen onions aren't good to eat fresh, but if you're cooking them, they lose nothing that I can see. If you want to save money and use up produce, you can also chop your own big batch of onions and freeze them for your own use later. Now instead of dicing onions while I'm trying to toss together a quick meal, I just reach into the freezer and grab a handful or two. Of course, I can still chop them fresh, like I did this time, because I was out, but it's nice to have the option.
TIP #2
Chilpotle in Adobo sauce is an amazing, flavorful addition to many dishes. I use it in Mexican dishes or in anything with a sauce or gravy. I make a great sherry chicken with chilpotle and lime using this. Or you can mix a bit of this with sourcream and lime for a tasty dip. Or just chilpotle with mayo, and you have a spread that makes great sandwiches. But it can be kind of annoying to chop the chiles as needed for recipes which sometimes mean I won't do it at all.
So I buy a can (found in the Mexican foods section of the grocery store) and just toss the whole thing in the food processor and puree it. Then I put the puree in a jar and keep it in the fridge for timely and easy flavoring whatever I want to have a smoky, spicy kick. I love my chilpotle in adobo.
I hope you guys like this recipe. It's so easy, especially with the tricks I added, and so tasty. I'm getting hungry just thinking about it. In fact, I'm going to dig around in my refrigerator and see if I have some leftovers for a lunch chicken taco.
Labels:
everyday,
food,
hints,
how-to,
living,
MomCreates,
moms,
organizing
Tuesday, April 24, 2012
Ten Ways Pinterest Can Improve Your Creativity
I've read a lot about how people love Pinterest, but it's a total time suck and they never DO anything that they pin on their boards. Or conversely, how people just don't "get" Pinterest, that it just seems to be a kind of cluttery virtual hoarding by squee girls.
Not me. Yes, I probably spend more time than is good for me browsing Pinterest, but I also try an awful lot of things that I see on Pinterest. I also use Pinterest as a resource for when I have my own projects to tackle. So I thought that I'd discuss some of the ways that I have used Pinterest not only to inspire but to actually DO STUFF.
1. Pin stuff you like!
This might seem self evident, but often when I am not sure what I am doing, the very act of pinning stuff will help me figure out what I really love, what I dream of, what I'd like to be doing and where I want to go with myself. Often, while I'm pinning, I will begin to notice trends in my interests, like dark colors or stamping or stuffed dolls. Which brings me to the next thing...
2. Make your boards as specific as possible.
It is very easy to just think one Crafts Board or one For The Kids board will do, but if you want to actually do stuff from pinterest rather than just squee over great ideas, it helps to make those boards very specific. So rather than one Crafts Board, I have Crafts and Stuffed Creations, Craft and Crochet, Craft and Stitch (hand sewing), Craft and Be Ye Unafraid of the Machine that Sews (yeah, my machine intimidates me). And that's not even counting the DIY boards I have, where I put tutorials and upcycling and other stuff. The important thing is that I gear my boards to my activities and needs and desires. I like crafts and art, so the majority of my boards are related to this... but they don't have to be. You can have boards focused on holidays, music, travel, fashion, food, kids activities, reading. But the more specific each of those categories is, the easier it is to actually find what you need when you are ready to DO STUFF.
3. Create Action Boards.
These are not mere inspiration boards, but these are boards where you pin things that you are in the process of planning, creating and researching. These boards might be something like a To Do Board, where you pin stuff you want to remember to do. Or project boards, like Kids Birthday Party, or maybe Kitchen ReDo ... basically any involved project can have its own board. Actually, giving a project its own board means that it will stay on your mind, rather than falling into the cracks and getting ignored. Every time you're unwinding on the internet, if you see something that might fit into your project, you can pin it, and that will get you thinking about it. If you are always thinking about a project, you're much more likely to actually do it. Plus, there's such a wide range of ideas on pinterest, that your personal project can become ever more creative and interesting.
4. Create Photo Reference Boards.
This is particularly something that helps me if I am creating something with visual interest, whether it's decorating or painting a picture or sewing the doll above. I'm not the kind of person who just copies what someone else did, but I am unashamedly inspired by what other people have created. For instance, I had some trouble when I was making this doll, because I didn't know what I wanted her face to look like.
This is the face I came up with, but not before I looked at and sketched out a bunch of other faces like this and this and this. In the end, I came up with my own face, but looking at what other people had done gave me a sense of what was possible and what I liked. When I was making my stuffed owl, I used many references of real owls that I had collected on my do it photo reference board, so I could get away from the stuffed owls that were out there and make mine, if not more realistic, then at least more reminiscent of an actual Hedwig.
5. Use the Search Function.
I love the search function. In some ways, it has taken over for general search engines. I like that the images are visual and I can browse for my own visual interest. Sometimes I just search a term on Pinterest and then let chance lead me to inspiration. But it also works because it is a curated collection of things related to your terms. Someone has already chosen these images because they love them or found them useful. The search function was particularly useful to me when I was looking for ways to do this doll's hair. I felt like I'd never done the hair right, so when I searched on pinterest, I was looking for a tutorial for doing hair "right." I found this and knew that this was the right way to do doll hair... but then I was also running out of time so I kept searching for something less.... intimidating. I didn't want to do something in felt, although it was cute, so I kept searching until I found this tutorial which is what I used and which came out fabulously.
6. Participate in the Community
People have answers. If you are stuck on something, ask a question on a relevant pin, and someone might have an answer. Or, solicit advice from your followers. Ask them if they know the right way to make a doll wig, or if a recipe works out the way it looks, or... well hey, I've been asking for all sorts of advice on my library board. I want to know if books are good or just hype, or if my kids will like them. The answer for this book seems to be yes. Something to be aware of here is the caption that you pin. Very frequently, I won't notice the caption when I pin and my followers will respond to a question I didn't have. So if you want advice or reviews or suggestions, pay attention to your comments and captions. Another community aspect that can encourage your creativity are the group boards. Create a board with friends working on a similar project, or find pinners you love and include them or just join in on the conversation where like minded people are sharing their ideas, like in this parenting board.
7. Keep Pen and Paper Nearby
Pinterest is a great virtual pin board, but there comes a time when you have to take things into the real world. To do so, it helps to have scrap paper or a notebook or journal with you while you browse pinterest. You might want to write down a recipe and bring it over to the kitchen. Or you might want to take the good book ideas and bring them with you to the IRL library or bookstore. Keep Lists. Note things down in your calendar. Take the impulse and paint something while you're sitting in front of your computer. If you have tools nearby to write something or draw something down, then it will encourage you to make one of those great ideas IRL.
8. Make a Did It Board
How fun! You tried a recipe from pinterest, or you followed a tutorial, or you crocheted a pattern, or you went to a place on a travel board! Great. Tell us what you did. Put that pin on a board of completed pins and share with us how it worked out. Keep it there as a reference so that you can go back to it again. I've gone back a bunch of times to do this, (it's great.)There is a feeling of accomplishment when you can mark something as done, and it is encouraging to see that other people are out there trying things, not just browsing.
9. Show and Tell
Similar to a Did It board where you pin things that you've attempted from pinterest, you can create a board to show how your own efforts turned out. Make a board of things that you have made, decorated, cooked. Upload your own photos, pin from your blog or flickr account. Honestly I'm still leery of pinning too much of my own stuff, I don't want to be a spammer, but the truth is that people want to be inspired, and when you show them what you have done, they can be inspired to do it themselves. I finally made my own blog board, after a year and a half of pinning. I'm not sure what took me so long, but it's also a nice place for me to see what I've done, how well various projects and blog posts are received, and to share my projects with a wider audience. There is actually a category for "My Life" when you make a board, so hey, why not show your life and what you have created.
10. Review Your Boards
And last but not least, remember that pinterest is not just for grabbing cool images that you see, it is for curating these images, collecting these ideas, saving things for later use. You pinned those images because there was something that grabbed you. Take time to go back over your own pins. See the comments that have been made. Remind yourself why you pinned that gorgeous room or yummy drink. When you first saw it, you thought, "I want to do that!" so periodically go through your pins to remind yourself of what you want to do. Don't forget to look at your specific boards, too. I have boards for various writing ideas. Sometimes, if I want to get back into a particular story, I might peruse this board. See now, you all thought that was just a board for weird stuff, but no, that is actually an inspiration board for my long neglected novel, characters, moods, settings, plot twists etc. So if I want my brain to go back to that project, I go there. Or if I want a new dinner idea, there's nothing like a food board. Shoot, I was browsing that board last night and decided on a whim to make this and it was delicious. Or if you want to do something for a holiday? Hey, this board is rocking for creativity at Christmas. We can pin good ideas all year long, but when it comes time in November to find a new wreath or project, all you have to do is browse your own collection, and you already have somewhere to start.
So THERE! That's it. Ten Ways Pinterest Can Improve Your Creativity.
But before you run off and get your make on, leave a comment and tell me if there's anything I forgot. What ways does pinterest help YOU to be creative. How do you avoid the time suck issues? How does pinning help feed your productivity?
Labels:
community,
cool,
crafts,
creativity,
DIY,
hints,
how-to,
inspiration,
lists,
organizing,
pinterest,
process,
realize
Tuesday, April 17, 2012
Creating a Mind Map to Plan Your Goals
Goals/Mind Map (Rowena's Planner)
Yesterday, I had this big plan to blog this huge post, but it was so big and, while I had worked on it, I hadn't worked on it enough. In the end, it overwhelmed me, because I didn't break it down enough and I hadn't clearly thought out what I wanted to do with it.
So I didn't end up posting at all.
Today, I thought I'd take a smaller bite out of the apple and actually post about planning goals.
It can be really easy to let the goals that you really want to accomplish in life get washed away in the flood of every day tasks and responsibilities, but the truth is that you have a responsibility to yourself and to the world to reach for those big goals, to put in the energy and follow your passion. Even as a mom, when it seems that your needs often come last, you are actually giving to your family when they see you actively working on your goals. When they see you working hard, not giving up, believing in yourself, following through, doing something that is important to you. This is a good example for children to see, and to imagine for themselves.
But HOW to do this, in this world of baking chicken and bus stop pickups and homework help and baths and etcetera?
One of the first things I do when I am faced with a large task that seems overwhelming in the face of living, is to get a precise handle on the task ahead of me. What exactly do I need to do? Are there things I need to do before I can even get started? How can I break one task down into its various elements? And once I know what those various elements are, can I break them down into smaller steps?
I like doing a little brainstorm with this mind map/spider web kind of planner. I put my main goal in the center... here, we have "Published Novel," and then in the next ring of bubbles, I write out the things I need to do in order to get to the main goal. Here I have "Organize Writing Space," "Finish 5th Draft," "Polish Opening," "Get Feedback," and "Get An Agent." These are the main tasks I have been thinking about, some of which I feel need to be done first, and some need to come later. But even so, they can be mighty overwhelming. So I made a second ring of bubbles to indicate the tasks that I need to do to accomplish the first tasks.
Here's one corner of the mind map. Attached to "Finish 5th Draft," I have "Delete Chap 3," "Re-read," and "Complete 5th Pass." That goal does seem a little redundant, but in actuality, it's a refinement. If you'll notice, I left some space to write notes about each individual goal. When I do my 5th pass of my novel, I'm actually going to be looking for some certain things to edit/revise. I'm thinking I want to tighten the writing, pay attention to consistency of character, and add some fierceness... but I am not sure what I'm going to be looking for exactly, because when I re-read, I will be able to spot the elements that I want to focus on in this revision. This is a plan in progress. There is room for me to fine tune the tasks and goals. There is room to add details.
However. There comes a time when you have to stop planning to take action and simply just take action. Notice that at the top of the planner, I added a bubble: "WRITE." Because when it comes down to it, I have to make sure that breaking my goals down and planning and making lists and planners and all that stuff doesn't take over, and the goal remains the focus. It's not about planning to publish a novel, it's about publishing a novel.
Now this kind of goal setting could be for any large task you set yourself. It could be organizing your house or finding a new job, or writing a paper. Whatever the goal, the key is to break down the large tasks into smaller, achievable goals that no longer seem as overwhelming. And then get started on the newly simplified tasks.
Then it's time to get going.
Labels:
crafts,
development,
DIY,
goals,
hints,
journals,
MomCreates,
organizing,
passions,
process,
realize,
the journey,
Writing
Thursday, March 11, 2010
8 Things To Get My Creative Mojo Going
What is this?No idea. A piece of glass? A tiny quartz? Some half melted rock salt? But it's heart shaped, and it's clear and transparent.
I don't have a lot of stuff to show, or maybe I do, but I don't have photos of it because I have been so unmotivated to be creative or to post or really to do much of anything but take care of the kids and feed people and read and watch some tv.
But, I say, BUT I know what makes me feel better as a person, and despite the dumps in which I find myself, I need to be creative.
And when it comes down to it, I don't think that feeling sorry for oneself ever really makes anything better.
So, strolling around the internet, I stumbled upon Magpie Girl's post about resistance and mantras, and I thought maybe I should start my own 8 things list of getting through the resistance. Because moping about not being creative never helps. So here it goes.
8 Things to Get My Creative Mojo Going
1. Write in a journal. Sometimes it's nice to write about what's bothering you, but that often doesn't get the juices going. Sometimes that just makes you focus on what is keeping you from writing. Better is to write about moving forward. Or write about plans. Or write about where you are right that minute. Write about positive things or things that get you inspired. Keep it positive, get the energy flowing.
2. Get the hands moving and turn off the mind. Sometimes we think too much. We can think ourselves right out of doing. So sometimes I just like to get the hands moving, and not worry so much about what it is I am doing, forget the outcome, forget the perfection, just do. I might be the only person who does this, but I've found my most productive painting time can be after the kids go to bed while I watch primetime tv. Not sure why, but I think it has to do with occupying that "think too much" part of my brain while allowing the creative part to arise. This doesn't work as well with writing. I think because both have to do with words.
3. Make lists of things to do, things youd like to do, things you have to do, things you've been thinking about doing, things you dream of doing, things that help you get to doing. Like this list. This is helping.
4. Start small. A little sketch. Some frosted cookies. A haiku. A ribbon hair clip. A collage in a journal, postcard sized watercolors, a paragraph. Whatever it is, lower the stakes and make it small. There's less at stake this way, less to mess up, more opportunity to explore and take chances without fear of imperfection. Maybe a doodle seems unimportant, which might make it easier to tackle when you're facing resistance, but maybe that doodle leads to the break through you really need.
5. Get out and do it somewhere else. Take the laptop to a cafe to write. Or try writing poetry on a train/bus/airplane. Take the paintset to the garden. Or knitting to bed. Sometimes a change in venue gets the blockages released.
6. Set a timer. This can work in two ways. One, you can set a timer and commit to being creative for until the bell goes off. I find 15 minutes is a good amount of time. It's not too big a commitment to keep you from sitting down, but it's not so short a time that you can't really get into doing the work. And once you're into the work, the resistance has been beaten. And two, you can set the alarm for doing something that has been keeping you from your work, chores and the like. If you can't work because your study is a wreck, clean for 15 minutes before you start work. If you have that phone call you've been dreading weighing on your conscience, take that 15 minutes to take care of it. Use the timer to clear the deck for your work. Maybe it's the other stuff that's been cluttering your creativity.
7. Get together with a friend to talk about your work. Or to work together. Or to work separately, but together. Or to act as a sounding board or critical partner or maybe just someone to be accountable. Sometimes being creative is a lonely job, but sometimes it helps to have someone along. Find a community, take a class, join a challenge. Other people help to get the funk released.
8. Just do it. There is no equivocating. Just get started. Start the painting. Start the revision. Stop thinking about doing and just do. I've always hated that Nike could co opt such a good motivational tool, but those advertisers do know what they're doing. Just do it. Just do it. Just do it. It doesn't have to be great, it just has to be done. Maybe next time it will be better. Maybe. But one thing I know for sure, you can't break through that resistance if you don't just sit down and do it.
Monday, June 15, 2009
Flying Girl Like a Child, or Yes to Life
015/100 in 100 Creative Challenge 6/15/09
Golden Fluid Acrylic on moleskine watercolor paper, 5x8"
Did I paint like a child? Probably not. But my intention was to do so. I was thinking about the way my son draws, but trying to combine it with the flying girl. It's an approximation. S says it reminds him of Francis Bacon, and I can see the similarities, but I would like to think that mine is not so nightmarish. I think I was influenced still by TST I saw red prompt. But also by Inspire Me Thursday Child Draw prompt. I don't know if it matters, but there is also gold in this painting, that you can't see in this picture.
It can be quite interesting to see what happens when you put two prompts together.
In fact, that can be the what makes creativity take off. I remember reading Orson Scott Card's website... probably his writing workshop... and in it, he said that his novels always start out with at least TWO instigating inspirations. Two separate and possibly clashing ideas that allow all sorts of tensions and connotations to grow within them.
What do you do to get that inspiration pop? Do you have any tricks or treats to turn your ideas into works of art?
How have you managed to keep your ideas flowing?
Monday, January 26, 2009
Flying Girl and the Migration, or Flock
1/26/09
Golden Fluid Acrylic, Prismacolor Watercolor Pencils on paper, 5x7
What is it I have to say? I do not even know. Perhaps it's because I am going through some sort of migration myself, and so can only see things from a distance. I am unable to see the details right at this moment. I am looking at movement and progress and dreams and goals and the past and the future. It's all very not grounded, it's just busy. Maybe that's why there's no horizon or land in this picture.
But I'm not even saying that's a bad thing at this moment. Part of the reason why is because I am getting near the 4 week mark of the portfolio project, and I am beginning to examine my progress so far. And in looking at that, I am beginning to look at what I want to focus on in the weeks ahead.
One third done with this puppy and well... I think my goals were meant for a woman without a 24 hour job as toddler wrangler.
Plus, I think I may have been pretending that I didn't still have to overcome my always struggles with the issues that I am now tackling. I may be closer than ever, but I am still chicken when it comes to putting my work out there as a professional.
That stuff doesn't go away. You may learn coping strategies, maybe even you learn to love the adventure, but I don't know how that deep insecurity goes away. Oh, maybe it does. Maybe it only feels like it doesn't when you're in the middle of it. Maybe that insecurity gets taken over by some other insecurity when you do finally manage to conquer it.
So in the end, it almost doesn't matter if I do indeed conquer my fears about being a fraud. (I just recently realized that's what a lot of it is about, that I'm faking, not a real artist or writer, just a poor kid pretending.) If I get over these fears, new ones will step up to take their place. So what matters is finding coping strategies for tackling your blockages.
An Incomplete List of Blockage Knockage-Downers
1. Lower the consequences. Make big things smaller. Break large goals into small pieces. A novel might be scary to you, but perhaps a chapter/short story at a time is manageable. Not a whole elaborate poem, but one that you can write on the subway from one stop to the next, or waiting in the car for that really long light to turn green. Maybe photos of your kids or your breakfast or your view outside your window are less frightening than the thought of being a "real" photographer who has models and stuff like that. For me, big paintings FREAK ME OUT. I never want to mess up or waste paint. I don't know where to start or where to set up even. Instead, years ago, I bought a tiny pad of 6x8" watercolor paper and a tiny travel watercolor set and would carry it with me. Nothing ever had to be special. All I needed was some time and something pretty to paint and I could sit down and whip something out. If it sucked, I could move on to the next. That period produced some of my very favorite and most well received paintings.
2. Switch media. Writing not going well for you? Paint a picture or play the guitar. For extra credit, paint a picture that reminds you of your writing. Collage a character study, make a map of your setting, sing a song that might be playing in the background. And if painting is stuck, try writing a poem about images you can't get away from. Keep your head in the writing game while using a different part of it to create. You know what also works? Turning on some music and dancing. That works too. Get that energy flowing and then sit back down to your project.
3. Set the timer for 15 minutes. Force yourself to work through the block. But only require that fifteen minutes (or alternately, require yourself to meet a quota-- 1000 words, or one painting a night.) Make a log or chart to mark your quota. Give yourself a sticker every time you meet a goal. Get so many stickers and get a treat. Hey, it's how I potty trained my son. Me, I just like to draw some graphs and rewards don't work for me, but it's about trying to find what works for you. If you keep moving, you push through your block. By refusing to give in to the "I can'ts" you actually end up doing what you were afraid you couldn't. No one says you have to love that stuff, the point is, you didn't give up the game, and I bet you will find some gems inside of that struggle.
4. Have you been working too hard and exhausting yourself? Are you blocked because you just need to stop and rest???? Then give yourself a break! Not working can be as important as working to art. Give yourself a night or two to just do things for yourself and not demand that you be productive. Beware though, that you don't take too much time off and lose your momentum. You want to build up good habits, and you don't want to lose your routine.
5. Oh, did I say you should get yourself a routine? You should. Whatever works for you, but something that gets your body in a habit of working. If you always sit down after the kids go to bed, turn on the tv and start painting, then if you don't paint... your night will feel empty and just WRONG. You may get tired of your routine, but it will keep you working even when you are struggling.
I'm going to stop here with my motivations, because there are five red birds in the painting, and I like to not overwhelm with too much info at once.
By the way, as I look at it, these suggestions aren't only good for creative pursuits. I can see how each of these techniques could help me in my struggle with house keeping. Or they could help with homework or studying. They could help with child rearing. I should have used some of these techniques when I was potty training the boy (although I did use the chart).
See, as life goes, so does art.
Subscribe to:
Posts (Atom)