Showing posts sorted by relevance for query sugar mice. Sort by date Show all posts

Friday, July 27, 2012

Harry Potter Sugar Mice with Sour Sghetti Tails


Sugar Mice for a Harry Potter Party

In my search for sweets for my son's Harry Potter party, I fixated on a few things. Chocolate frogs,butterbeer, and these sugar mice.


I've looked through quite a few recipes, looking for something that was easy, inexpensive and tasty. I learned that real sugar mice, classically, use cotton strings for the tail. But in some of the recipes I found, they had licorice strings. I realized that I had already packages of "sour sghetti" that I got on sale and they would be perfect. I also found some recipes that were basically fondant.... like the kind people frost wedding cakes with. Those were all pretty high maintenance recipes. In the end, I decided to go for the simplest. I didn't use a sugar mice recipe at all, rather I went for a butter mint recipe, but I skipped the mint entirely, and flavored it with vanilla, since I knew I would be using the sour sghetti, I thought plain sugar mice would go better with the fruity sour taste than mint.

Vanilla Sugar Mice

1/4 cup softened butter.
1/3 cup sweetened condensed milk.
3 1/4 cup powdered sugar. 
1/4 tsp salt
1/2 tsp vanilla
sour 'sghetti or other long thin candy strings

Mix butter, condensed milk, vanilla and salt with a stand mixer or hand mixer until smooth. Add the sugar a little bit at a time and mix until it reaches a consistency of firm play dough. 

You might need to add more powdered sugar to make it stiffer or more condensed milk to soften it up. When it feels right, you can start modelling the mice.


 Here I've illustrated the process.

First I take out some sugar dough and roll it into long snakes.

Then divide the snakes into more or less even  pieces. You don't want the mice to be too big, because that's a lot of sugar for one bite, so aim for marble size ball.

Roll your pieces into marble balls.

Take your marble balls and press the end of your sghetti string into the ball.
Pinch the ball so that it surrounds the sghetti string.

Mold the squooshed piece into a pear shape, largest shape near the tail. Pinch the nose so it is vaguely mouse shaped.

Take two tiny dots of sugar dough, pinch them flat between your fingers and then pinch onto the mouse where the ears would be. Try to keep the dough warm/workable before you add the ears, because as it starts drying it gets less sticky. 

Poke tiny dots into the face of the mouse to serve as dots. You can also add tiny frosting eyes, but I thought the impressions worked fine.

And there is your mouse.

I even found that the extra step of adding the ears, while cute, isn't really necessary. They still look enough like mice when it is just the pear shaped dough with the eyeballs pressed in. I bet you could also use little round sprinkles as eyeballs, too. That would be cute.

Let them dry for a day or two to harden. And then serve to all the wizard wannabes.


Monday, August 06, 2012

Harry Potter Party!


 I have been working on this party for quite some time, from searching pinterest for great ideas to making favors to hunting thrift stores and making decorations and taking trips to the 99 cent store oh and all the crafts.

So this weekend it finally happened. And it didn't rain until after the party, woo hoo!

I still have some crafts to post, so I'm going to show you some of the things I've already posted or things where I don't have tutorials, or just fun things.


 I brought my fancy wooden table out to the deck and laid a baroque looking runner across it so I could set up my potions table scape. I set out the gold cups and napkins and I had a few candle stands and candy bowls that I set with crystal platters. I liked the height they gave and thought they would work really well when I brought out the candy for Honeydukes Sweetshop and the Cauldron Cakes.  But somehow, the sweets never made it onto the pretty table.


 I took some of my son's toy snakes and wrapped them in and out of the bottle, for just a little bit of added spookiness.

And how about that fantastic green glass bowl I found at the thrift store? I filled it with the Expecto Patronum and Dementor Stones activity.


 Here we have a photobooth set up that I made. I took out the navy sheet and pillowcase and bought some glow in the dark stars from the dollar store, but for a while, I thought I'd run out of time and not be able to put it up... but at the last minute, I tacked the sheet up to an unused corner of the deck and covered the ottoman with the pillow case, brought out the little railroad village rug and stuck those stars on the sheet.


For the amount of effort it took, this photobooth was really worth it.  If I'd had a little more time, I would have made a witch broom to go with it.


When the kids first got here, I had them choose their favorite owlet from amongst Pigwidgeon's Pals.

That is Ivy's christmas gift, Mrs Hoot Hoot inside the old birdcage, on top of the old suitcase, ready to travel to Hogwarts.

Then they got to pick their wand from the box sent from Ollivander's Workshop.


I made gift bags and wrote their names on the gift bags so that they would be able to keep track of their owls and wands and other assorted stuff. That was a good plan, because with all the running around that happened later, they really needed one place to put their favors. Here is a tutorial for the gift bags .

 While waiting for all the kids to arrive, they got right to work at Transfiguration Class, where they needed to turn a rock into a creature.

All I did for this activity was to go to the 99 Cent store and buy some decorative rocks (in gray and green glass) some paint, glue, feathers, markers, gems, pipe cleaners and of course, googly eyes.

Then I just put those all in a box and put it on a kids table covered with a silver table cloth.  They really loved it. Who knew?


 I also made some Hogwarts House Banners. I really like how they came out, so I'll try to do a tutorial later on, but I really just painted them free hand.

I kept staring at them during the party and going, "wow, I like those." Right now, they are living very happily up above G's bed.

Once a bunch of kids were all there, I brought out some balloons and told them that they had to keep them in the air with their wands and the spell, "Wingardium Leviosa" I didn't get any pictures of that because I was going another craft at that point.


ACID POPS! You can see how I made these and displayed them here. They were a big hit with the kids and with the adults. But the kids were still sweaty after the acid pops so I remembered that I had some Gillywater in the fridge.

What is Gillywater? Oh, no one knows, but it was in the books, and I found this site where they wanted an alternate Harry Potter drink and found an Invisible Koolaid that tastes like Koolaid but looks like water. I put it in a clear glass jar and filled their glasses with the magical stuff.

The kids really liked the Gillywater and it was so easy, I almost forgot about it until I realized how thirsty the kids were after running around.

I forgot about quite a few things during this party. I forgot to put out the chocolate covered flies/raisins. I forgot to make that broom so the kids could fly. I forgot to do the crystal ball reading with the meditation jars I made. I also forgot to hang up the floating candles, and I'm kind of bummed about that one, because I really wanted to see how they turned out.


Then they went back out to play again, off in the yard. It was a Wizard War, with their wands and another craft I made out of recycled coffee can lids that I painted with silver stars, lightning bolts and swirls of various types. They would fling them like frisbees at each other and then run around picking them up again, with cries of, "I'm loaded! Better watch out!"


These are the spell discs I made. No tutorial. It's just painted directly on the plastic with silver craft paint. Frisbees would work very well for this and could also serve as favors for the kids to take home, but I had a dozen coffee can lids that I'd been holding onto (I use them for paint palettes sometimes) and when the brainstorm came that is what happened. I'd been thinking they would be used in a Wizard Duel where two kids stood apart and tried to throw it at/to the other kid, but the kids turned them into a wizard war and then ran their little butts off and got all sweaty.

I really tried to alternate slow paced, sit down activities with running around, because it would keep the kids from getting bored or worn out. So after Wizard War, I got out the Butter Beer. No photos of that, because I was too busy serving and by the time I was finished, everyone was pretty much done.


The next activity was the Expecto Patronum spell with the Dementor Stones.  That was a lot of fun and very cool when they were opening them... I mean, working on their spell. You can see how that worked here.

Once we finished the Expecto Patronum, I asked the kids what they wanted to do next and if they were ready for the candy.

Silly me.

They practically herded me into the kitchen to get the candy. I wisely didn't have it sitting out for most of the party, not only because some things would melt in the heat, but also because they would have been snitching candy the entire time.

As it was, they all wanted to be "helpful" when it came to the candy, and offered to carry the candy back out to the deck. Aww so sweet. I gave them the sugar mice and the chocolate frogs to take out.

But by the time I brought the main tray out, they'd set everything up on the little coffee table I'd put out there, kid height, instead of the pretty potions display table where I had all the nice cake stands and such.

Oh well. There was no orderly civilized Honeydukes Sweetshop line. No, it was mass, sweet, chaos. A free for all.


THEY LOVED IT.


Then I brought out the cauldron cakes but that was kind of anticlimactic after the candy. I thought they were great, but the kids were mostly sugared out.

And then they spent about an hour pulling each other around in a wagon. That wasn't part of my party planning. Perhaps in their imaginations, it was the flying Ford Anglia that Ron wrecked.

Anyway it was a lot of fun and some things were definitely more worth the fuss than others.

The wands were worth it.

The owlets, sadly, not quite as fun. Unless they took them home and loved them quietly. So not quite worth it.

The Acid Pops were great... for adults and kids. Worth it.

The chocolate frogs? They were cool, but the kids didn't love them that much and the adults didn't bother much with the candy. I would have made fewer chocolate frogs. Not so worth it. Better for an adult party.

Sugar Mice? Also cool, but I will probably eat more out of my fridge than all of the kids combined. So I'm glad there are left overs, because those are mine. But perhaps not worth it for the level of time consumed in making them. Also better for an adult party.

Honeydukes Sweetshop/table of candy. TOTALLY worth it. Maybe better to just get candy from the store instead of making some of it, though. Most of the home made candy was more trouble than it was worth.

The Gillywater/Invisible Koolaid? Cheap, easy and fast. Beloved by kids. Worth it.

The Butterbeer? Tasty, but very sweet, done soon, with no refills. I bought too much ice cream and cream soda. Maybe not worth the stress. Adult party. Spiked with real booze.

The Expecto Patronum/Dementor Stones activity. Really cool and worth it, though it took a while to craft.

Cupcakes? Worth it, because you need cake and these were tasty and not that hard, although a little stressful. But it could have been any cake really... so not necessary. Also, i had trouble with the heat and the melting of chocolate. Again possibly more for an adult, indoor party.

Those flying disc spells? I painted them months ago and just stuck them in a cupboard and the kids played a lot with them, so Worth It. Same for the balloons which are always fun.

Gift bags, easy and worth it. Really I had been planning some sort of difficult craft for making cauldrons and the bags worked fine.

The Pet Rocks/Transfiguration. awesome and low maintenance and just the cost of the dollar store items. Worth It.

And as for the banners and the potion bottles? I really liked the way they looked and I think they added to the Harry Potter feel, so worth it. And G gets to keep the banners.

Also, the photo booth was pretty easy, so that was worth it too. I've got pictures from it.

It seems that I got wrapped up in "cool projects" that would have been better for older party goers but were kind of lost on little kids who like koolaid, running around and candy. Hmm. Well, live and learn there, Ro.

Boy, I also have a lot to post on this party. If you click the links, you will find my tutorials and recipes to many of the crafts and foods, and you can decide for yourself which ones might be worth your time and effort.


Friday, August 03, 2012

Easy DIY Sweet Creamer and a Pretty Tea Cup

 Yum. Sweet Cream Creamer.

I'm taking a break from the Harry Potter extravaganza to make myself a cup of iced coffee with this super easy creamer.

So easy.

One can of evaporated skim milk.
One can of sweetened condensed milk.

Mix together.

Pour into coffee.

I had an open can of sweetened condensed milk from making my sugar mice and I needed to use it up and then I came across this recipe.  And I always have coffee to drink. Regular coffee is fine with sugar, but iced coffee needs something that is already dissolved for sweetness. We don't want grainy iced coffee, now do we? No we don't. So I tried the creamer recipe. Maybe some day I'll get around to doing that cold brewed coffee thing. I should hurry up before summer is over.

And yes that is a parmesan cheese container. Don't hate me. They are a good size and have that nice flip cap, so the sticky stuff doesn't get all gummed up in the threads of the screw cap.

Here's the iced coffee. For some reason it reminds me of  my grandmother. She made cafe con leche all the time, and it wasn't with canned milk, but something about it brings her back, so that's nice.

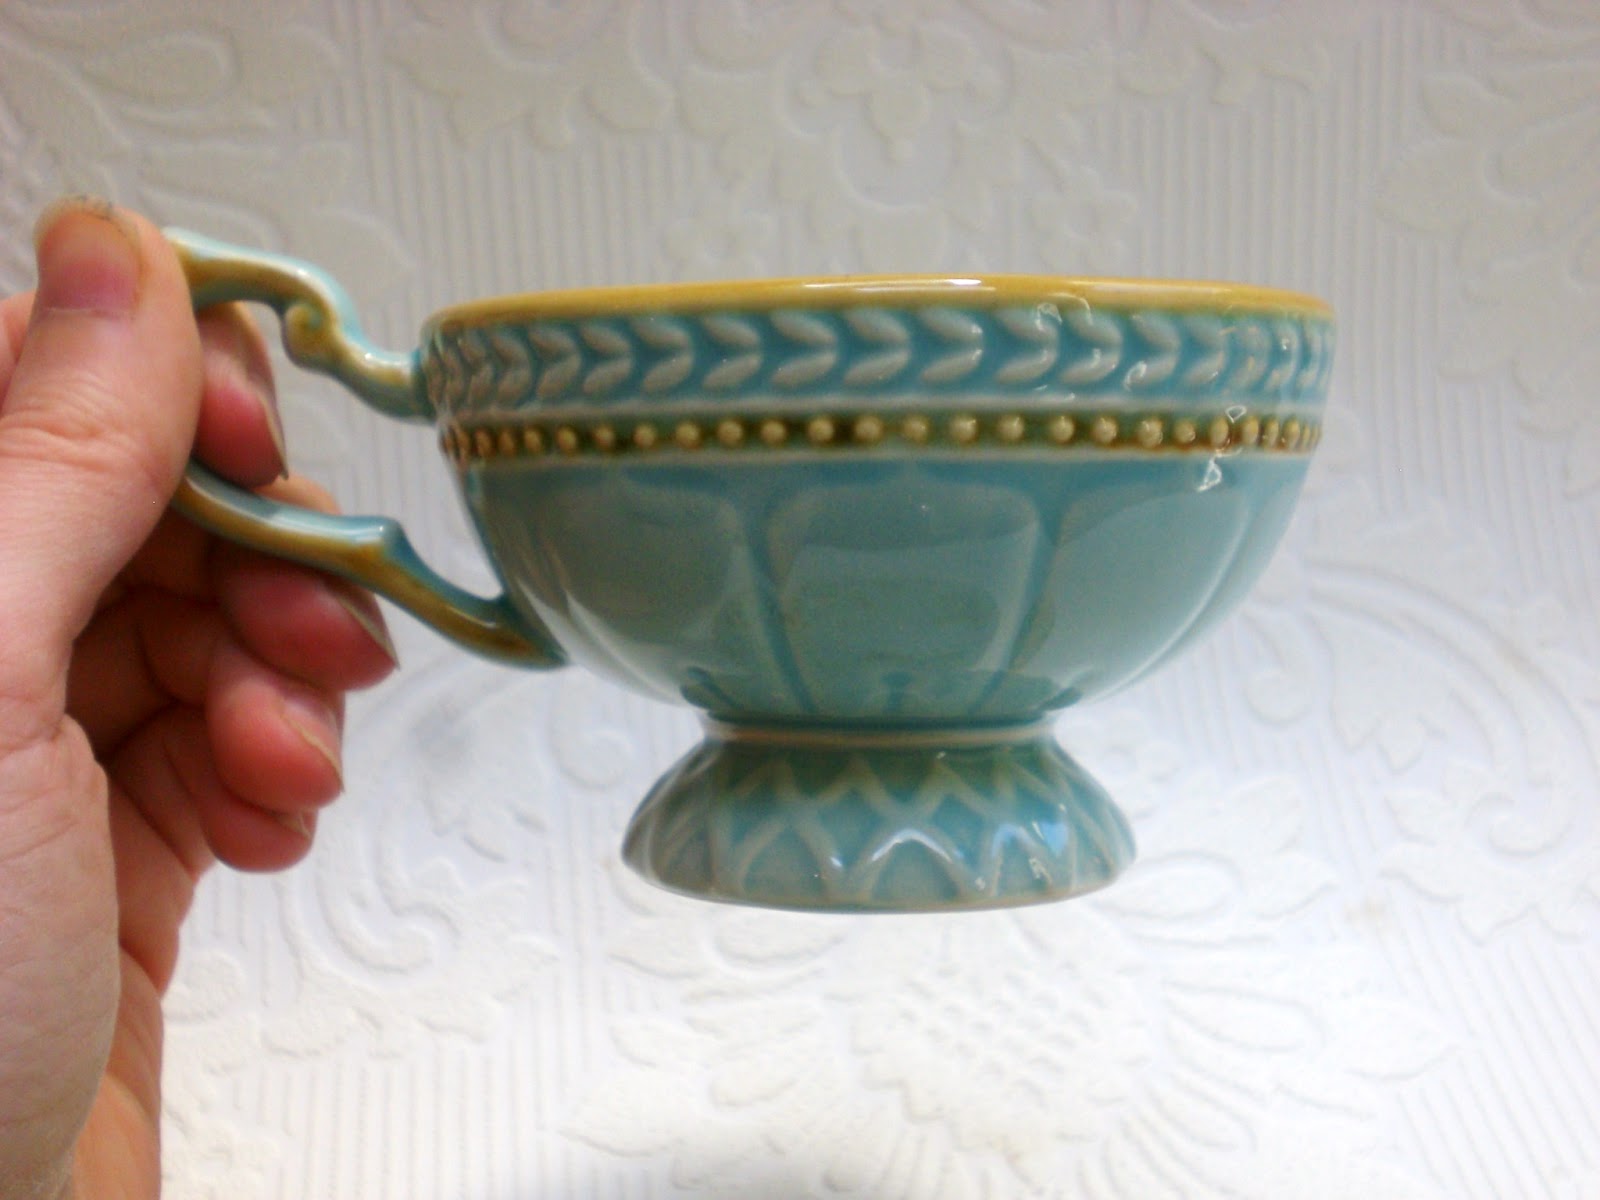
Also nice is this lovely majolica tea cup I found at a thrift store when I was out looking for bottles and other supplies for my Harry Potter party.

It is so pretty I couldn't resist. Love the color and the design. I used to collect tea cups before I had kids, so it's nice to find one that I like.


Oh, what a pretty pattern.
And a lovely cup.

That is all. Break over. I must go back to tending the Harry Potter party now. I hope to have many pictures come Monday.  I hope I have the time to take photos. Sometimes I run out of time and the kids are too all up in my bizness and won't let me have leisurely photo shoots.  Well. We'll see what happens.

Thursday, August 09, 2012

DIY Chocolate Frogs and Honeydukes Sweetshop at the Harry Potter Party


It is a truth held to be universal that kids love candy.

What better for a Harry Potter party than to provide a sweet shop to indulge the delights of the kids?

So that's what I did. I would call it the biggest hit of the party, actually, and I encourage all hosts of wizarding parties to include a sweet shop or a Hogwarts Candy cart. 


Now, the thing about Wizard Candy is it's unusual to us muggles, but as muggles, what can we do to approximate the wonders of the candy of the wizarding world? There are, of course, Bertie Botts Every Flavour Bean, which even muggles can enjoy, and the kids certainly do, but outside of that, what do we do?

We use our imaginations. 

Peruse the candy aisle and keep your mind open for near approximations of wizarding candy.

All sorts of gummy treats can be used, some that they mention in the book, and sometimes you can just make up ooky sounding treats that MIGHT be wizarding treats. I found:

Jelly Slugs (aka gummy slugs)
Sour Caterpillars (aka sour gummy worms)
Wiggling Snakes (aka gummy worms)
Boneless Frogs  (aka gummy frogs) 

As you can see, much of the wizarding verve comes from the names you give the candy, so make sure to add labels.

And we don't need to stop there, with creative naming, we can turn all sorts of regular candy aisle stuff into wizarding treats.

Cockroach Clusters (chocolate covered nut clusters)
Chocolate Flies (raisinets)
Cobweb Crunch (white chocolate bark)
Drooble's Best Blowing Gum (gum balls)
Wizard Wands (twizzlers)
Candy Floss (cotton candy)
Lemon Drops (actual lemon drops... Dumbledore's favorite was a muggle treat)

And then there's another option. 

You can create your near magical candy with muggle recipes meant to recreate wizard ones. 


 or todays recipe,
Chocolate Frogs

I've seen plenty of chocolate frogs around the internet where they got frog molds and then made chocolate shaped candies in the molds, but it was not in my plan to do so. I wanted something short cut-y-er.  Enter...

Crunchy Chocolate Frogs

I found the original recipe here and pretty much that's what I did but I'm going to pass on some of the things I learned along the way. You need Haribo Gummy Frogs, Dark Chocolate and Pop Rocks candy.


Start with Haribo Gummy frogs. They are yummy on their own and were a big hit, naked, at Honeydukes.

I used about two bags. I could have done with one bag, but I guess I forgot that I was serving other kinds of candy. I have plenty of these chocolate frogs sitting in my fridge right now, waiting for me to nibble as I watch tv or read books or what have you.


Melt your chocolate over a double boiler until it is smooth.

I used one extra large bar of Hersheys Special Dark. It is a tasty dark chocolate that works surprisingly well in recipes.  It melts smoothly and tastes great.

When the chocolate is melted, dump in two pouches of  Poprocks candy. They will pop on contact, but mix them into the chocolate and most of them will retain their crunch/pop.


 Dip your gummy frogs into the chocolate. Flip over until covered in chocolate and then remove, quickly. I found that the gummies started to melt if you left them in the chocolate too long, so don't attempt to dump all the gummies in and then take them out as you go along, as I was tempted to do... which would have been a gummy massacre. Don't do that.

Instead, dip them one at a time.

 They cover well. They look nice covered with the lumpy chocolate, too. The frog shape comes through but is not too bold. The crunchy poprocks look a little bit like warts. (Note the plain cookie sheet underneath these frogs. This was a mistake.)


Place your chocolate covered frogs on a silicone mat or parchment paper or waxed paper. Initially I just put them on a cookie sheet, but that was a BAD idea. The chocolate sticks like glue. I had to redip  my frogs because of this mistake.

Put the chocolate frogs in the refrigerator to harden.

Ideally, they should be in a covered container to avoid condensation issues, but I found that impossible until they were actually cool and hard. So I chilled them on the mat, and then transferred them (easily, thank you wonderful thing that is a silicone baking mat) into a tupperware container with foil between the layers. They store there very well, without condensation issues.

I'm really glad I remembered that I found that silicone mat on one of my safaris to the thrift store. And really glad I didn't leave it behind, thinking it was just some useless kitchen junk. How did I ever make anything in the kitchen with out a silicone mat?

Back to the story.

Once chilled, you may take out your chocolate frogs and present them to your wizarding guests.  Please remember, though, that these are chocolate covered and they do indeed melt in summer temperatures.

Leave them in the refrigerator until they are ready to be served. Also, they are small enough that you can eat them in one bite. Two bits makes for messy melted chocolate. I guess that's because  they are trying to get away. *wink wink*


As for presentation of my Honeydukes Sweetshop, I always keep my eyes open for interesting containers. I was strangely drawn to those cylindrical containers that you find brie and other cheeses wrapped in. I've been collecting them for a while.

When it came time to create my Honeydukes containers, I thought these would be the perfect thing. They were the right size and they looked as if they were packaging, but were not like our normal muggle type packaging of plastic and cardboard.

So I peeled off the paper labels, turned them upside down and filled the inside of the white or tan containers with... well, the paper plates from last year's birthday party, cut to size. Thus there was a bright pop inside the candy containers and also the plate kept grease spots from showing on the containers themselves.

I could place my candy labels inside the containers or tape the labels to a skewer and then tape the skewer to the container. (Please ignore the fact that I forgot to label some containers of candy. It is very hard to hold kids off of candy, once they see it, just so you can put up the fancy labels.)

(honeydukes sweetshop frenzy)


I put the round containers on a pretty tray and brought them out and before long, the containers were mostly empty and the kids were buzzing with sugar highs.


YAY CANDY!!! (Wizard and otherwise.)


P.S. Is it possible that silicone baking mats were created by wizards?
Related Posts Plugin for WordPress, Blogger...