Showing posts with label food. Show all posts

Thursday, August 23, 2012

Quick Coffee Cake with Dried Cherries

  Quick Coffee Cake with Dried Cherries

Browsing pinterest one day, I was struck with the desire to have a nice warm coffee cake for breakfast.

After a quick look at my pantry and another quick look for a bisquick coffee cake recipe or two as a guide line, this is what I came up with.

Coffee Cake

2 cups Bisquick mix (or Jiffy Buttermilk Complete)
2 eggs
1/3 cup milk
1/3 cup sour cream
1 tsp vanilla
2 TBS sugar

1/3 cup chopped dried cherries

In a large bowl, beat eggs and milk and sour cream and vanilla until smooth. Add bisquick mix and sugar, mix until just smooth. Do not over mix. Fold in chopped dried cherries.

Pour batter into a greased 9" cake pan or 8x8 square pan. Set aside while you make the topping.

Crumble Topping
1/3 cup bisquick mix
1/3 cup oatmeal
1/3 cup chopped pecans
2/3 cup brown sugar
1/2 tsp cinnamon
3 TBS melted butter

In a medium bowl, mix together the bisquik, oatmeal, chopped pecans, cinnamon and brown sugar. Pour melted butter over the topping mix and stir until the butter is mixed evenly through out.

Spread evenly on your coffee cake batter.

Bake in a preheated 400 degree oven for 24 minutes or until a tooth pick inserted in the center comes out clean.

Let cool 10 minutes. Slice and eat.


This coffee cake has a LOT of crumble. Yum. That's the way I like it, crispety, buttery sweet. The sour cream adds moisture and the cherries add a tangy sweetness. If you're a big pecan fan, you could add more chopped pecan to the batter and topping. This really isn't very pecan-y.

I think as a basic recipe for people who are trying to cut their cooking time down (like me) the bisquick coffee cake recipe is a sentimental classic. But that doesn't mean we aren't free to doctor it up. Before I made this coffee cake, I was considering making an apple cake or a chocolate chip coffee cake. I went with the cherries because I have these beautiful dried cherries in my fridge. And I added pecans and oatmeal to my topping because I often top my muffins with an oatmeal/nut crumble and really enjoy it. That's why I went  heavy on the topping this time.

Sadly, I made this two days ago, and it is already gone. :( I kind of wanted some for breakfast.

I suppose I should make some more. I could. Apparently, you can make the mix the night before, leave it in your fridge over night, and then bake it in the morning. That's good for those of us, like me, who take a while to wake up and be effective in the morning.

I'd love to know if anyone makes this and what kind of additions or substitutions they make to their coffee cake.

Friday, August 10, 2012

Cauldron Cakes, A Harry Potter Treat


When it came time for cake for my son's Harry Potter birthday party, after much exhaustive research, I came upon this recipe. Cauldron Cakes. I loved the idea and that it was relatively easy for such special type results. I of course, had to modify my recipe.

Really, it is just flipping your basic cupcake concept on its head... almost literally. It's just an upside down hollowed out cupcake with some embellishments, but it fits the theme and looks special.


:
Step 1

Make devil's food cupcakes.  

I just used a regular Duncan Hines cupcake mix, but I modified it with a food hack to make box mix taste like bakery cakes which I found, here. Again I modified it. Since this was a devil's food cake mix, I added one extra egg that the directions called for, switched out the oil for melted butter (rather than double the amount, I doubled it by half) then I switched out the water for half milk and half strong coffee. 
So bake the cupcakes according to the directions and when they are cool, take off the cupcake liners and, using a sharp knife, core the cupcake. You do this by cutting out a cone. Hold the knife at an angle pointing towards the center of the cupcake and then cutting into it in a circle. Make sure you go deep enough to leave a nice hole for your cream, but not deep enough to cut through the cake. About half way into the cake is fine.


Step 2

Make your glaze.

1 cup chocolate chips
4 TBS butter.

Melt your butter and chocolate chips over a double boiler, stirring occasionally, until smooth. Take the glaze off the heat.

I had a problem, because my glaze did not turn out smooth. In fact it was thick and lumpy. I think I cooked it at too high a temperature. But since I have been known to make myself a chocolate glaze at night after the kids go to bed, so I could dip apples for a treat, I know how to fix it. I added a splash or two of milk and mixed the glaze smooth and it turned out just fine... if  a little thick. You can also use the liqueur of your choice, cointreau or kahlua is lovely, but since this was for kids, I used just milk. 

You need to let the glaze sit and cool for about five minutes and then, although the recipe says dip the cupcake tops, mine was too thick for that, so I ended up smoothing it on with a spatula in a thin layer. Although it did not look as pretty as the original recipe, it tasted great.


Step 3

Add the chocolate chips for feet.

about 1/2 cup of chocolate chips, or enough choc chips to give each cupcake 3 feet.

Make sure you let the glaze cool a bit (I didn't, and when I tried to put my chocolate feet on it, the glaze melted my chocolate chips. oops.) 
Place three chocolate chips about an inch apart on waxed paper or a silicone mat. Press the chocolate cupcakes, glaze side down, into the chips so the chips can serve as tripod feet. Press gently so the chips stick. 


Step 4

Make the cream. 

I did not use the marshmallow cream found in the original recipe because I am not a fan of marshmallows. I considered using just plain whipped cream (from a can) as a short cut, but at the last minute, I found this recipe for a whipped cream-cream cheese frosting that really made me happy... so that's what I did.

1 small package of cream cheese, room temperature
1.5 cups of powdered sugar
1 tsp vanilla extract
1 pint of whipping cream.

In one bowl, mix your room temperature cream cheese with a mixer on low speed, adding the powdered sugar gradually, until it is light and fluffy. Add the vanilla and mix until incorporated.
In another bowl, mix your whipping cream at high speed, until the whipped cream is stiff and firm. It works best if your cream is very cold.
Fold the whipped cream gently into the cream cheese frosting until it is blended smooth.


Step 5

Fill the cupcakes

Put the cream cheese filling into a pastry bag, or a sandwich bag with the corner clipped off (which is what I did) and squeeze the filling into the hollows of the cupcakes, allowing it to rise out of the top like boiling potion. 
Sprinkle the top with yellow sanding sugar.


Step 6

Add the handle.

Take a handful of licorice sticks. I used black Twizzlers. These turned out to be far too big for my cauldron, so I sliced the twizzlers in half and then again, in half the long way, making them both shorter and thinner. 

For each cupcake, I took the quarter Twizzler and bent it into an upside down U shape. I pressed one end into one side of the opening of the cupcake cauldron, and the other end into the other side of the opening, pressing them in until they stuck.

I tried to find chocolate Twizzlers, as I don't like black licorice, but couldn't. If like me, you don't like licorice, the handles should be discarded before eating, as we don't think licorice is edible. For those strange ones who DO like licorice... well, go ahead and eat it, it's ok if I think you're strange. 

Step 7

Enjoy!

I actually loved the way these cupcakes tasted. The chocolate glaze was fudgy and the cream cheese filling was light and sweet and tangy. I don't know how often I'd make the upside down cauldron, but I would definitely make this combination in regular cupcakes. 

They were great at my Harry Potter party, but I somehow feel that older kids or young adults would enjoy them even more. For links to all the other crafts and tutorials and recipes involved in the Harry Potter party, check out the main post.

Thursday, August 09, 2012

DIY Chocolate Frogs and Honeydukes Sweetshop at the Harry Potter Party


It is a truth held to be universal that kids love candy.

What better for a Harry Potter party than to provide a sweet shop to indulge the delights of the kids?

So that's what I did. I would call it the biggest hit of the party, actually, and I encourage all hosts of wizarding parties to include a sweet shop or a Hogwarts Candy cart. 


Now, the thing about Wizard Candy is it's unusual to us muggles, but as muggles, what can we do to approximate the wonders of the candy of the wizarding world? There are, of course, Bertie Botts Every Flavour Bean, which even muggles can enjoy, and the kids certainly do, but outside of that, what do we do?

We use our imaginations. 

Peruse the candy aisle and keep your mind open for near approximations of wizarding candy.

All sorts of gummy treats can be used, some that they mention in the book, and sometimes you can just make up ooky sounding treats that MIGHT be wizarding treats. I found:

Jelly Slugs (aka gummy slugs)
Sour Caterpillars (aka sour gummy worms)
Wiggling Snakes (aka gummy worms)
Boneless Frogs  (aka gummy frogs) 

As you can see, much of the wizarding verve comes from the names you give the candy, so make sure to add labels.

And we don't need to stop there, with creative naming, we can turn all sorts of regular candy aisle stuff into wizarding treats.

Cockroach Clusters (chocolate covered nut clusters)
Chocolate Flies (raisinets)
Cobweb Crunch (white chocolate bark)
Drooble's Best Blowing Gum (gum balls)
Wizard Wands (twizzlers)
Candy Floss (cotton candy)
Lemon Drops (actual lemon drops... Dumbledore's favorite was a muggle treat)

And then there's another option. 

You can create your near magical candy with muggle recipes meant to recreate wizard ones. 


 or todays recipe,
Chocolate Frogs

I've seen plenty of chocolate frogs around the internet where they got frog molds and then made chocolate shaped candies in the molds, but it was not in my plan to do so. I wanted something short cut-y-er.  Enter...

Crunchy Chocolate Frogs

I found the original recipe here and pretty much that's what I did but I'm going to pass on some of the things I learned along the way. You need Haribo Gummy Frogs, Dark Chocolate and Pop Rocks candy.


Start with Haribo Gummy frogs. They are yummy on their own and were a big hit, naked, at Honeydukes.

I used about two bags. I could have done with one bag, but I guess I forgot that I was serving other kinds of candy. I have plenty of these chocolate frogs sitting in my fridge right now, waiting for me to nibble as I watch tv or read books or what have you.


Melt your chocolate over a double boiler until it is smooth.

I used one extra large bar of Hersheys Special Dark. It is a tasty dark chocolate that works surprisingly well in recipes.  It melts smoothly and tastes great.

When the chocolate is melted, dump in two pouches of  Poprocks candy. They will pop on contact, but mix them into the chocolate and most of them will retain their crunch/pop.


 Dip your gummy frogs into the chocolate. Flip over until covered in chocolate and then remove, quickly. I found that the gummies started to melt if you left them in the chocolate too long, so don't attempt to dump all the gummies in and then take them out as you go along, as I was tempted to do... which would have been a gummy massacre. Don't do that.

Instead, dip them one at a time.

 They cover well. They look nice covered with the lumpy chocolate, too. The frog shape comes through but is not too bold. The crunchy poprocks look a little bit like warts. (Note the plain cookie sheet underneath these frogs. This was a mistake.)


Place your chocolate covered frogs on a silicone mat or parchment paper or waxed paper. Initially I just put them on a cookie sheet, but that was a BAD idea. The chocolate sticks like glue. I had to redip  my frogs because of this mistake.

Put the chocolate frogs in the refrigerator to harden.

Ideally, they should be in a covered container to avoid condensation issues, but I found that impossible until they were actually cool and hard. So I chilled them on the mat, and then transferred them (easily, thank you wonderful thing that is a silicone baking mat) into a tupperware container with foil between the layers. They store there very well, without condensation issues.

I'm really glad I remembered that I found that silicone mat on one of my safaris to the thrift store. And really glad I didn't leave it behind, thinking it was just some useless kitchen junk. How did I ever make anything in the kitchen with out a silicone mat?

Back to the story.

Once chilled, you may take out your chocolate frogs and present them to your wizarding guests.  Please remember, though, that these are chocolate covered and they do indeed melt in summer temperatures.

Leave them in the refrigerator until they are ready to be served. Also, they are small enough that you can eat them in one bite. Two bits makes for messy melted chocolate. I guess that's because  they are trying to get away. *wink wink*


As for presentation of my Honeydukes Sweetshop, I always keep my eyes open for interesting containers. I was strangely drawn to those cylindrical containers that you find brie and other cheeses wrapped in. I've been collecting them for a while.

When it came time to create my Honeydukes containers, I thought these would be the perfect thing. They were the right size and they looked as if they were packaging, but were not like our normal muggle type packaging of plastic and cardboard.

So I peeled off the paper labels, turned them upside down and filled the inside of the white or tan containers with... well, the paper plates from last year's birthday party, cut to size. Thus there was a bright pop inside the candy containers and also the plate kept grease spots from showing on the containers themselves.

I could place my candy labels inside the containers or tape the labels to a skewer and then tape the skewer to the container. (Please ignore the fact that I forgot to label some containers of candy. It is very hard to hold kids off of candy, once they see it, just so you can put up the fancy labels.)

(honeydukes sweetshop frenzy)


I put the round containers on a pretty tray and brought them out and before long, the containers were mostly empty and the kids were buzzing with sugar highs.


YAY CANDY!!! (Wizard and otherwise.)


P.S. Is it possible that silicone baking mats were created by wizards?

Wednesday, August 08, 2012

DIY Acid Pops for a Harry Potter Party


 This was one of my favorite Harry Potter handmade treats. It caused the least stress and delivered the most fun. I found the original recipe here and tweaked it a little. I found the original recipe through this post, and I have to give those girls credit for giving me some of my ideas.


 The original recipe used sour lollipops with honey to get them sticky and poprocks to add the sizzle.

I knew my kids and also knew that they do not always enjoy sour candies, and sometimes they can't even finish a fullsize lollipop. So here is my adaptation


KIDS ACID POPS

One bag of dum dum pops, assorted flavors (about 24)
1/4 cup honey
the juice of one lemon
4 packets of poprocks, assorted flavors (I used watermelon, grape, and blue razz)

Put the honey and lemon juice into a small bowl and stir until it is well mixed.

Unwrap the dum dum pops and dip them one by one into the honey mixture. Set them aside to dry until the lollipop is sticky and tacky, not wet. I left mine out to dry for about an hour. If they are too wet, they will cause all the poprocks to lose their sizzle. I used an upside down colander to dry my lollipops and was very pleased with how it worked, not only to dry the acid pops, but also as presentation.

As close to presentation as possible, open up the packages of pop rocks. pour them into piles of separate colors. Then dip your sticky dum dum pops into the pop rocks and roll them around a bit to pick up the little nuggets. Stick them back in the colander, or however you are presenting them, and serve. It is best to eat them as soon as possible, because these do not keep at all. The few that were left at the end of the party had no acid left at all. They were still sweet lollipops, but the magic was gone.

I picked one color for each dum dum pop, but near the end when the poprocks were getting low, I combined the colors and had multi-color poprocks. Either way, it makes for a pretty candy. The presentation on the colander showed off the colors. It's also important to label your wizard candy, because without the name, it's just regular muggle candies mixed together. WITH the name, it's a treat imported from the Hogwarts Train candy cart.


 By mixing colors of pop rocks and dum dums, you can get a whole delightful assortment of pretty candies. This one is green and blue pop rocks on a white dum dum.


This is the one I had. It is grape pop rocks on a butterscotch dum dum. It was pretty tasty. And fun.

Not only did the kids enjoy these, but all the adults had one and relived their child hood a little.

Now that's magic that even muggles can practice.

You can see the rest of the Harry Potter party here, with links to the other crafts.

Friday, August 03, 2012

Easy DIY Sweet Creamer and a Pretty Tea Cup

 Yum. Sweet Cream Creamer.

I'm taking a break from the Harry Potter extravaganza to make myself a cup of iced coffee with this super easy creamer.

So easy.

One can of evaporated skim milk.
One can of sweetened condensed milk.

Mix together.

Pour into coffee.

I had an open can of sweetened condensed milk from making my sugar mice and I needed to use it up and then I came across this recipe.  And I always have coffee to drink. Regular coffee is fine with sugar, but iced coffee needs something that is already dissolved for sweetness. We don't want grainy iced coffee, now do we? No we don't. So I tried the creamer recipe. Maybe some day I'll get around to doing that cold brewed coffee thing. I should hurry up before summer is over.

And yes that is a parmesan cheese container. Don't hate me. They are a good size and have that nice flip cap, so the sticky stuff doesn't get all gummed up in the threads of the screw cap.

Here's the iced coffee. For some reason it reminds me of  my grandmother. She made cafe con leche all the time, and it wasn't with canned milk, but something about it brings her back, so that's nice.

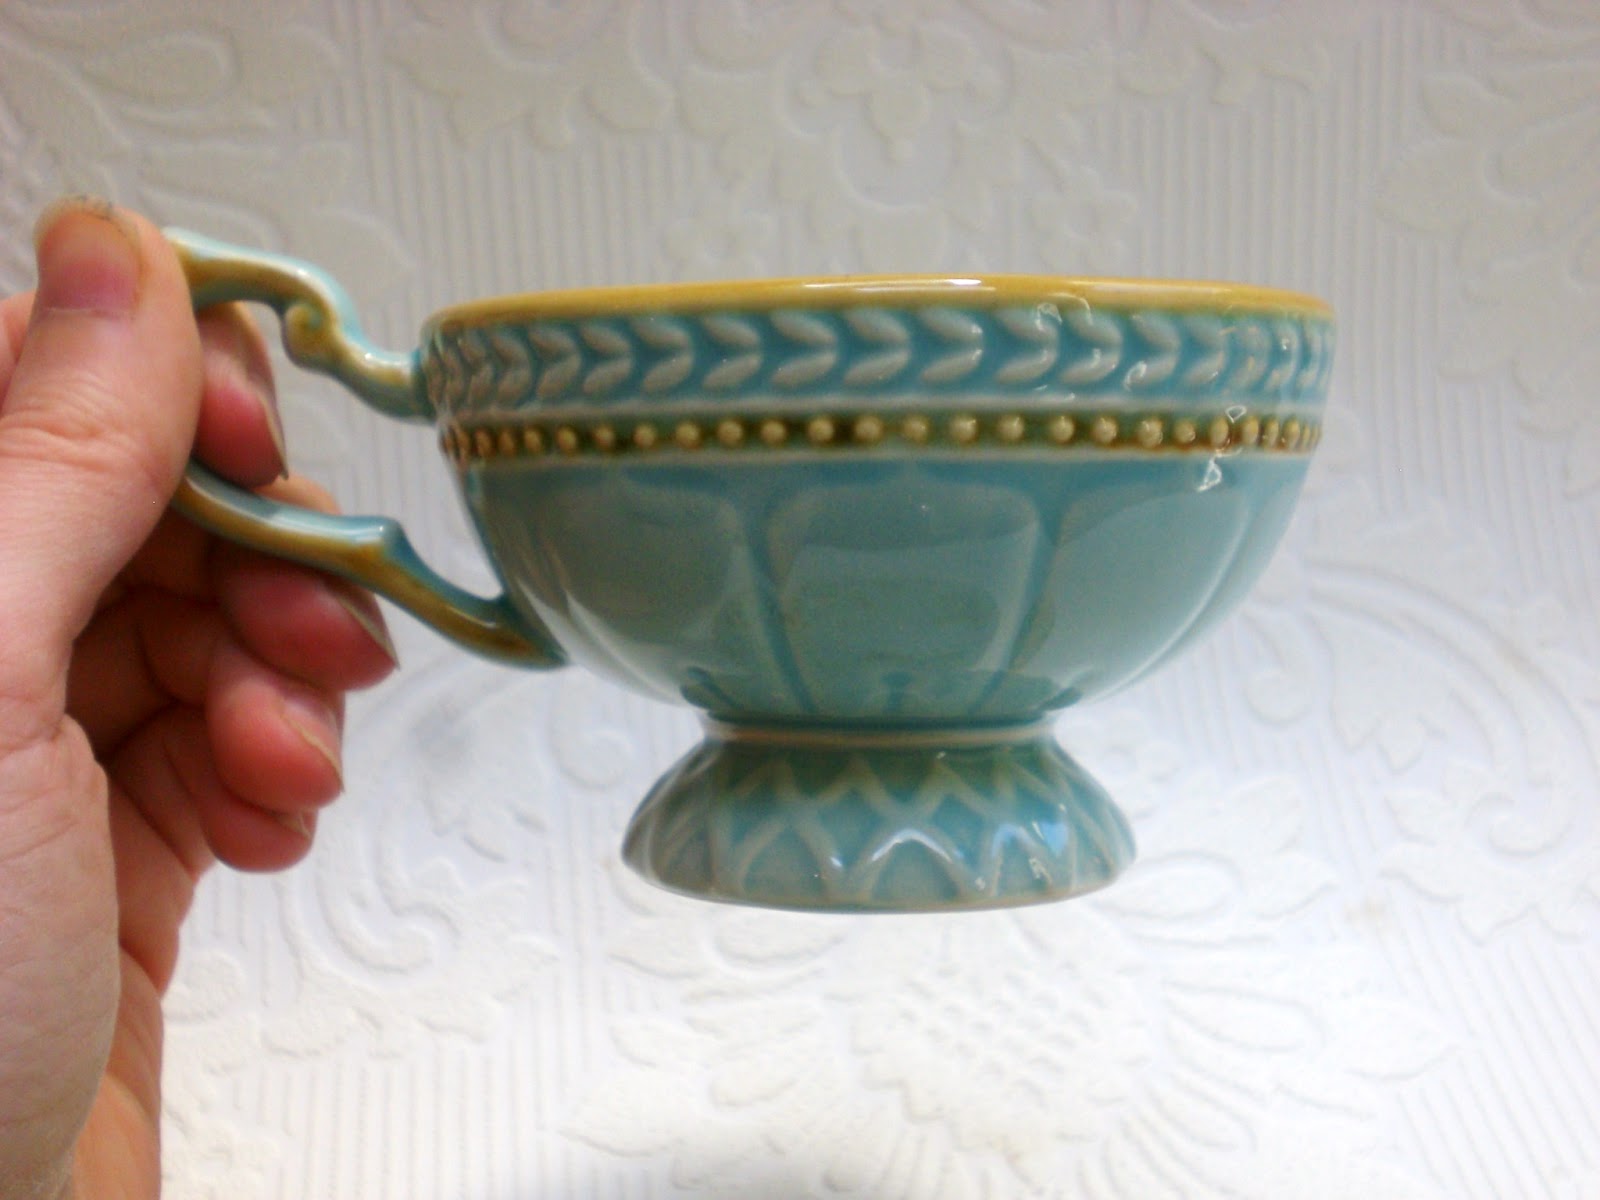
Also nice is this lovely majolica tea cup I found at a thrift store when I was out looking for bottles and other supplies for my Harry Potter party.

It is so pretty I couldn't resist. Love the color and the design. I used to collect tea cups before I had kids, so it's nice to find one that I like.


Oh, what a pretty pattern.
And a lovely cup.

That is all. Break over. I must go back to tending the Harry Potter party now. I hope to have many pictures come Monday.  I hope I have the time to take photos. Sometimes I run out of time and the kids are too all up in my bizness and won't let me have leisurely photo shoots.  Well. We'll see what happens.

Friday, July 27, 2012

Harry Potter Sugar Mice with Sour Sghetti Tails


Sugar Mice for a Harry Potter Party

In my search for sweets for my son's Harry Potter party, I fixated on a few things. Chocolate frogs,butterbeer, and these sugar mice.


I've looked through quite a few recipes, looking for something that was easy, inexpensive and tasty. I learned that real sugar mice, classically, use cotton strings for the tail. But in some of the recipes I found, they had licorice strings. I realized that I had already packages of "sour sghetti" that I got on sale and they would be perfect. I also found some recipes that were basically fondant.... like the kind people frost wedding cakes with. Those were all pretty high maintenance recipes. In the end, I decided to go for the simplest. I didn't use a sugar mice recipe at all, rather I went for a butter mint recipe, but I skipped the mint entirely, and flavored it with vanilla, since I knew I would be using the sour sghetti, I thought plain sugar mice would go better with the fruity sour taste than mint.

Vanilla Sugar Mice

1/4 cup softened butter.
1/3 cup sweetened condensed milk.
3 1/4 cup powdered sugar. 
1/4 tsp salt
1/2 tsp vanilla
sour 'sghetti or other long thin candy strings

Mix butter, condensed milk, vanilla and salt with a stand mixer or hand mixer until smooth. Add the sugar a little bit at a time and mix until it reaches a consistency of firm play dough. 

You might need to add more powdered sugar to make it stiffer or more condensed milk to soften it up. When it feels right, you can start modelling the mice.


 Here I've illustrated the process.

First I take out some sugar dough and roll it into long snakes.

Then divide the snakes into more or less even  pieces. You don't want the mice to be too big, because that's a lot of sugar for one bite, so aim for marble size ball.

Roll your pieces into marble balls.

Take your marble balls and press the end of your sghetti string into the ball.
Pinch the ball so that it surrounds the sghetti string.

Mold the squooshed piece into a pear shape, largest shape near the tail. Pinch the nose so it is vaguely mouse shaped.

Take two tiny dots of sugar dough, pinch them flat between your fingers and then pinch onto the mouse where the ears would be. Try to keep the dough warm/workable before you add the ears, because as it starts drying it gets less sticky. 

Poke tiny dots into the face of the mouse to serve as dots. You can also add tiny frosting eyes, but I thought the impressions worked fine.

And there is your mouse.

I even found that the extra step of adding the ears, while cute, isn't really necessary. They still look enough like mice when it is just the pear shaped dough with the eyeballs pressed in. I bet you could also use little round sprinkles as eyeballs, too. That would be cute.

Let them dry for a day or two to harden. And then serve to all the wizard wannabes.


Friday, July 13, 2012

Caccio e Pepe with Bucatina (Pasta with cheese and pepper)

Caccio e Pepe with Bucatini


I have recently learned to love this simple and basic pasta recipe.

Apparently it's an Italian classic, but I never knew about it until I read it on some blog.... I don't even remember which one, since it was a while ago, and I've done a little research since on how different people make theirs.

The other day, in the heart of the heat wave, I had a hankering for it, so I suffered through the boiling water and had it served with a few slices of left over cold grilled steak.

It's pretty simple. The original recipe is nothing put pasta, fresh ground pepper, grated grana padano (a type of parmesan) cheese and pasta water, but being me, I fudge a little and figure out how I can make the meal my own. I really enjoyed the addition of the bucatini, which is a delightful long tube shaped pasta that has some heft.

1 lb Pasta (some type of long thin pasta is best)
1 or 2 cloves of garlic, minced
1/4-1/2 cup grated parmesan and/or romano cheese  (I used half parm and half romano)
Freshly ground pepper to taste (do not be afraid of the pepper)
Reserved water from cooking the pasta.

Make the pasta according to the directions on the package. Do not forget to salt the water.

Sautee a couple cloves of diced garlic in olive oil in a large pan. When the pasta is done, strain and reserve the cooking liquid. Add the pasta to the garlic and olive oil.  Add your grated cheese to your pasta and fresh ground pepper to taste. Don't be afraid of the pepper.  Mix it up a bit.  It's a little sticky at this point and perhaps not quite melted. Add some of your pasta water a few ounces at a time, and stir your pasta so the rest of the cheese melts. The cheese and starchy pasta water should blend together to make a creamy sauce.  And there you go, your pasta is done. Yum.

As with all simple foods, this dish will be best with fresh ingredients. Fresh ground pepper. Fresh grated cheese. But I must confess, I have made it with parmesan from a jar and a pre-ground pepper (shhh. don't tell anyone,) and I have still devoured it and licked out the bowl. Well, maybe not literally. I add the garlic and olive oil because I like garlic and olive oil, but you don't need them for this dish. And also, these ingredients are so simple that you are free to adjust measurements purely to your liking. More or less peppery. More or less cheesy. Drier or creamier. Garlic or no garlic. It's up to you.

S thought I should add mushrooms or sausage or cream, and I told him no. The delight of this dish is the simplicity. Sometimes, that's all you want.

Friday, July 06, 2012

Too Hot to Cook Oreo Pudding Pie


Oreo Chocolate Pudding Pie

This Fourth of July, it was too hot to do anything but sit inside, the air conditioning blowing, and watch movie marathons. Ok, I went online for a little while. Shh. Don't tell anyone. 

Whatever is one supposed to do when one wants to have a sweet treat to go with one's grilled steak and corn feast?  One certainly isn't about to turn on the stove, let alone the oven. So one searches the internet to find no cook desserts and then goes to one's pantry to figure out what one has in stock.

Or that's what I did, anyway.

What I finally came up with was this no cook Oreo triple layer pie. Oreos. Instant pudding. Milk. Heavy Cream for whipping. I didn't follow the recipe exactly, I almost never do... but I did notice just now that I put too many cookies into the crust. Whoops. Almost the whole package.  Perhaps that's why the crust crumbled when I took it out of the pan. And I used unsweetened whipped cream instead of koolwhip, which, while it is more labor intensive, I think is actually an improvement on the recipe. It avoids the chemical taste of koolwhip and cuts the sweetness. I didn't add the cookie pieces to the whipped cream, either, because I like the smoothness without the crunch. I also think non instant pudding would be better but I didn't have any, and I wasn't about to turn on the stove to make pudding, either. 
24 oreos (plus more for garnish) food processed into crumbs
1/4 cup butter, melted
2 packages instant chocolate pudding mix
2 1/2 cups milk
1 half pint heavy cream, whipped

Mix oreo crumbs with melted butter and press into bottom and sides of  9" pie pan. Mix pudding according to pie instructions on the box (you know, pour milk into pudding mix and stir until combined.) Spoon half pudding mix into the pie plate and spread out evenly. Add half of the whipped cream to the remaining pudding mix and mix together. Add to pie plate and spread out evenly. Add remaining whipped cream to the top of the pie and spread out evenly. Sprinkle with cookie crumb garnish. Put in the refrigerator to chill/set. (The recipe says four hours, but with the instant pudding, it was definitely ready by the time dinner was finished, about 2 hours.)

If you want, garnish pie with mocha syrup. That was my daughter's idea, and it was really good. This pie is not nearly sweet as you'd expect it to be and is pretty light, although do not imagine that means you can eat another piece and not get a stomach ache. At least that's what happened to me.

Ok, well this isn't one of my recipes and it's a pretty well known one, I guess, but I've never made it, and it was easy, and I do really like the sub of fresh whipped cream. It satisfied my needs and hit the spot, so I'm posting it.

Friday, June 29, 2012

Rich Iced Coffee Treat and Mocha Syrup

This is one of my favorite summer afternoon treats.

It's simple to make, and delicious, and turns a regular day into a celebration.

Take some cold coffee. I make a little extra in the morning and save it for later. Make sure you take it off the burner so that it doesn't get burned. Burned coffee is not a treat. Or you can make one of those fancy cold brewed coffees that I never get around to, because I always have leftover coffee in my coffee maker. (Actually, after reading that tutorial, I really want to try it. I know where to get gallon glass jars.)

Pour your coffee into a glass and add milk or cream to your desired lightness. Or leave it black if that is your taste.

Add ice.

Add a scoop of vanilla ice cream. Coffee ice cream also works. As does chocolate. Truth is, the pictured coffee has butter pecan ice cream, because that is what I had in the freezer.

Pour on some lovely chocolate syrup. Here is where you want to be careful. I find that regular hersheys syrup is not that good, but dark chocolate hersheys is works well. I also don't like mine too chocolatey so I add just enough for a slight sweetness, but if you wanted yours more mocha, add more chocolate.

I did not use store bought chocolate syrup here. I made my own, because I have been feeling disappointed with store bought varieties. It was very easy and is very delicious. And I added coffee too my syrup because I wanted it to be a bit darker. Here is my chocolate syrup recipe, which is technically, probably a mocha syrup.

Mocha Syrup
1/2 cup water
1/2 cup strong coffee
1 cup white sugar
3/4 cup cocoa powder
1 tsp vanilla
pinch sea salt

In a heavy sauce pan, heat water, coffee and sugar together over medium heat, stirring frequently, until sugar is dissolved. Simmer for a few minutes. Add cocoa powder a bit at a time, whisking into the sugar syrup until incorporated. Add vanilla and sea salt. Simmer for a few minutes more.

Let cool and pour into a glass jar for storage in the refrigerator.

According to my children, who got to taste the syrup before bed, "Mommy! I will DIE if I don't get more chocolate syrup!" It's that good. Or they're that dramatic. Not sure which.

This is a syrup and does not get thick in the refrigerator, so is always ready to pour onto ice cream or into milk or iced coffee. It is not a chocolate or hot fudge sauce, but thin like a syrup. I think this recipe could stand cutting out the water entirely and making it all coffee. I can't actually taste the coffee in the syrup, as it compliments the stronger chocolate flavor and just gives it a richer taste, rather than a mocha taste. A cup of espresso might make it a powerful mocha flavor. If anyone tries that, I'd love to hear how it works out.

Anyway, enjoy your Friday. Have a chocolate creamy treat for me.

Friday, June 15, 2012

Rowena's Butter Beer

 Rowena's Butter Beer
(aka Cream Soda Float with Salted Caramel Sauce and Butter Pecan Ice Cream)

I've started planning on my son's Harry Potter birthday party, and one of the things I was thinking about was how to make the Butter Beer.

So when I found my salted caramel recipe yesterday I thought I'd try out the idea I was kicking around in my old noggin.

So I stopped at the corner store to grab a small bottle of cream soda, and a carton of butter pecan icecream, and when I got home, I threw it all together to see what would happen-- if it would taste good as I suspected or if it would be overwhelmingly sweet and not something I'd want to serve anyone. It's pretty simple, once you make the caramel sauce.

 One or two scoops butter pecan icecream.
 One teaspoon (more or less to taste) of salted caramel sauce.
 Fill the glass with cream soda. Woah, watch the foam bubble up.

 Woah. That looks pretty good.
 Woah. Woah. That is really good. Oh ma gah. Who the heck thought this up? Oh yeah, me. Get away from me little boy, this is mine. Go grow up and create your own super yummy Harry Potter inspired summer drinks.
OMG. Look at that foamy goodness all swirled with buttery caramel.

Just so you know I did actually let the boy finish it. I wasn't quite the piggy mom that I wanted to be and  I let him taste test his new butter beer recipe. I was gratified by that icecream soda slurp that the straw makes when it gets to the bottom of the yumminess.

And all the worries about the salted caramel sauce being too salty all disappeared, because with the sweetness of the cream soda and the butter pecan icecream, the salty sauce just adds a flavorful layer of depth and actually cuts what could have been a cloying and overly sweet drink.

But, I must say that when I make it for the party, I will use smaller glasses, because it was pretty darn sweet. A dessert all by itself, and if I am going to get a dozen kids out of my house after the party without going into sugar shock, I'm going to have to make the portions smaller.

Thursday, June 14, 2012

Salted Caramel Sauce Delight

Oh yummy.

Yesterday I was taken with the urge to try to make a salted caramel sauce. Luckily I came across this on pinterest.

I've never made caramel sauce before, so I pretty much followed the recipe exactly... well, except I cut it in half, since this was an experiment and I didn't know if it would work out. Oh yeah, and I didn't have heavy cream so I used half and half. And my butter was salted, so I cut back on the sea salt.

Oh all right.... I'll tell you what I did. I'll also tell you what I learned after I went and consulted my friendly neighborhood pastry chef, Susan.

1 cup white sugar.
6 TBS salted butter
1/2 cup half and half.
about a teaspoon of sea salt (not fancy flaky sea salt)

I covered the bottom of a heavy, large pot with the sugar and heated over medium high heat, stirring pretty much continuously. It took a long time. At first I thought I was doing something wrong, because it wasn't clumping up like the recipe said, it was just getting to be hot sugar. But as Susan pointed out to me, it takes a while for sugar to get up to 300 degrees. Interesting she kept saying 300 degrees, because the original recipe said 350.

So soon it clumped up and I stirred it with a whisk like the recipe said until all the sugar was melted. And then I stopped stirring because the stirring will make it seize up. I swirled the pot a bit until it got to the right color. I didn't use a thermometer, because I didn't have one, and I thought I"d seen sugar being cooked enough to be able to judge the correct color change.

Then when it got to a nice caramelly color, I put in the butter all at the same time. Good thing the original recipe warned that it will boil up quite a bit (which is why you need a bigger pot than you'd assume) It really boiled up. Susan says that's because it's 300 degrees and it will bring the butter up to that temperature, but then it settles down and I stirred it until the butter was melted completely and then I turned off the heat.

That's when I added the half and half, and I think I should have done it even more slowly, because it REALLY boiled up and I almost burned myself. So be careful. Whisk again until the cream is incorporated and add the sea salt and whisk until smooth. Let cool 10-15 minutes and put in a glass jar.

I must say that I didn't wait 15 minutes. I HAD to taste test it.

My caramel sauce is quite salty. And the caramel has a very slight bitterness to it, because I think I cooked it just a tiny bit too long. Susan told me it was because the caramel kept cooking after the butter and cream was added, so that counted for the darker taste than I wanted. I thought I was so clever to "know" the right color for the caramel, and then I got confounded by the rest of the cooking process. Oh well, live and learn.

I also told Susan that I thought my caramel sauce was a tiny bit too grainy, and she said that it was okay, and that I could just heat it up and stir it and it would get smooth again. Have I mentioned how much I love having a pastry chef at my disposal? Pastry chefs have sweet brains for picking. Susan also told me to use better butter and that I would be surprised by how good butter would affect my baking.

However, the toasty flavor and excess salt in my caramel sauce did not stop me from enjoying it by the spoonful and giving myself a stomach ache.

Sadly, I did not have the brainstorm of dipping sliced apples into the salted caramel sauce until I already had the stomach ache. Because when combined with the sweetness of the apple, all the saltiness of the caramel sauce is offset and instead it is just an explosion of flavor.

Oh my god. So good.

I recommend anyone try it. It wasn't hard, although getting it to the right temperature/color is a little intimidating. If you want to try it, I also recommend that you go to the original recipe link, because not only is it more complete than mine, but she also has pictures. I was too frightened of burning sugar to take pictures, plus my light sucked.

All in all, I enjoyed this experiment and am looking forward to all the delightful treats I will be able to grace with a salted caramel sauce.


Friday, June 01, 2012

Mango Mint White Sangria, (and how to cube a mango)

Oh it's a gray and chilly Friday morning where I am, and I have to go to work in an hour and a half, and I am seriously not in the mood for a kick-back and relax, have a drink kind of post, but I think I'm going to write one, anyway.

This Memorial Day, it was a beautiful sunny day, quite hot, and the kids were having a play date down the street, and I was in the mood for a nice drink... but I couldn't find where S had hidden the limes for my margarita and he was out and didn't get back to me before I decided to take matters into my own hands and invent a cooling summer drink on the spot.

I opened up the fridge to see what I could find. There was half a bottle of white wine, a little too sweet for my tastes, some fruit that needed to be used up asap, a handful of mint from my potted herb garden and of course, some of my homemade orange liqueur. I only had enough to make one or two glasses, enough for me, but let's see if I can adjust the recipe for a larger portion.

Mango Mint White Sangria

One ripe mango, cut into one inch cubes
One orange, cut into one inch cubes
6 strawberries, cut into one inch pieces
One bottle white wine of choice
One cup mango nectar
1/2 cup orange liqueur (triple sec, cointreau, grand marnier, or homemade)
6 or so sprigs fresh mint, torn into small pieces
Ice
Splash sprite or seltzer (optional)
Fruit for garnish (optional)

Cut fruit and put in a wide mouth jar or pitcher. Toss in mint. Pour in mango nectar, wine and liqueur. Stir. Pour in a glass over ice and add a splash of sprite or seltzer to taste. Garnish with fruit.  Voila.

In the interest of full disclosure, I got my mango nectar when the first mango I tried to cut up ended up being too soft to cut, so I squeezed it into the pitcher instead. It turned out to be quite a bit of nectar. I'm sure store bought nectar would be just as good. Or, almost anyway. You could substitute the mango/mango nectar for peach and peach nectar... in fact, I substituted mango for peaches, since all the recipes I found online were for white sangria with peaches, and I didn't have any peaches.

I was a little worried that it would be too sweet, what with the sweet white wine, but perhaps because my liqueur was less sweet than store bought, it turned out fine. If it had been too sweet, I'd have added some lime juice to add a bite. But then, if I'd known where the limes were, I would have been drinking a margarita.

There's one more thing I'd like to share about this, the part that is actually the trickiest in making this drink.

How to cut a mango into cubes
Despite the terrible picture, I'm going to do my best to explain this.

Okay, take a ripe mango. First you have to understand the mango. The pit inside is large and almond shaped  and flat, and you want to cut around the pit to get the largest portion of the flesh. To do this you cut the mango into three pieces. The center piece with the pit, and two side pieces that will be rather boat shaped and full of mango flesh.

Hold the mango with the stem end pointing up and look for the widest diameter of the mango. That is where the pit will be. Slice down from the stem end, starting a little bit in front of the stem. If you meet some resistance (the seed) angle your knife out a tiny bit to cut around it and then slice all the way through. Do this on both sides of the stem and you will have your two mango boats.

For each mango boat, slice a grid into the flesh, without cutting all the way through the skin. Take your grid marked boat and using your fingers, turn the boat inside out. The flesh will pop up in cubes, which you then can easily slice off of the skin and put into your sangria.

You are now left with the pit, which is ringed with mango flesh and skin. You could peel the skin and cute the flesh off the pit, chopping it up and putting it into you drink, but I always just peel the skin and the eat it all, right off the pit. Yum yum.

I am not sure if this explanation of mango cutting is clear enough, so if you need a visual tutorial, leave a comment and I will go back in and add pictures. I was taught by a Caribbean friend. Once you learn it, it makes mangoes much easier to eat and cook with. Well much less messy anyway.

I hope you take the opportunity this weekend to enjoy yourself and relax, try something tasty. Add a new flavor and see how it works for you.


Friday, May 25, 2012

How To Make Your Own Orange Liqueur, and Bonus Candied Orange Peels

Orange Liqueur In Progress

One of the things about being a mom and being an artist and being a partner and being a worker and all these other hats I have to wear in this modern gotta-get-it-done world is that I don't necessarily take time to take care of myself. 

I do a lot of sacrificing. I do a lot of taking care of others. I do a lot of anxious, running to catch up. I do a lot of crashing, exhausted, feet up at night.

One of the things I'm trying to do is to remember to do things for myself. Things that are not just about crashing and watching tv anyway. Rather things I just do for fun, things that renew me, things that I'm not trying to find a way to turn into a business. Things that are not about money or responsibilities or work. I started reading The Giver, by Lois Lowry. That's one of those books I've heard about for years, and I'm finally getting around to it. 

And I'm getting back into my margarita habit. For some reason, margaritas and summer just seem go together.

And to feed my margarita treat, I am making my own orange liqueur.

 This is the first time I've ever attempted something like making my own liqueur before, although I've thought about it and always said I'd try. So I finally decided I would.

I was inspired by this recipe from pinterest, but of course, I had to put my own spin on it. It's very simple. It has only four ingredients. Vodka. Oranges. Water. Sugar. But it does take some time and patience in order for the oranges to infuse the vodka, and it is a two part recipe, first the orange vodka, then the orange simple syrup.   I am not all that patient, so, that accounts for my small adjustments to the original recipe.

Orange Vodka

One bottle of vodka. I just used a fifth of cheap vodka. Since it is my first attempt at this, I didn't want to make too much or spend too much.
Organic sweet oranges. Organic because you're using the peels in this so you don't want them to have anything unsavory on them. I used navel oranges.


Clean and dry a good sized jar.
Slice oranges into fairly thick slices.
Pour vodka into jar.
Add as many orange slices as will fit and still be covered by vodka. Pack them in there. I used two very large oranges and there was no room left. If you have more vodka or smaller oranges it will take more.

Cover and let sit in a cool dark place for 2 to 3 weeks.

Strain through cheesecloth or mesh sieve into a bottle. Squeeze the remaining pulp/oranges to remove all the juice/vodka, add to bottle. (I used the sieve, but I think the cheesecloth is better, because you can just wrap up all the pulp and squeeze that out without the mess. I had to squeeze mine handful by handful. Messy.)

The original recipe said to let this sit for another 3 weeks. Like I said. Impatient.  So on to the next step.

 Simple Orange Syrup

One cup sugar
One cup water
The rind of one orange. Try to remove as much pith as you can and just use the orange part.

Peel the orange, trying to remove only the orange zest, without the white pith. I did not zest the orange, because I wanted to remove the peels later. Cult the peels into fairly large pieces. Put in a saucepan. Add one cup water and one cup sugar. Boil the water, sugar and orange peels until the sugar is dissolved, stirring occasionally. Continue to simmer for a few minutes to infuse the orange into the sugar syrup.  Let cool. Remove orange peels.

The original recipe just used plain simple syrup, but I saw an opportunity for another layer of orange flavor, and I took it.

Add orange syrup to the jar with the vodka. I had about 31/2 cups of orange vodka and started with 1/2 cup of syrup, tasting as I went until I liked it. All together, I added about a cup of orange syrup.  It has a little bit of a floral flavor to it, not nearly as sweet as most orange liqueurs and a slight bite of bitterness from the peels. I am still considering adding more syrup, because I want my margaritas to have a bit of sweetness, but not too much. Oh these are the things that you really need to work through with trial and error. Perhaps I'll err on the side of another 1/4 cup of syrup, since I have no idea what I'll do with that last little bit of syrup.

The original recipe says it will get sweeter as it ages...

Stop the presses.

I just went to add the last little bit of syrup, and realized I had these lovely syrup soaked peels. So I...


ROLLED THEM IN SUGAR!!!!

 HOLY COW. Candied orange peels. It's a quadruple bonus recipe day. Orange vodka, orange liqueur, orange simple syrup and candied orange peels. They're super yummy, too.

Plus, since I took the time out to make the candied orange peels, and S was putting some meat in a marinade and had sliced open a lime for it, I said, 'hey give me that other half of the lime, I should try a margarita with my new orange liqueur.' So that's what I did.

Uhm. Ohmagah!

WOW.

This margarita is absolutely fantastic.  Note the pleased, slightly smug look on my face from a new recipe that not only works, but improves an old recipe and is a new skill never attempted. Plus, I'm also supremely tickled about the candied orange peel brainstorm.

Plus, I haven't had lunch yet and it is mighty early for a margarita and even though I only sipped it for a taste test, I might just be a little tipsy.

Anyway, happy Friday, happy Memorial Day, and remember to do something for yourself, something that makes you feel good, not just for the moment, but about yourself.

Monday, May 07, 2012

Rowena's Easy Crockpot Chicken Tacos


Rowena's Easy Crockpot Chicken Tacos

Here I am trying to keep up with my blogging and all my artistic goals at the same time I am a mom who stays at home part of the time and works out of the house part of the time. It's kind of a difficult balancing act, much like being a mom just in general. 

But I have decided to count my cooking and organizing and repurposing and kid activities and photo editing and social networking and researching as part of my creative output, along with my painting, writing and crafting. I need to understand all the various parts of my life as being creative and productive. It makes me feel more productive, which makes me feel stronger and more capable which means I am able to tackle more and more challenging creative endeavors. 

It all goes together. It isn't separate. One of the things I'm trying to do, in addition to keeping to do lists and creative logs, is to plan ahead. Take photos of things as I am doing them and then saving them for when I am ready to post, or editing them, (I used PicMonkey here, due to the demise of Picnic.) Also to make my plans for Monday early, so I can get prepared and not feel overwhelmed when I sit down to do EVERYTHING I want to do on my day off. Unlike most people, my weekends are the height of my work week, and Monday is when I can get my personal work done.

And the truth is, I often devise my own recipes, and then I forget to write them down and think I'll remember the next time I try, and sometimes I don't, so I lose that dish that I liked so much (like that Linguine alla Rowena... black olives, lemon zest, goat cheese? I forget.) So maybe I'll start posting them here, a kind of illustrated extended creative log. 

So here is my crockpot chicken tacos recipe, which I made last week while also painting.... and which is inspired by this post and my own shredded pork tacos recipe that I've been making for years now.  I have a couple of secrets that make it super easy and super tasty.

Rowena's Easy Crockpot Chicken Tacos

Chicken breasts (can be frozen, no defrosting! save time!)
1 large can diced tomatoes (this time I used tomatoes with chiles, which is great, but you can use plain tomatoes, too.)
One diced onion
Chilpotle in Adobo (diced or food processed)
Salt and Pepper to taste
Cumin to taste.

Toss your diced onion into the crock pot. Open a can of diced tomatoes, toss that in, too.  Add your chilpotle in adobo. I put in one heaping tablespoon of the food processed mix. That might be two or three chiles diced. Don't forget to add the adobo sauce if you are dicing. Put less in if you like it less spicy and more if you like it HOTT. Put in your frozen chicken breasts. I used 5 here. Again, adjust it to your needs and tastes. Salt and pepper to taste. Cumin to taste. The chilpotle in adobo adds a lot of flavor, but I put in cumin because it is a comforting flavor to me. You could probably skip it if you want. Or add some of your favorite spices and herbs.

Cook it for 8 hours on low or 4 hours on high.

Shred with two forks.

Serve with slotted spoon on tortillas with desired toppings. Cheese, Avocado, Jalapenos, Pico De Gallo, Lettuce, Tomatoes, Onions, Cilantro, Olives, Sour Cream....really anything that floats your boat. I used Cheese, Avocado, Jalapenos.

Bring a big napkin, it's messy and delicious.

You could use this chicken recipe in many dishes. A quesadilla with this, cheese and salsa verde is delightful. Or burritos or Enchiladas? Yum.

Like I said, I actually adapted this from my pork tacos recipe, and really the only difference is that instead of frozen chicken breasts, I use a big pork roast. Everything else is the same. And it's great with cheese, pico de gallo, guacamole and lime.

 But wait. There's more.

Get ready for my two hints.

TIP#1
 Chopped onions are great for cooking. Yes. They are cheap and flavorful and a necessity for many foods and many cuisines.

However, chopping a load of onions while you are watching two rambunctious kids can be dangerous. When my kids were toddlers, I actually chopped off the tip of my finger trying to prep a crockpot meal while my kids were running around. Not only did that meal take longer than necessary to get ready, since I spent quite a while clutching my finger and getting lightheaded at the sight of blood, it also caused a great deal of pain and stress.

Then my mom introduced me to the little bags of pre-diced onions in the frozen food section of the grocery store. Sometimes they come with diced peppers and carrots too. Once I started using those, my prep time could shrink down to almost nil with some dishes (like this one.) Frozen onions aren't good to eat fresh, but if you're cooking them, they lose nothing that I can see. If you want to save money and use up produce, you can also chop your own big batch of onions and freeze them for your own use later. Now instead of dicing onions while I'm trying to toss together a quick meal, I just reach into the freezer and grab a handful or two. Of course, I can still chop them fresh, like I did this time, because I was out, but it's nice to have the option.


TIP #2

Chilpotle in Adobo sauce is an amazing, flavorful addition to many dishes. I use it in Mexican dishes or in anything with a sauce or gravy. I make a great sherry chicken with chilpotle and lime using this. Or you can mix a bit of this with sourcream and lime for a tasty dip. Or just chilpotle with mayo, and you have a spread that makes great sandwiches.  But it can be kind of annoying to chop the chiles as needed for recipes which sometimes mean I won't do it at all.

So I buy a can (found in the Mexican foods section of the grocery store) and just toss the whole thing in the food processor and puree it.  Then I put the puree in a jar and keep it in the fridge for timely and easy flavoring whatever I want to have a smoky, spicy kick. I love my chilpotle in adobo.

I hope you guys like this recipe. It's so easy, especially with the tricks I added, and so tasty. I'm getting hungry just thinking about it. In fact, I'm going to dig around in my refrigerator and see if I have some leftovers for a lunch chicken taco.
Related Posts Plugin for WordPress, Blogger...