Friday, May 04, 2012

Flying Girl and the Wave, or I Am a Part of It All

Flying Girl and the Waves, or I Am a Part of It All (revised)
Acrylic Paint on Moleskine, 8"x5"


This painting is actually a revision of a previous painting, done almost three years ago. I was not comfortable with the original green in all those years, I'd look at the painting and then put it away again. There was something I liked, yes, but also something that I just didn't like.

Flying Girl and the Waves, or Go With the Flow

Oh, okay. Here it is. I didn't change that much except I painted over the green with various shades of blue. And then, all of a sudden, I was not only okay with it, but I really liked it.  The problem was the color scheme, I'm sure. It was all too hot, and too close, with the yellow green and the yellow gold and the goldy brown. There wasn't enough contrast, or something.

Sometimes I takes a while for me to get a handle on what is not exactly working. Sometimes I need to take a break from whatever it is, ignore it, put it away and just not bother with it.

There's nothing wrong with failures. Isn't that an odd thought?

It's okay to fail.

Getting things wrong is good.

I'm just trying to get a handle on this concept. But how? you say. How is it okay to fail? Failure is bad, isn't it? Failure means you can't do it, you messed up, you didn't live up to expectation, you got it all wrong, oh woe is me I'm just not good enough. Right?

But here's the thing... from failures, we learn. When we make a mistake, we learn what DOESN'T work. By understanding the not-no-negative, we can discover the outline of the positive. Just like you can draw a chair by focusing on what the chair is not, the air around it, the negative space. What isn't the negative space is, ta-da! The Chair.

And here's the other thing. Just because something doesn't turn out doesn't mean it's a dead end. Once you have something to work on, you have the ability to work on it. Sometimes a blank page is much harder to tackle. I took out this old painting and I had a place to start. I fixed it up and started to love it. If you can look at something old with new eyes, if you can objectively see the good in something, and also see what fails, then you can work on making it succeed. Sometimes the distance of time allows you to see things without all your old feelings and thoughts and preconceived notions attached. You can re-vision it. You can revise it.

I am comforted by the fact that I can look back on my archive, on my history, on my past and find things that I can use today. I can learn from past mistakes and bring those lessons into the present. I can also use what I've learned in the intervening years and improve on the failures of the past. I can go back to the things that I have done and bring them back. I can do it with an old painting or I can do it with an experience. For instance, I am not teaching High School anymore, but I learned so much from the experience, and I can pull on those skills I learned, in many, many areas of my life.

Think back in your life to an experience or project or lesson that did not work out the way you expected it to, something you gave up on or put away. Are there things that you can take from that and bring into today? Are there unfinished projects that you gave up on that are ready to see the light of day again? Any trunk novels or afghan squares that need to be crocheted into a blanket?  Are there "bad" projects that you can now give a new life to? Take some time and look at your own archive, your own history. Is anything ready for your re-vision?

Thursday, May 03, 2012

Self Portrait, Reflection


Self portrait, Reflection

One of the things I learned last week when I kept track of my creative output and productivity in my creative log, is that some things made me feel happier and more productive. 


Oddly, one of the things that made me feel the most happy was just simply taking a walk to the post office. It wasn't the post office that made me happy, it was the walk, on which I took my camera and pulled it out when I saw things that struck me, things that made me happy... like this pretty porch with flowering tree and wicker chairs. 
 Or this one
 What a cozy place to curl up with a book in the shade, watching the cars or few pedestrians pass by.
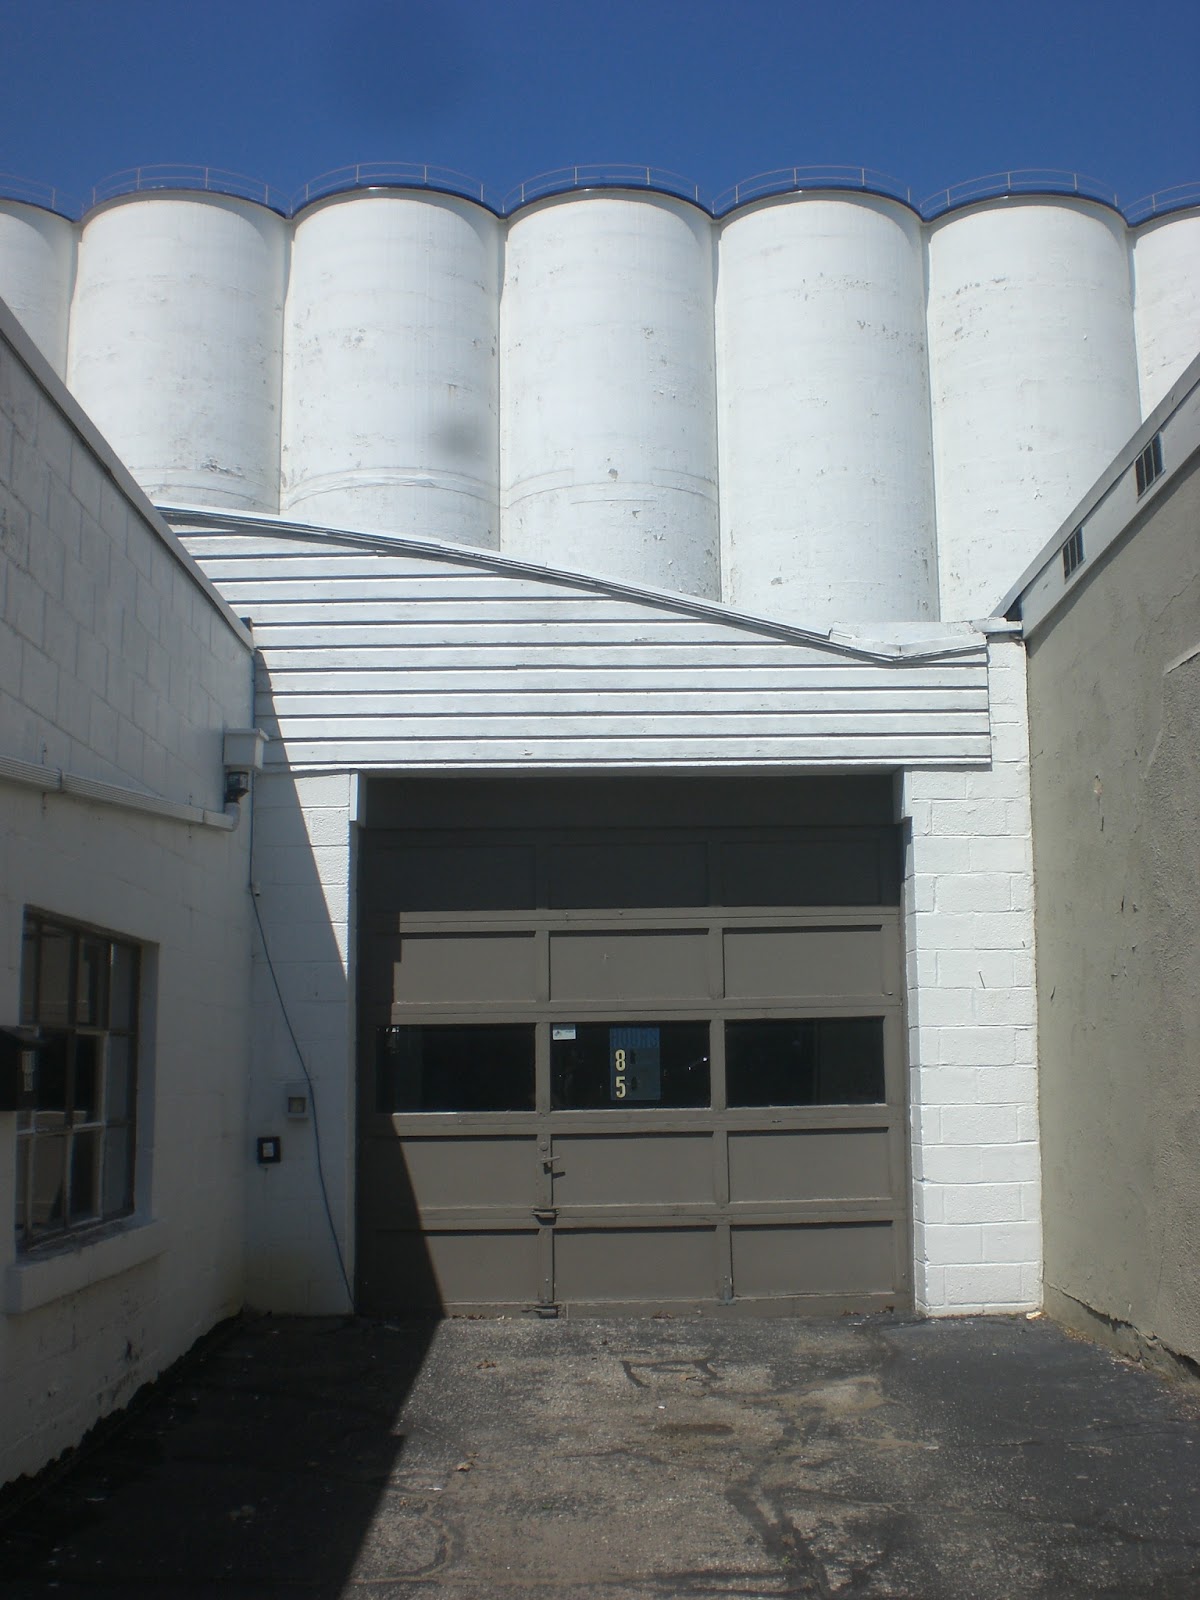
 This is a picture of the famous Chelsea Jiffy silos behind a garage. I always want to take photos of them but some how, they never quite live up to the actual impression of them. I mean it's just a factory, really, a little industrial action, but there's something quite stunning about the white silos and the factory buildings and the train tracks in the middle of this small town.

So why did this little walk and photo shoot make me feel accomplished? I did particularly like the self portrait, but that wasn't it. It's not that I had some great output of work. I don't really consider photography to be my real work, for me it's just a hobby, something I do for fun. Some day I might take it more seriously, but right now, it's just something I do because I want to, without having any other responsibilities attached to it. There are no shoulds. No people who are counting on me. No deadlines or timetables involved. No money involved.

That might have been part of the good feelings. There was no stress in those few minutes of my walk. I was already on my way on one of my errands. I had no child duties. It was just me and my feet and my eyes and my thoughts. This is why I made "self" one of the categories in my creativity log, because there is something about taking care of yourself, doing things you know make you feel good, not just for the moment, but for the long run. Things that feed your soul and recharge you. I'm an introvert and I need time to myself to recharge, and as a mom, I don't often get it. I'm writing this post now with a little girl sitting five feet from me, jabbering on, with moments of silence.

A ten minute walk, taking pictures and having my thoughts to myself, being able to reflect upon my thoughts or take in my surroundings or just being able to BE myself set me back on the right path for two weeks, I think.

I think also I need to make sure this is part of my regular activities. Remember to walk out by myself. Even if I don't have an errand to run.

Do you remember to do things that are just for you? Do you remember to take care of your self in the middle of all your other responsibilities and doings for other people? What recharges you? What simple activities could you try that would feed your soul?

Wednesday, May 02, 2012

Self Portrait, or I Am Made of Lessons


Self Portrait, or I Am Made of Lessons
gesso, torn vintage book pages with drawings, acrylic paint, moleskine notebook

Yesterday, while dinner was cooking, after blogging and browsing pinterest and planning and organizing, I had the sudden urge to paint. And then I laid out my stuff and painted. Just painted. No fuss, no talking, no worries, no self doubt, no questions. I just painted. 

I had an idea, which bubbled up after looking at this and this, after many weeks of thinking I wanted to give some interest to my grounds, but not really knowing what to do. After many weeks of letting the desire to take up painting again simmer on the back burner while I lived my life and went on organizing my thoughts and my work space and my supplies.  

I grabbed an old moleskine notebook, and opened, not to a blank page, but to one that had already been prepped with a wash of blue.  Then I went to my collection of scrap papers and found an old Alice in Wonderland page that I'd already started to draw on but had never been satisfied with.  Then I gessoed the painted page, and I ripped up the Alice in Wonderland altered page and fixed it to the gessoed, painted page, then I gessoed that. 

And then I took a quick snapshot of my face... which is often much easier than using a mirror... and started painting, quickly, almost carelessly. First the eye, then the other eye, then the hairline swooping around to the cheekbone, jaw, the other cheekbone. Place the nose, the lips, the hair. Adjust the eyes. Add some pink, some warmer colors, shadows, hilights. Touch ups. Done.

It went so fast and so easily that I never even thought to take process photos. It was done before dinner was ready. And voila. Almost effortless. As if it came out of nowhere.  But that is an illusion. 

I'm really happy with this painting and I impressed myself with the way it came out. Paying attention to only those few minutes when I was painting makes it look like magic. Looking at the end point only, as we do so often with things that are successful, makes it seem like these accomplishments are miraculous, the gift of genius, something that is unreachable for us lowly people here on the ground.

But the truth is, I didn't just paint this in 15 minutes. The act of painting, took 15 minutes, but so much went into this painting, it was actually 40 years in the making. Without even considering my last few weeks of thought and organizing and browsing and intending and wishing, there are years of observing and practicing and failures and struggles and art classes and photography and playing and doodling and self assessing and museum going and reading and sketching and finding out what I like and color matching and collaging and journaling and so on and so on. 

Anyone who achieves at anything has been working on it for a very long thing and putting into it the result of many different lessons learned. No one starts out knowing how to be a great artist or a great anything. 

You just keep at it and you get better and better the more you are willing to fail.

I show you this one successful painting, but you do not see the pages that failed, the sketches that were covered over, the drawings hidden in folders or deep in journals from years ago. You don't see the 10 years of self portrait practice in my twenties, where I could often be found with a mirror and some drawing tools. You don't see the other pages in that same moleskine where self portraits hide because they're just not right. Actually... sometimes you do see those, because I have a tendency to show even some of my failures here on my blog, because I believe in showing the man behind the curtain of the wizardry. I believe in transparency and process. I believe it helps us to know that no one is perfect and failure and struggle is part of the process... not just of art, but also of life.

We fall down. We make mistakes. We get up and keep trying until we figure it out. Until it starts to make sense. Until we start moving forward. Until we find success.

Just like this painting, we are made of the failures and successes that came before. The stories read, the extra paint that we didn't know what to do with. The discards and the yucks. They make us what we are. Just like this painting, you almost can't see what was on the original ground. You almost can't see what was behind the painting.... but it's there.


Tuesday, May 01, 2012

DIY Glitter Meditation Jars

Ivy and her meditation jar

I finally tried out those meditation jars I've been seeing around pinterest, and they are cooler in person than they are in photos. There's something about the swirling water and bits of sparkle that catches even my attention, and I just want to sit and watch it glitter.

I don't know how well it is going to help any of us meditate or calm down, but that is still to be discovered.

 The project itself is very very easy.

Here we see glitter, glitter glue, two cups of water total, and a jar and lid.

But wait. My before photo was optimistic. This will be the mistakes portion of the post.

Mistake 1
My plastic jar had too much give and was not water proof. Please double check to make sure that your jar is water tight, because there is a lot of shaking and moving and holding with this project.

Mistake 2
Your jars don't need to be that big. Bigger is heavier. Bigger means you have to use a lot of glitter and glue. Smaller is just fine, there's plenty of movement in a smaller jar.

Mistake 3
Not every glitter glue is as effective. I used these little tubes of glitter glue from the toy store, and they did not dissolve very well nor did they give enough body to the water to make the glitter swirl, rather than float on the top.  The craft store glue worked immediately, with far less glue. I read one tutorial that said to use 1 Tablespoon glitter glue per cup of water. That worked for the better glue, but not for the other.

Mistake 4
Do not use white glue to give the water the right viscosity. It will immediately work for viscosity, but it will also immediately make the water opaque. There is no purpose in having swirly glitter if you can't see it. I suppose there might be some clear craft glue that would work, but I didn't have any. I read this post (also a fascinating post about teaching the kids meditation) that said to use glycerin and dish soap. That would probably be the best option, but I didn't have any.
 In the end, I used three cheapo glitter glues and two half empty craft glitter glue jars from an old project (it probably would have worked fine with just the craft glitter glue). Use warm water to help the glue dissolve and shake shake shake it up. I also used one and a half vials of extra fine glitter. I basically tossed in every glitter glue I could find that I thought would be close to purple, my original color. Well the original color was gold, as you can see from the before photo, but once I added the white glue, I ruined the whole thing and had to toss it out. So I started over with purple.

One might think that using so many different colors would make the glitter muddy, but I actually found that using the blue, purple, red, and opalescent glitter gave the jar a lot more interest than it would have had if it had just been one color.

 It looks like the starry sky, actually.
 Let's watch it settle.
 Red. Purple. Blue.
 Flash of opal.

 This one takes about three minutes to settle. I read here that if you add more glue, it takes longer. She uses it for time outs, as a tool to help her kids calm down. So if you want a five minute "time out" jar, then you want to get yourself some extra jars of glue so you can fuss with the timing. You can tell from my experience that it could take a bit of experimenting to get it right.

Finish. Are you calm yet? 

When my son came home from school, I realized I was going to have to make him one too. I took the lessons I learned and made him another one. The only color glitter glue I had left that hadn't gone into the purple jar was green, and I used the rest of the blue glitter and another vial of green glitter. And then I added some gold glitter for sparkle. The last improvement was in the jar I chose. I realized smaller works, too, so I picked a fancy olive jar. Which I think turned out amazing, even though it settles far faster. I can add more glue later if I want it to go slower.

He thinks it looks like Snape's potions, and asked if it was for his Harry Potter Birthday coming up in the summer. That's a very good idea, although I might use it for divination. Stare into the globe and try to tell the future. I don't have a picture of him because he just isn't as willing to sit and pose as the girl is.

There are a few different things you could do with this project. I like my son's idea for a Harry Potter project, but it could also be adapted to make a snow globe, because essentially, that is what this is. You'd want far less glitter and something pretty to look at inside the jar and some waterproof glue to seal the lid, but it would work.

All in all, this was a very simple project, once you get past the oopsies and it does kind of make me want to go get some more glitter glue and make one for myself. What can I say, I loves sparkly things. And there are times I sure could use some calming down and a focus for meditation.

Monday, April 30, 2012

Let it Go and love, or Some Thoughts on Being Zen


Let It Go, and love
watercolor, ink, gel pen on paper

One of the things I have never quite managed to figure out is the practice of non attachment. The idea is that we don't hang onto our ideas of the way things should be, what we think we need, our desires.

I know some people have said that this would be bad because it would mean we have no ambition, no desire to change things for the better, it would be settling, but I don't really think that's what it means.

I think, although I'm by no means sure, that the concept of non attachment means we don't fixate on having our specific ideas come true. It's about accepting what is, about living in the present and the world that you are actually living in.

It doesn't mean that you can't work to improve things or WANT things. It's more like standing where you are and saying, "I am here," and having that be good. And being able to move, from where you really are, with all the tools you have at your disposal, to where you are going next, without ideas of what you SHOULD be doing or who you SHOULD be.

How do we stop fixating on what we think we SHOULD be? How do we let go of our ideas of what things SHOULD be like?

I'm still working on it, but I've worked up a few things.

1. Be who you are. Stop comparing yourself to other people. Someone will always have something you don't. Someone will always be better at something. You will always look to see where you are lacking in comparison. So stop it. They are them. You are you. Every life has struggles and every life has joys.

2. Pay attention to the positives. Stop focusing on the negatives in your life. Don't obsess over what you haven't achieved, what you don't have, what is wrong with you or your life. I know it's hard, when you feel like you should be fixing all these things that feel broken, but just think of all that energy you are giving to these negative feelings. Look instead at what you do have. Pay attention to that. Feed the positives in your life and they will grow. Look for the love. You'll find it.

3. Don't idealize things. Your idea of something you want may turn out to be a lot harder and more complicated and uglier than you first imagined. Like for instance, I thought this little post with the little illustration would be a lot easier than it's turning out to be. Hey, what could be easier, right? Let it go. Don't obsess. Focus on the love, right? But no, it led into non attachment, one of the most difficult Buddhist philosophies, which I have, honestly, been trying to figure out for 25 years, which of course, leads me to confusion and struggle. But maybe that also what it's about.

4. Don't over complicate things.  Am I making it more complicated than I need to? It just is what it is, right? Let it go means let it go. Don't fuss over getting it just right, allow it to be what it is. Don't add on what ifs. Don't try to make something that will stun the world with your genius. Don't over think it. Simplicity is often the key.

5. Accept it for what it is. Whatever it is. We're flawed. Period. We fall down. We make mistakes. We don't live up to our expectations. Even if we'd like to change things, where we are is still where we are. We can only be here, we can only change things from where we are, with the tools we have at our disposal.  We can only be who we are.

6. Let it go. Don't hold on to those fears and angers and upsets and pains and disappointments. Allow them, yes. Feel them, yes. Recognize that feeling the sad things does not mean that they will take over. You are strong enough to get through sad feelings, but they are part of life. So feel them, then let it go.
7. Say 'Yes' to life. When you hold on to all those negative things and feelings and shoulds, we close ourselves off to what is really out there. This is the "and love" part of the post, I think. Love is about yes, isn't it? It's about saying, 'yes, I see your beauty,' or 'yes, I see the possibility.' 'Yes, I will give you my time.' or 'Yes, I will risk being vulnerable to you."

I'm going to have to leave it at lucky seven. I am surprised at how much this supposedly quick post got me thinking. The funny thing, is that I had a more involved craft post that I thought would be too hard, but now I think it would have been a lot easier. 

What do you think of the idea of non attachment? How do you practice letting go? How do you love and accept an imperfect world and imperfect people for what they are?

Friday, April 27, 2012

Look for the little beauties, or Teapots

Look for the little beauties, or Teapots
pencil, watercolor, acrylic, ink on scrap paper
4"x8"

This weekend, I am going to focus on looking for the little beauties, the small things that make me happy.

It might be story time with my kids, or a clean kitchen floor, or the lilacs in bloom, or a pleasant interaction.

I'm also going to look for the small steps forward that I make. The new sentences scrawled in the margin of a New York Times. The sketch of teapots done at work in those moments of down time before it gets busy.  The continued use of my creativity log. Organizing my stamping box. A quick project with the kids.

I know that this will be a busy couple of days for me at work, so rather than feel frustrated that I can't get back to my creative goals, I'm going to look for what I can do, the lovely things that are already there. And I'm going to keep taking stock of where I am and where I want to go.

When I can get back to my creative work, on Monday, I'm going to try not to get overwhelmed by everything I want to accomplish. That happens to me a lot on Mondays. I set up my expectations so high, I want to be SOO creative, that when I sit down to work, I just go blank.

So I'm going to take it easy this weekend, but I'm not going to do nothing.

I'm going to take baby steps because even if baby steps feel like they are going nowhere, they go a lot farther than doing nothing because you are too overwhelmed by those big giant steps you think you're supposed to be taking.

So this is a weekend for little beauties and baby steps. And I'm going to enjoy the journey for exactly what it is.

Thursday, April 26, 2012

Take Stock and Feed Your Creativity

 Flying Bird Felt Medallion Charm/Book Mark

I spent the other day not being as creative as I wanted.... but I was busy the whole day doing things related to creativity. Yes, I did finish up this book mar charm that I was sending out with a package, but I need to confess that I didn't "make" it. Well, yes I did, but I made it a couple years ago. You see, I have this whole bunch of projects that I've started and never done anything with, never finished, never figured out where I should go with them.

One of the things I did was to find all of those incomplete medallions and felt scraps and put them into my felt scraps and projects box. I don't know why this little collection pleases my crafty self so much. Perhaps it's seeing all those little circles of many colors. Or looking back at projects I've put energy into, like that beetle medallion. 

 I was also sorting through the kids' big toy box when I found some stray piece of costume jewelry that no one ever used and I took it apart and separated the beads. I particularly liked the silver beads and thought they'd make a good bracelet some day. And the black beads will be great if I make any small stuffed animals or dolls... which is always a distinct possibility.


And then, when I was looking for my sewing box so that I could finish up that bird medallion, I decided it was time to transfer my sewing materials from the cookie tin I'd been using to this actual sewing box, which I'd found in a thrift store. I detangled all the thread and dug all the little needles and pins out of the cracks of the box with a magnet.Organizing that also made me feel satisfied. Although I think I'd like to do something to the amber plastic... does any one know some way to upcycle that plain old plastic? The form fits my needs, but the color is not my color. *frownie face*
 I even sorted and collected all these little paperclay doodads that I made and never did anything with. I still don't know what I am going to do with them, but I think having them available to me and being able to look at them and wonder helps.
The Harry Potter Experience: G's Birthday 7th ed.

I also organized my thoughts and ideas for my son's upcoming birthday party. He really wants a Harry Potter party, so aside from searching through Pinterest, I have started to write out notes of things that I think would work well, not be too labor intensive, and are crafty and inexpensive. The more I started listing things down here, the more things I thought of, and then while I was bustling about organizing and sorting my crafty stuff, I got more ideas, since my brain was already in creative mode, and looking at the stuff I had sparked ideas for new projects.

It's surprising how much of creating is connected to organizing, planning, thinking, day dreaming, reading, listening, living, staring out the window, sorting, cleaning, etc.

It's a phase that is part of the creative process. Taking stock, I suppose you might call it. Holding those supplies in your hands. Deciding where everything goes. What you might do with them. What things please you and what things need to be recycled into something else.

And in other ways, too. We take stock of ourselves. Who am I? What do I like? Where do I want to go? What is important to me?

In a way, being creative is about choosing. We choose what we want to spend our time with. We choose whether to use this color combination or that one. We choose the medium. We choose the mood. Taking stock of ourselves and our materials and our thoughts helps us to make the right choices in our creating.

Yay. Organizing is not just fun and satisfying, it also has a purpose in the larger scheme of thing.

Think of ways that you can organize your thoughts, your home and your supplies to inform you creativity. What do you need to take stock of so that you can feed your creativity?

Wednesday, April 25, 2012

New and Improved Creativity Log, Now with Bravery!

 A New Improved Creativity Log (blank)

I'm really trying to get organized and be productive again. It's quite the process and often doesn't look like it's going anywhere in all the business of every day life... until it does, and you realize you've finished huge projects and pulled your life back together and taken major steps on the journey to your dreams.

I realized something about how far along I am right now in my creative process when I found this post in the random search of my archives. That post was about wanting to be creative, but still being quiet and still...being fallow. Which can feel awful when you really really want to be doing stuff and making stuff, but is often a necessary phase in being creative. But if you keep at it and keep trying and continue to have faith in yourself and your creative process, then you do ultimately start moving.

I am right now in the motion phase of my creative journey. What a relief after standing still for so long. I'm not going as fast or as far as I want to yet, but I am picking up speed.

One of the things I'm doing to keep up my momentum and take stock of what I actually am doing is to go back to keeping a creativity log. I've written about it before, but I've decided to make some improvements.

The planner is a place where I can keep track of what I have done that day. We all know about to do lists and how gratifying it is to cross stuff off, but it is very easy for us to forget everything we are doing that never got onto the list, small things, or unexpected things, or every day things that have a big impact on your day and your creativity. That's why I keep my log. And I break it down into categories because it is so easy for me to lose my balance and focus too much on one area, all my attention might go to my kids, or I might be obsessed with painting or I might completely forget that I have to take care of myself. So I list the important categories/goals at the top of my log, and then the day of the week down the side and then write down what I've done to fit that category for the day. Simple as that. But this time around, I'm changing things around to fit my life and also to deal with some things that I struggle with, to make the log even more effective for the way I do things.

First of all, I put some pages in my handmade planner. I'm kind of loving my planner and making all the notes  and lists and such. But I also love using my stamps in my planner. For some reason, when the papers we look at all day are pretty and have pleasing colors, when they feel good in the hand, I'm more likely to use them, so making my log pretty, not just a drawn in grid, helps me want to use it.
New and Improved Creativity Log Imperfect and In Action

 This one here is my first try at making my new log. I don't know if you can tell, but there are some mistakes with the stamping and the boxes do not all line up as you go down the page. Whoops. Luckily I had a marker the same color as the ink I used so I just drew lines to keep the days straight. But even though I hadn't gotten the format down pat, I started to log my creativity for the week, anyway.

New and Improved Creativity Log (detail) in use, with some entries and notes

 Here is a closeup of the started log. You can see Self, Writing, Art/Craft, and Business (which is anything that has to do with money and jobs and finances). The categories you can't see are Blog, Kids, Home, and there's one more, which I'll talk about later.

One of the things I noticed right away when I started my log (this is only two days of logging, mind you) is that I am seriously avoiding Writing. I am not counting blogging as writing because I know the projects I mean to be working on and I am not doing them because I am afraid. So, when I noticed that I was avoiding writing, I filled my empty log slot with a stamp, saying "DON'T IGNORE ME".  I need to know when I am avoiding something. I need to be faced with the fact that I am avoiding it. I need to stop hiding from it, because I know what my real goals are.

Another thing that I added to my new log is that I am not only keeping track of the tasks I complete, but I am also adding a star to the activities that make me feel good about myself, make me feel productive and make me feel like I can tackle the next step. I want to see which kinds of things lead to the most positive feelings. And I want to value those activities for their emotional and psychological weight.

New and Improved Creativity Log (detail) with the hand carved stamp that has helped improve it.

This brings me to the last new thing that I added to my creativity log. A new category. It isn't strictly about being creative... actually neither is the whole log, it's more about productivity, or perhaps, working on the rest of my life so that I can be creative. The new category is called, "Big Girl Panties," aka "Be Brave." In this row, there is a place that I can mark down what I have done that has been scaring me, intimidating me. What I have been avoiding because it is too important, fits into my neuroses, or is too far out of my comfort zone. All those things about which I have spent my life muttering, "I cant!" This is the category that has been standing in my way, and these are the things that I need to put on my big girl panties and deal with.

This category pleases me. I feel so good when I can accomplish something that has been scaring me, even if it something so simple as emailing someone. I feel competent and capable and brave, and that means I am feeling stronger and more able to tackle everything else. This category also helps me think about the other things that are scaring me, the things I need to tackle next. I've put lists in my weekly planners of scary stuff that I am afraid of but still need to take care of. Like I said before, the more I pay attention to these things that scare me and the less I hide from it, the better it is for my creativity, my productivity and my life.

All in all, I'm really proud of the way this creativity log is turning out. It is about doing it. It is about taking those steps toward what you really want. I suppose it wouldn't even need to be about creativity, if your goals were more along the lines of career or home or business, but for me it's creativity. And something they don't really tell you before you start trying to make art or write novels or compose symphonies is that the hardest part about creating is not really about writing, painting or the act of creating. The hardest part about being creative is confronting your own fears, battling your demons, overcoming your flaws, facing your dreams and digging into the heart of all that you are.

What are the categories that you would put into your own personal creativity log? What are the things that you need to tackle to be as creative as you would like?

Tuesday, April 24, 2012

Ten Ways Pinterest Can Improve Your Creativity

 My Stuffed Doll, inspired by, researched on, and created with help from Pinterest. Because Pinterest is not just for wasting time.


I've read a lot about how people love Pinterest, but it's a total time suck and they never DO anything that they pin on their boards. Or conversely, how people just don't "get" Pinterest, that it just seems to be a kind of cluttery virtual hoarding by squee girls.

Not me. Yes, I probably spend more time than is good for me browsing Pinterest, but I also try an awful lot of things that I see on Pinterest. I also use Pinterest as a resource for when I have my own projects to tackle. So I thought that I'd discuss some of the ways that I have used Pinterest not only to inspire but to actually DO STUFF.

1. Pin stuff you like!
This might seem self evident, but often when I am not sure what I am doing, the very act of pinning stuff will help me figure out what I really love, what I dream of, what I'd like to be doing and where I want to go with  myself.  Often, while I'm pinning, I will begin to notice trends in my interests, like dark colors or stamping or stuffed dolls. Which brings me to the next thing...

2. Make your boards as specific as possible.
It is very easy to just think one Crafts Board or one For The Kids board will do, but if you want to actually do stuff from pinterest rather than just squee over great ideas, it helps to make those boards very specific. So rather than one Crafts Board, I have Crafts and Stuffed Creations, Craft and Crochet, Craft and Stitch (hand sewing), Craft and Be Ye Unafraid of the Machine that Sews (yeah, my machine intimidates me). And that's not even counting the DIY boards I have, where I put tutorials and upcycling and other stuff. The important thing is that I gear my boards to my activities and needs and desires. I like crafts and art, so the majority of my boards are related to this... but they don't have to be. You can have boards focused on holidays, music, travel, fashion, food, kids activities, reading. But the more specific each of those categories is, the easier it is to actually find what you need when you are ready to DO STUFF.

3. Create Action Boards.
These are not mere inspiration boards, but these are boards where you pin things that you are in the process of planning, creating and researching. These boards might be something like a To Do Board, where you pin stuff you want to remember to do. Or project boards, like Kids Birthday Party, or maybe Kitchen ReDo ... basically any involved project can have its own board. Actually, giving a project its own board means that it will stay on your mind, rather than falling into the cracks and getting ignored. Every time you're unwinding on the internet, if you see something that might fit into your project, you can pin it, and that will get you thinking about it. If you are always thinking about a project, you're much more likely to actually do it. Plus, there's such a wide range of ideas on pinterest, that your personal project can become ever more creative and interesting.

4. Create Photo Reference Boards.
This is particularly something that helps me if I am creating something with visual interest, whether it's decorating or painting a picture or sewing the doll above. I'm not the kind of person who just copies what someone else did, but I am unashamedly inspired by what other people have created. For instance, I had some trouble when I was making this doll, because I didn't know what I wanted her face to look like.
This is the face I came up with, but not before I looked at and sketched out a bunch of other faces like this and this and this. In the end, I came up with my own face, but looking at what other people had done gave me a sense of what was possible and what I liked. When I was making my stuffed owl, I used many references of real owls that I had collected on my do it photo reference board, so I could get away from the stuffed owls that were out there and make mine, if not more realistic, then at least more reminiscent of an actual Hedwig.

5. Use the Search Function.
I love the search function. In some ways, it has taken over for general search engines. I like that the images are visual and I can browse for my own visual interest. Sometimes I just search a term on Pinterest and then let chance lead me to inspiration. But it also works because it is a curated collection of things related to your terms. Someone has already chosen these images because they love them or found them useful. The search function was particularly useful to me when I was looking for ways to do this doll's hair. I felt like I'd never done the hair right, so when I searched on pinterest, I was looking for a tutorial for doing hair "right." I found this and knew that this was the  right way to do doll hair... but then I was also running out of time so I kept searching for something less.... intimidating. I didn't want to do something in felt, although it was cute, so I kept searching until I found this tutorial which is what I used and which came out fabulously.

6. Participate in the Community
People have answers. If you are stuck on something, ask a question on a relevant pin, and someone might have an answer. Or, solicit advice from your followers. Ask them if they know the right way to make a doll wig, or if a recipe works out the way it looks, or... well hey, I've been asking for all sorts of advice on my library board. I want to know if books are good or just hype, or if my kids will like them. The answer for this book seems to be yes. Something to be aware of here is the caption that you pin. Very frequently, I won't notice the caption when I pin and my followers will respond to a question I didn't have. So if you want advice or reviews or suggestions, pay attention to your comments and captions. Another community aspect that can encourage your creativity are the group boards. Create a board with friends working on a similar project, or find pinners you love and include them or just join in on the conversation where like minded people are sharing their ideas, like in this parenting board.

7. Keep Pen and Paper Nearby 
Pinterest is a great virtual pin board, but there comes a time when you have to take things into the real world.  To do so, it helps to have scrap paper or a notebook or journal with you while you browse pinterest. You might want to write down a recipe and bring it over to the kitchen. Or you might want to take the good book ideas and bring them with you to the IRL library or bookstore. Keep Lists. Note things down in your calendar. Take the impulse and paint something while you're sitting in front of your computer. If you have tools nearby to write something or draw something down, then it will encourage you to make one of those great ideas IRL.

8. Make a Did It Board
How fun! You tried a recipe from pinterest, or you followed a tutorial, or you crocheted a pattern, or you went to a place on a travel board! Great. Tell us what you did. Put that pin on a board of completed pins and share with us how it worked out. Keep it there as a reference so that you can go back to it again. I've gone back a bunch of times to do this, (it's great.)There is a feeling of accomplishment when you can mark something as done, and it is encouraging to see that other people are out there trying things, not just browsing.

9. Show and Tell
Similar to a Did It board where you pin things that you've attempted from pinterest, you can create a board to show how your own efforts turned out. Make a board of things that you have made, decorated, cooked. Upload your own photos, pin from your blog or flickr account. Honestly I'm still leery of pinning too much of my own stuff, I don't want to be a spammer, but the truth is that people want to be inspired, and when you show them what you have done, they can be inspired to do it themselves. I finally made my own blog board, after a year and a half of pinning. I'm not sure what took me so long, but it's also a nice place for me to see what I've done, how well various projects and blog posts are received, and to share my projects with a wider audience. There is actually a category for "My Life" when you make a board, so hey, why not show your life and what you have created.

10. Review Your Boards
And last but not least, remember that pinterest is not just for grabbing cool images that you see, it is for curating these images, collecting these ideas, saving things for later use. You pinned those images because there was something that grabbed you. Take time to go back over your own pins. See the comments that have been made. Remind yourself why you pinned that gorgeous room or yummy drink. When you first saw it, you thought, "I want to do that!" so periodically go through your pins to remind yourself of what you want to do. Don't forget to look at your specific boards, too. I have boards for various writing ideas. Sometimes, if I want to get back into a particular story, I might peruse this board. See now, you all thought that was just a board for weird stuff, but no, that is actually an inspiration board for my long neglected novel, characters, moods, settings, plot twists etc. So if I want my brain to go back to that project, I go there. Or if I want a new dinner idea, there's nothing like a food board. Shoot, I was browsing that board last night and decided on a whim to make this and it was delicious. Or if you want to do something for a holiday? Hey, this board is rocking for creativity at Christmas. We can pin good ideas all year long, but when it comes time in November to find a new wreath or project, all you have to do is browse your own collection, and you already have somewhere to start.

So THERE! That's it. Ten Ways Pinterest Can Improve Your Creativity. 

But before you run off and get your make on, leave a comment and tell me if there's anything I forgot. What ways does pinterest help YOU to be creative. How do you avoid the time suck issues? How does pinning help feed your productivity? 

Friday, April 20, 2012

Felt Dolly Pin, a small project

 Felt Dolly Pin
felt, thread, fiber fill, metal backing pin.

This was one of those off the cuff projects I did. I had these little scraps and decided to make my daughter a little doll pin that she could take with her. It's pretty simple. Just stitching and stuffing. Although I did stitch the arms and legs together (two pieces, front and back for stability) before I attached them to the body. And I do think I could make a cuter face... but hey. It's last minute. Much like this quick post today.
 Here's the back of the dolly. Witness the pin. I probably should have added another layer of felt to the head to hide the face stitching. Oh well, next time.
The girl still loves it. Look at the big smile. She was so proud of her dolly pin. However, no one even mentioned it when she wore it to school. Oh well. That's okay. She loves it.

I have a longer post in production. One of those "ten ways" kind of posts. I've been thinking about it for a while, but the more I thought about it, the bigger it got and the harder it seemed and the more time I needed to do it. And truthfully, it does take more time than I have this morning.

Not all projects can be off the cuff and done in 20 minutes. Some are more involved and take more commitment and time and thought. But there is a process, and the small steps add up to the big project.

But for today, here's a small project.

Perhaps the big one will be ready for Monday.

Oh, I'm a tease, aren't I?
Related Posts Plugin for WordPress, Blogger...