

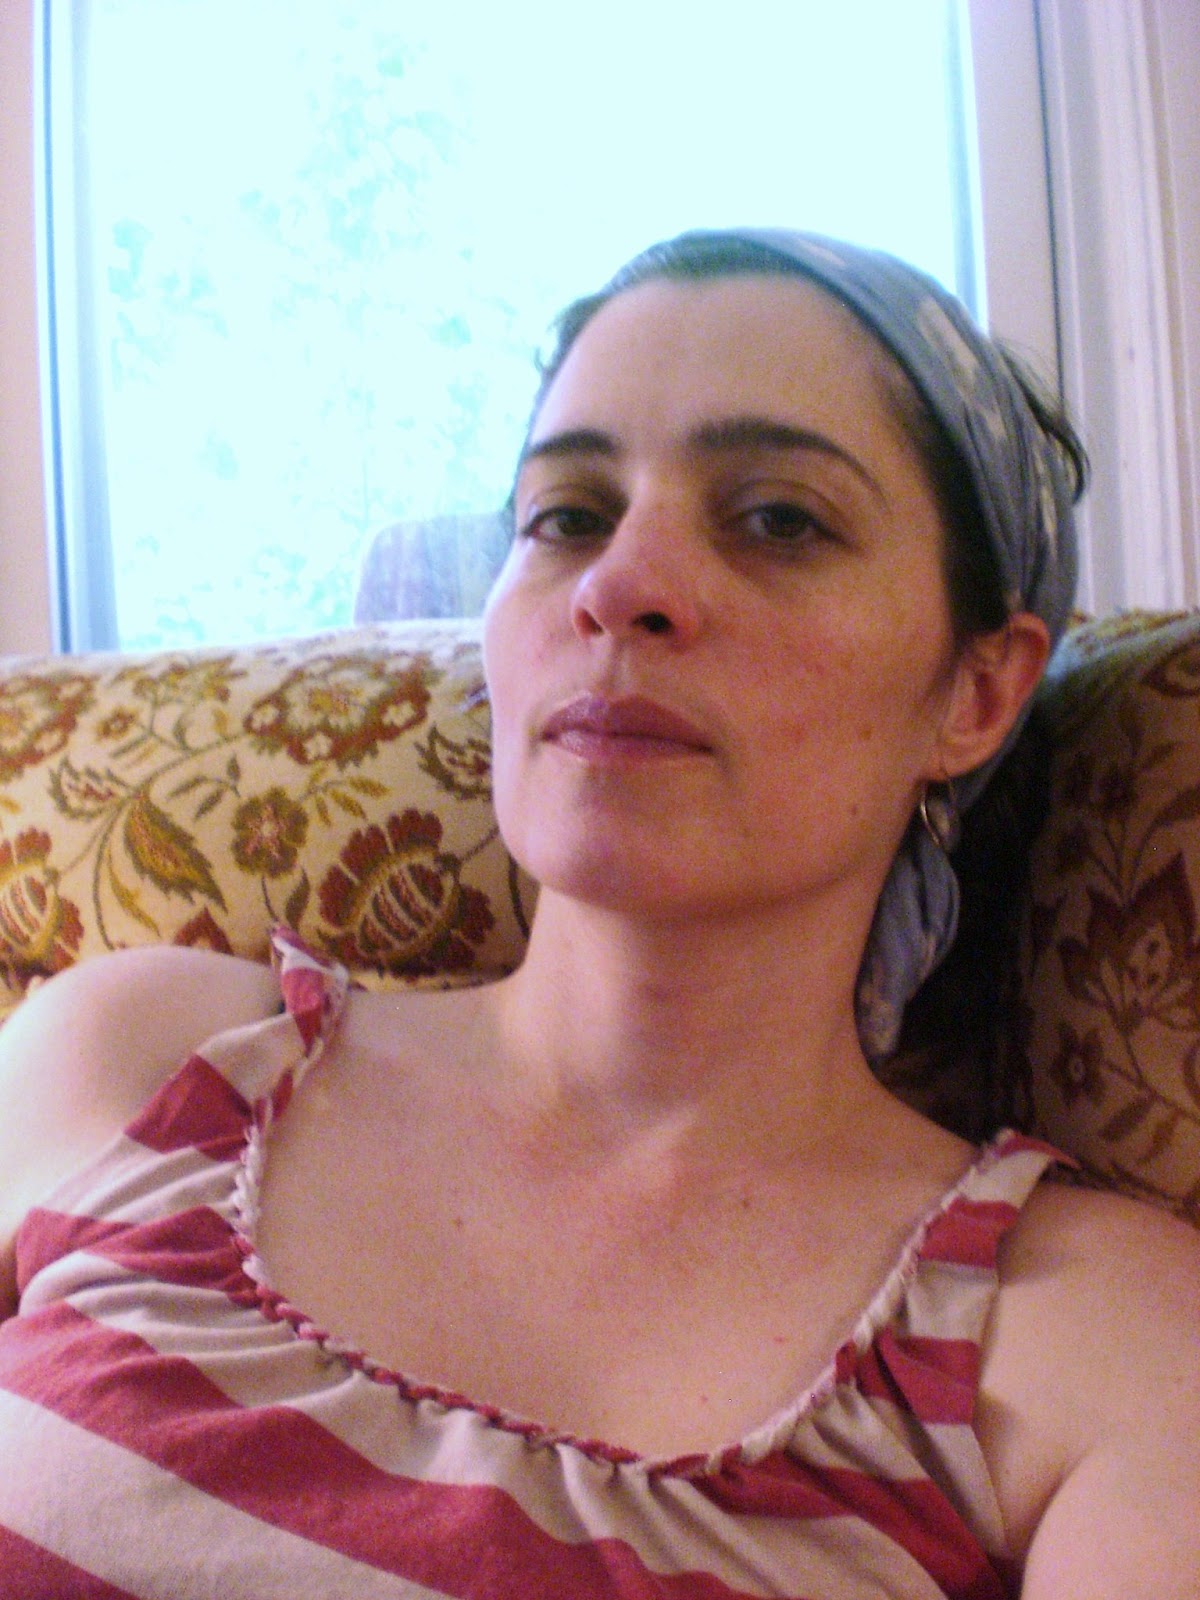
Refashioned boxy boys t shirt with a faux braided neckline.

I like stripes. Perhaps a little too much. So when I found this boys tshirt at a thrift store, tight on the neck and sleeves, I decided I had to have it, even if I wasn't a boy.
I sat with it for quite some time before I did anything. I knew I was going to cut off the sleeves and the neck, so I did that, then I sat with it for a bit longer. It is mighty square at this point. I tried it on though, and it was so comfortable that I decided I didn't want to put in darts or anything that would make it skinnier. But how was I going to refashion it to make it a bit more girly?

That's when I found a tutorial on pinterest (where I collect refashioning and upcycling of tshirts hints) and decided, well.... that's what I'm doing. This is a braided top tutorial. It makes a faux braid around the neckline without much sewing at all. Really, it's not a braid, which is made of separate strands wound together. It's more like crocheting, or weaving or twisting.
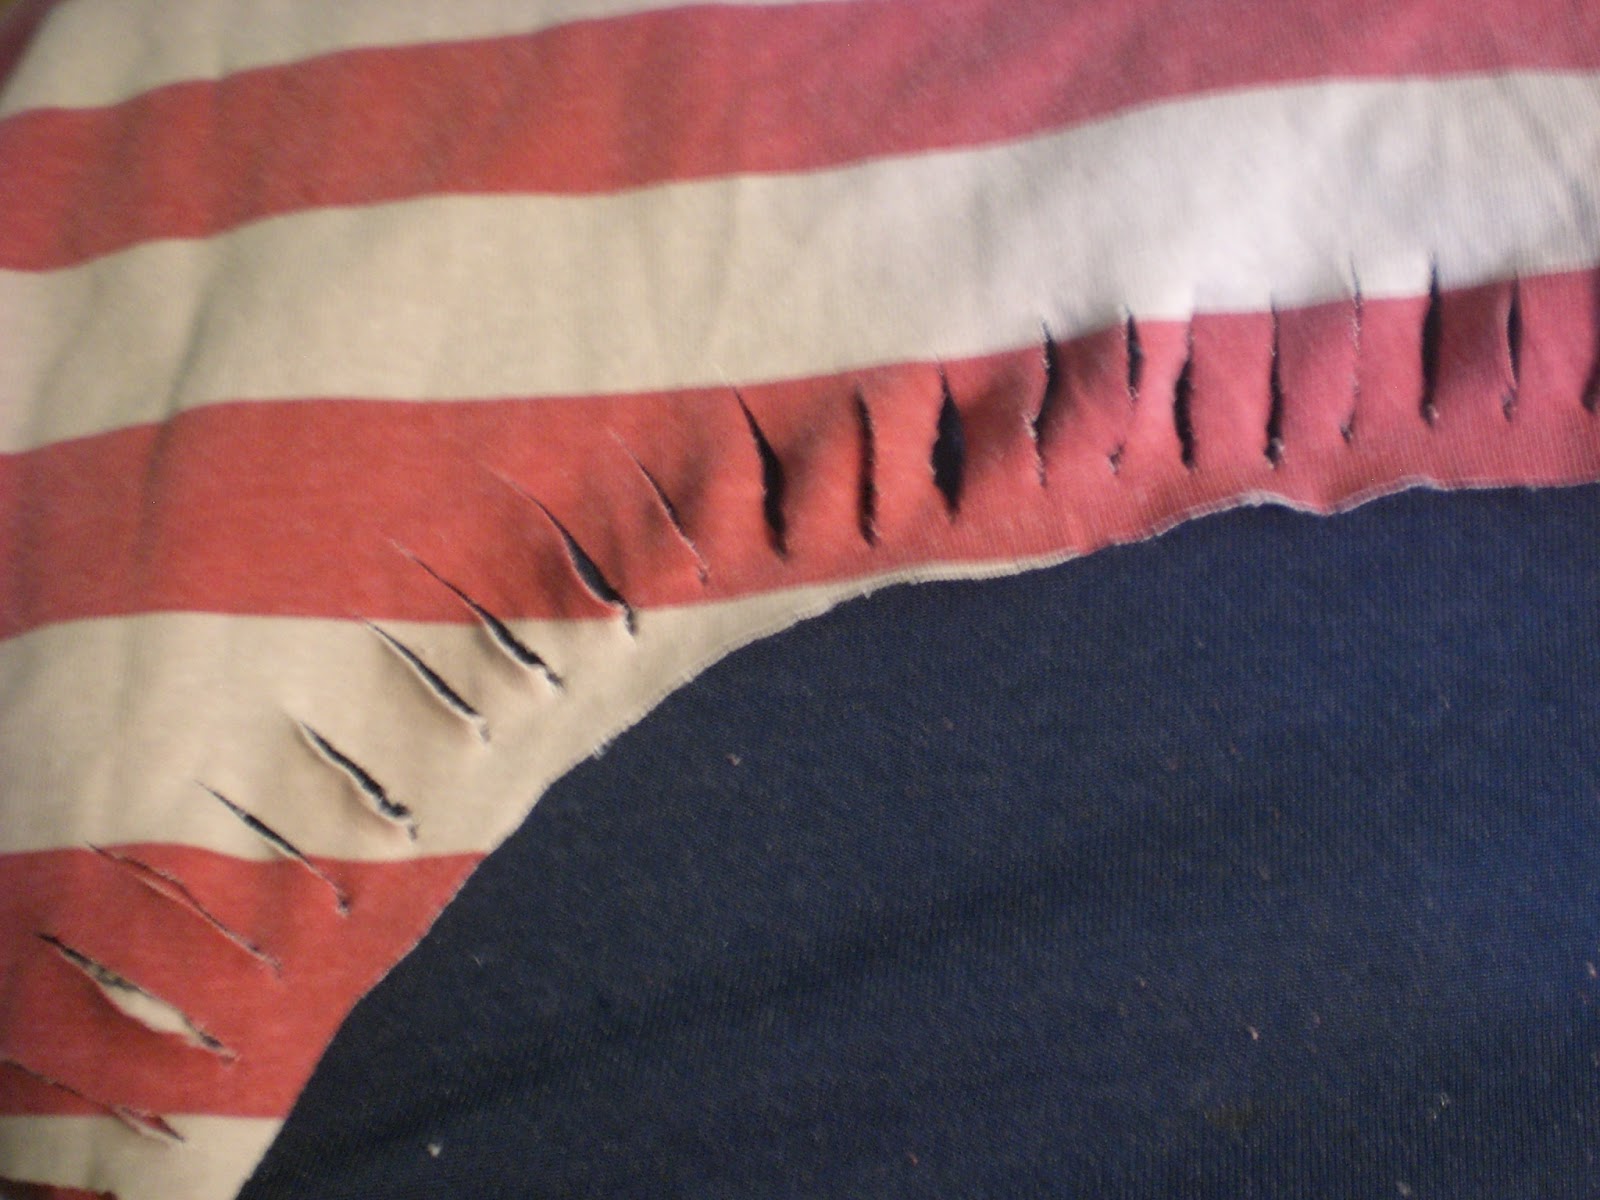
First, you cut 1" slits all the way around the top, making sure that your initial slit is very small, just big enough to pull the strip through (or you'll have to stitch up the extra hole that is left). My first attempt made the slits around an inch apart...but when I wove them together, it was bunched up far too tight and the neck was itty bitty. So I unwove it and cut more slits in between the original slits. These are about 1/2 inch apart. pretty thin. The original tutorial has 2 inch long slits about 1 inch apart... so I suppose it's the proportion that is important. And you'll notice that there is no seam in the neckline any more, so I wanted to leave enough room in the fabric so it wouldn't tear. In the end, the 1/2 inch I left was plenty. It kind of flipped over behind the braid and became invisible.

The original tutorial has her finger weaving the strips together, sliding each strip of tshirt through the hole above it...but i realized immediately that a crochet hook would make it much easier. So that's what I did, using the hook and then hooking each following strip through the last one, bringing it over and looping another strip through, all the way around the collar to the original starting point. It would be possible to just weave the front of the neckline, but, my shirt was boxy enough that I had extra fabric enough to go all the way around. I did take my scissors to the back of the shirt and cut the neckline lower... and with a slightly squared off curve. In retrospect, I might have cut it even lower... and I think a v-neck might have been nice, too. It can really be any shape, the braid look is just embellishment to the neckline, although it does add a bit of "pleating" of fabric.

When I got to the end of the braid, I used a bobby pin to hold it together so I could try it on. Just one little bobby pin. Then, when it turned out nicely, I took a piece of thread and a needle and stitched that last, loose loop onto the very first loop, sewing it down nice and tight. And that's it.
I did do some modifications afterwards. The sleeves ended up being kind of ruffled next to the braid, so I took my scissors and cut off some of the extra fabric, which made the ruffles less noticeable. I think that you could actually work with the ruffling effect to change the shape of the tshirt... maybe making a double row at the shoulder... one for the neck line and one for the shoulder line, and so creating a little bit of interest there. I also thought about adding another row of braiding to the front neckline, but since it was such a short shirt to begin with, I was worried about pulling the fabric up any more. Another interesting modification might be to take a few stitches to the body and make it a bit more narrow under the bust area... but then I'd be worried about interfering with the comfortable ease. Oh, I think I'll leave it comfy just the way it is.


3 comments:
LOVE the shirt! Thanks for trying one of our 4th of July hair tutorials too... Hope you liked it!
XO,
Kristin
www.latest-hairstyles.com
Женские кожаные сумки купить сумку среднюю – это эталон крутости и красоты. При их созаднии используется итальянская кожа и расходники, что гарантирует изделиям долговечность. Материал поражает многообразием выбора: кроме гладких и матовых присутствуют тканевые модели, с тиснением под игуану или рельефным принтом. Долговечная кожа делает сумки удобными. За прикольное видение стиля ручается бригада классных дизайнеров, которая наблюдает за современными модными тенденциями.
Магические силы и всякие способы хиромантии научно не описаны, впрочем различные люди в них верят. Комплекс деяний, ориентированных на предвидение будущего, называется гадание. Гадание на картах ленорман - это надежный вариант узнать судьбу с использованием различных вещей и приемов.
Post a Comment